PS4 Repair: Step-by-Step Guide for Home Fixes
Learn practical, safe PS4 repair steps for common issues like power problems, overheating, and disk errors. This step-by-step guide emphasizes safety, data backup, and knowing when to seek professional help.

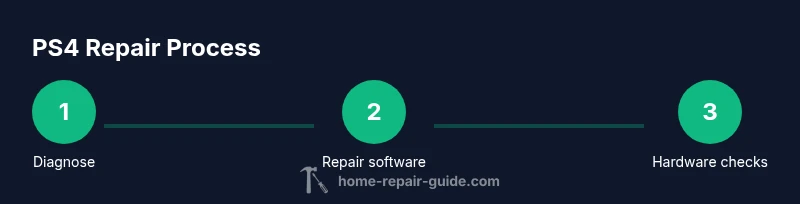
By following this PS4 repair guide, you will learn practical, safe steps to diagnose and fix common console problems at home. It covers basic troubleshooting, software updates, and when to seek professional help. You’ll also get safety reminders, a preparation checklist, and a route to prevent future issues. This article uses Home Repair Guide expertise to help homeowners maintain reliability.
PS4 common issues and what they mean
According to Home Repair Guide, the PS4 can exhibit a variety of symptoms that point to different underlying causes. Power problems may stem from the power supply, a faulty cable, or a failed standby circuit. Overheating often results from blocked vents, accumulated dust, or a failing fan. Disk read errors can originate from a failing drive, damaged discs, or a corrupted database. Understanding the symptom helps you choose the right, safe next step and prevents unnecessary disassembly. Recognize patterns such as repeated crashes during games, loud fan noise, or a blinking LED sequence, and map them to probable causes. This section sets the foundation for a methodical repair approach that minimizes risk and preserves your data.
To keep things actionable, create a quick fault map: note the symptom, how long it has occurred, recent changes (updates, new games, accessories), and any error codes. This map becomes your reference when you progress through the troubleshooting steps and decide whether a hardware repair is required. While many tasks can be tackled at home, remember that some issues are best handled by professionals, especially when the console is still under warranty or contains sensitive components.
Safety first: preparing your workspace
Before touching any PS4 internals, establish a safe, static-free workspace. Ground yourself with an anti-static wrist strap and work on an insulated, non-conductive surface. Disconnect all cables, including the power cord, HDMI, and any USB accessories. Have a clean container to organize screws and small parts, and keep a soft brush or microfiber cloth on hand to remove dust without scratching surfaces. The moment you touch the console, avoid touching the motherboard circuitry directly; handle components by edges and avoid applying energy or force where it could cause damage.
Outline a basic plan: identify the symptom, perform non-invasive checks first, update software if applicable, perform non-destructive maintenance like cleaning, and reserve disassembly for when software fixes fail and you are confident in reassembly. This approach minimizes risk and extends the device’s life. If at any point you feel uncertain, stop and consult official guidance or a professional technician. Your safety and data integrity come first.
Baseline troubleshooting you can do without opening the case
Start with non-invasive checks that resolve many common issues. Verify the power supply and outlet by testing with a different cable or socket. Check the power indicator and listen for any unusual sounds from the fan. If the PS4 powers on but shows a corrupted display, switch to a different HDMI port or cable and test with another display to rule out peripheral issues. Enter Safe Mode to access recovery options without fully booting the OS.
Safe Mode options are a practical first-passage for software problems: rebuild database, update system software, restore default settings, or reinstall the System Software. Rebuilding the database reorganizes data without erasing user content, which is a safer option when you notice slow performance or random crashes. Always back up important data before major software changes and ensure you have a recent backup on USB or cloud storage. If issues persist after Safe Mode, the problem may be more than software and could require deeper inspection.
Manual inspection and cleaning: when to proceed with caution
If software-focused steps don’t resolve the issue, you may need to inspect for hardware-related problems. Begin with a careful exterior inspection for loose ports, bent connectors, or visible damage. Cleaning vents and fans can dramatically improve cooling in dusty environments; use short bursts of compressed air from a distance to avoid pushing dust deeper into the unit. If you proceed to open the console, document each screw location and use labeled containers to avoid misplacement during reassembly. Do not apply force to components; delicate connectors can be easily damaged.
Disassembly carries risks: static damage, broken connectors, and warranty voidance are real concerns. Only attempt hardware repairs if you are confident with precise torque, specialty screws, and the layout of PS4 components. If you do find a likely faulty part (such as the cooling fan or power supply), compare it with reputable guides and verify compatibility before replacement. If in doubt, pause and seek professional assistance.
Upgrading or replacing the hard drive and other components
A storage upgrade can improve load times and game libraries, but it’s an advanced operation. If you decide to upgrade the hard drive, ensure you have a compatible 2.5-inch drive and that you can reinstall the PS4 OS after the swap. Back up your data beforehand and prepare a USB drive with the proper PS4 reinstallation files. Disassembly to access the drive bay requires careful removal of screws and a method to detach the drive caddy without bending or snapping connectors. After installation, restore the system software to recover your data and ensure the new drive is recognized.
If you’re replacing other components, verify vendor compatibility and obtain the correct torque specs for screws. Some internal connectors are delicate and require precise handling. If your repair involves the motherboard or power supply, consider professional service as incorrect handling can cause permanent damage or safety hazards.
Maintenance to prevent future PS4 failures
Prevention is easier than repair. Keep the PS4 in a well-ventilated area away from walls or clutter that blocks air intake. Regularly clean dust from air intake grills and fans, and consider elevating the unit to improve airflow. Keep firmware updated and avoid inserting counterfeit or low-quality accessories that could degrade performance or cause electrical issues. Monitor the system for overheating and reduce simultaneous background tasks during long gaming sessions. A simple routine—dusting every few months, checking cables, and updating software—extends the console’s life and reduces the likelihood of unexpected shutdowns.
For households with multiple users, set up a maintenance reminder and perform backups frequently. Tracking issues over time helps reveal recurring problems that may signal an underlying hardware decline. If problems escalate, consult a professional rather than forcing improvisations that could lead to more serious failures.
Authority sources
- https://www.cpsc.gov
- https://www.osha.gov
- https://www.nist.gov
- For industry reporting and guidance, consider major tech publications such as https://www.cnet.com
- You can also review official Sony support pages for device-specific safety and warranty information.
Data backup and warranty considerations
Backing up data before any repair is essential. Use USB storage or cloud backups to preserve saved games, profiles, and settings. Reinstalling or updating the PS4 software can sometimes erase data; a backup helps prevent loss. If your console is under warranty, opening the case or performing any non-authorized repairs can void coverage. Always review the warranty terms and consult official guidance before taking action. When in doubt, contact Sony support or a certified technician for safe, reliable help.
Tools & Materials
- Screwdriver set (Torx T8, Torx T9, Torx T10; Phillips #1)(Includes precision bits for PS4 screws and internal components)
- ESD wrist strap(Ground yourself before opening the console)
- Soft brush and microfiber cloth(Dust removal without scratching surfaces)
- Compressed air can (optional)(Use short bursts from a distance to avoid moisture or condensation)
- Small container for screws(Keeps fasteners organized during disassembly)
- Thermal paste (optional)(Only if reseating the heatsink or replacing a processor thermal interface)
Steps
Estimated time: 1-2 hours
- 1
Power cycle and power-supply checks
Unplug the PS4 and wait 60 seconds, then reconnect power and test. Check the power cable, outlet, and any surge protector. If the unit still fails to respond, try a different outlet or power cable to rule out external power issues.
Tip: Verify the wall outlet with another device to exclude an outlet problem. - 2
Enter Safe Mode for software repair
With the PS4 off, hold the power button until you hear a second beep to enter Safe Mode. Connect a controller via USB and follow on-screen options to rebuild database or reinstall system software if necessary.
Tip: Back up data before reinstalling software to prevent data loss. - 3
Rebuild database and update software
From Safe Mode, select Rebuild Database, then check for and install any available system updates. This can fix corrupted indexes and improve performance without erasing user data.
Tip: Database rebuild is safe and non-destructive for saved data. - 4
Check for overheating and clean vents
Power the PS4 down and inspect vents for dust buildup. Use a soft brush or compressed air a few inches away to remove debris. Ensure the unit sits in a ventilated area after cleaning.
Tip: Always unplug the console before cleaning to avoid electric shock. - 5
Backup and consider a hard drive upgrade
If storage or load times are a primary issue, back up data and consider installing a compatible 2.5-inch HDD or SSD. Reinstall the PS4 OS after the upgrade and verify the drive is detected.
Tip: Use a certified drive that matches the PS4 spec and keep the drive screws organized. - 6
Assess hardware faults and decide on professional help
If symptoms persist after software repair and cleaning, internal hardware faults (power supply, motherboard, fan) may be present. Seek professional help to avoid further damage.
Tip: Hardware faults can be dangerous to handle; a professional assessment minimizes risk. - 7
Test complete repair and restore data
Power cycle the PS4, sign in, and run a few games to ensure stability. Confirm all ports and functions (USB, HDMI, disc) operate correctly.
Tip: Document outcomes for future reference and troubleshooting.
FAQ
Can I repair my PS4 at home?
Yes for software issues and basic maintenance, but hardware repairs carry risk. If your unit is under warranty, check policy before opening. Consider professional help for internal components.
Yes, you can fix software issues at home, but hardware repairs are riskier and may void warranties.
Will opening PS4 void my warranty?
Opening the console can void warranty. Review Sony’s terms and your purchase details before attempting any internal work.
Opening the PS4 may void the warranty; verify terms first.
What is Safe Mode and why use it?
Safe Mode provides recovery options for software problems without booting the full operating system.
Safe Mode helps fix software issues without running the normal OS.
How do I back up PS4 data?
Back up saved games and settings to a USB drive or cloud storage before major repairs or reinstallations.
Back up your data to USB or cloud storage before repairs.
Should I replace the PS4 hard drive?
Hard drive replacement is optional for more space or speed but requires careful disassembly and OS reinstallation.
Replacing the hard drive is advanced; do it only if you’re comfortable.
What safety gear should I use?
Wear an ESD strap, safety glasses, and work on a grounded surface; unplug power before touching components.
Use an ESD strap and safety glasses, and unplug the console.
Watch Video
Key Takeaways
- Power down and unplug before work
- Use Safe Mode to troubleshoot software issues
- Back up data before major repairs
- Upgrade HDD only if comfortable with disassembly
- Seek professional help for hardware faults