Xbox Series X Repair Guide: A Practical DIY Approach
Learn practical, step-by-step methods to diagnose and repair common Xbox Series X issues. This Home Repair Guide tutorial covers safety, tools, and parts.

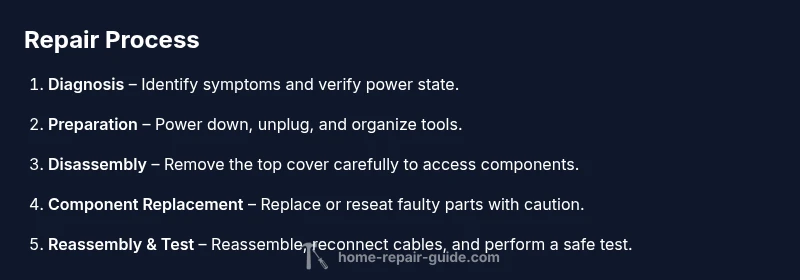
By following a careful, step-by-step process you can diagnose and repair common Xbox Series X issues yourself. This guide covers safety, essential tools, and typical fixes like overheating, boot problems, and drive errors. Gather a power-down, unplugged console, a clean workspace, and the right tools before you begin today, safely.
What You'll Fix: Common Xbox Series X Repair Scenarios
Xbox Series X owners encounter several recurring issues: overheating due to dust buildup or clogged vents; boot failures where the console won't start; noisy fans; disk drive detection problems; HDMI handshake issues; and occasional power supply quirks. These problems are often addressable with a careful, methodical approach. According to Home Repair Guide, overheating and dust are among the most common performance culprits in modern consoles, and addressing ventilation often yields the biggest returns. A practical DIY path typically falls into three categories: non-invasive maintenance (dusting, cable checks), safe component reseating (reconnecting loose cables, reseating a stuck USB-C port), and selective replacement of user-serviceable parts when required. While some repairs are straightforward, others demand professional service or official warranty support. Understand your risk tolerance, have a plan, and proceed only if you feel confident with electronics work.
Diagnostic Strategy: Narrowing Down the Fault
Start with symptoms and environment. Note when the issue occurs (during startup, under load, after a long session) and whether it correlates with heat, noise, or display problems. Check for obvious signs: loose cables, damaged ports, or accumulated dust around vents. Disconnect nonessential peripherals and run a power-on self-test to observe any error codes or LED sequences. If the console boots but overheats quickly, inspect the cooling path for dust or obstructions. For hard drive or storage issues, verify drive seating and try a safe reset. Based on Home Repair Guide analysis, most home fixes target dust removal, cable reseating, and component reattachment before moving to part replacement. Document every step to avoid repeating work.
Safety and Preparedness Before You Start
Safety first is a core rule for any console repair. Before you touch the Xbox Series X, unplug the power cable and disconnect all accessories. Work on a clean, dry, well-lit surface and avoid liquids nearby. Use an anti-static mat and an ESD-safe wrist strap to prevent static discharge from damaging sensitive components. Keep track of tiny screws with a magnetic tray or organizers. Do not attempt repairs while the device is powered or plugged in, and avoid forceful prying around plastic housings. The Home Repair Guide team emphasizes that a calm, organized workstation reduces risk and increases the chance of a successful repair.
Disassembly Basics: Opening the Console Without Damage
Opening the chassis should be done with care to preserve seals and connectors. Start by removing any outer screws, then gently separate the top shell using appropriate plastic tools to avoid marring plastic. Detach internal cables one by one while taking photos or labeling connectors to simplify reassembly. Do not bend or pry on fragile components, and avoid touching exposed circuitry with bare hands. If you encounter a stubborn connector, back away and recheck alignment instead of forcing it. Having a clean workspace and good lighting makes it easier to spot loose cables and damaged parts.
Replacing a Faulty Power Button or USB-C Port
If you identify a damaged or unresponsive power button or USB-C port, replace or reseat the component with the correct tools. Remove the component from its mounting points, disconnect its harness, and install the replacement part in the same orientation. Reconnect the harness securely, then test the function before fully reassembling. Take care to avoid bending flexible cables and to avoid over-tightening screws, which can warp the case. If the fault is intermittent, reseating nearby connectors can sometimes resolve the issue without a full replacement.
Cleaning Interior: Dust Removal Without Liquid Damage
Dust buildup can choke the cooling system and lead to overheating. Use compressed air in short bursts, holding the can upright to prevent liquid propellant from escaping. Keep a safe distance from fans and heat sinks, and avoid spinning the fans with your air blasts. A soft brush can help loosen stubborn dust on outer fins, while a microfiber cloth can wipe open areas once dust is removed. Do not spray cleaning solutions directly on circuit boards; use isopropyl alcohol on a lint-free pad only where necessary. Cleaning should be deliberate, not rushed, to protect delicate components.
Handling Overheating: Thermal and Ventilation Tips
Excessive heat is the most common cause of performance drops and shutdowns. Ensure vents are clear, the heatsink is properly seated, and thermal paste or pads are in good condition if you plan to re-seat the heatsink. Avoid applying excess force to the heatsink or fan assemblies. If you notice thermal throttling, improve airflow around the console by placing it on a hard, open surface and keeping it away from enclosed spaces. Regular dusting and a clean environment can dramatically reduce overheating incidents and extend device life. The goal is a stable thermal path for efficient heat removal.
Drive and Storage Issues: HDD/SSD Considerations
Storage problems can manifest as missing drives, intermittent recognition, or slow load times. Start by reseating the internal storage connector and updating firmware if possible. If the drive is failing, you may need to replace it with a compatible model and transfer data carefully. Always back up data when feasible and avoid handling drives unnecessarily while power is connected. If the console cannot detect the drive after reseating, consider an official diagnostic or professional service, especially if data integrity is critical. In some cases, disk issues stem from corrupted firmware rather than physical damage, which may require more advanced tools.
Reassembly: Securing Screws, Cables, and Thermal Interface
During reassembly, return every cable to its original path and secure fasteners at the correct depth. Route cables away from fans and moving parts to prevent snagging. Tighten screws evenly and avoid overtightening that can crack plastic or warp the chassis. Reapply thermal interface material only if you replaced the heatsink and are confident in the seating. A methodical approach and clean, labeled connectors reduce the risk of short circuits and post-assembly issues. Finally, use a controlled power-on test to verify that fans spin up smoothly and that the console boots without error codes.
Testing: Power-On Procedures and Safe Boot
With the console reassembled, plug in power and peripherals and perform a cautious power-on test. Observe for abnormal sounds, smells, or overheating during initial boot. If the system enters a safe mode or displays error codes, document them and consult the diagnostic steps you followed during disassembly. Run a basic test that checks power delivery, fan operation, and display output before pushing toward extended gameplay testing. If something seems off, power down immediately and recheck connections. This step confirms that the repair has not introduced new issues and that the device operates within safe thermal limits.
When to Call a Pro: Warranty, Cost, and Risk
Not every issue is appropriate for at-home repair. If your console is still under warranty, contacting the official service channel is usually the best option to protect coverage. Even outside warranty, some faults carry higher risk, such as power supply faults or damaged circuitry, where professional repair is recommended. If you encounter corrosion, ambiguous codes, or repeated failures after multiple DIY attempts, seek professional help. Professional technicians can perform more advanced diagnostics and avoid inadvertent damage that could void warranties or increase repair costs.
Maintenance Plan: Prolonging Console Lifespan
Preventive maintenance goes a long way in extending the life of your Xbox Series X. Create a simple schedule for dusting vents, cleaning the fan area, and inspecting cables every few months. Keep the console in a well-ventilated area and avoid placing it on soft surfaces that block airflow. Use a stand or elevated surface to promote airflow and reduce heat buildup during long gaming sessions. Regular checks help you catch issues early before they escalate into major failures. The Home Repair Guide team recommends documenting your maintenance steps and keeping spare parts on hand for common wear items.
Tools & Materials
- Precision screwdriver set (Torx/PH compatible)(Include T8/T6 or compatible bits as needed)
- ESD-safe wrist strap(Ground yourself before touching internal components)
- Plastic opening tools and spudgers(Avoid scratches on plastic housing)
- Isopropyl alcohol 99%(For cleaning contact surfaces and boards)
- Brush or canned air(Use to remove dust; hold can upright)
- Thermal paste (if reseating heatsink)(Only if you replace or reseal the heatsink)
- Replacement USB-C port or power button (if needed)(Only buy after testing confirms fault)
- Anti-static mat(Optional but helpful for workspace)
Steps
Estimated time: Estimated total time: 1-2 hours
- 1
Power down and unplug
Shut down the console, wait for any LEDs to stop, and unplug the power cable. This eliminates the risk of electric shock and protects internal components during handling.
Tip: Confirm no standby LEDs remain before proceeding. - 2
Disconnect external cables
Remove HDMI, controller, and any other connected peripherals. This reduces tension on internal connectors during opening and reassembly.
Tip: Label cables or take a photo to aid reassembly. - 3
Open the chassis carefully
Gently lift the top cover or access panel using plastic tools to avoid scuffs. Keep track of screws and note their locations for reassembly.
Tip: Work slowly and avoid forcing any parts. - 4
Inspect for obvious damage
Look for loose connectors, bent pins, or discolored components. Document any issues before touching components.
Tip: Do not move connectors that feel tight without releasing locking tabs. - 5
Remove suspected faulty component
If you’ve identified a damaged port or button, disconnect and remove it with the appropriate tools. Prepare for replacement part installation.
Tip: Handle metal brackets carefully to avoid bending. - 6
Install replacement or reseat connector
Install the new part or reseat the connector in the same orientation. Reconnect any harnesses securely before continuing.
Tip: Ensure connectors click into place and sit flat. - 7
Clean interior surfaces
Use compressed air to remove dust from the heatsink and surrounding areas. Wipe exposed surfaces with isopropyl alcohol on a lint-free pad if needed.
Tip: Avoid liquid contact with boards; apply minimal liquid per area. - 8
Reassemble and reconnect cables
Return all components to their original positions, route cables away from fans, and reseat all screws with even pressure.
Tip: Double-check the cable routing before closing the shell. - 9
Power on and perform a diagnostic test
Plug in the console and perform a careful power-on test. Look for normal fan startup, no unusual noises, and a clean boot.
Tip: If you see error codes, document them for reference.
FAQ
Can I repair my Xbox Series X at home?
Yes, for common issues you can perform safe, non-destructive maintenance and component reseats. For more complex faults or under warranty, professional service is recommended.
Yes—start with non-destructive maintenance, but seek professional help for complex faults or warranty concerns.
What are the first signs a repair is needed?
Watch for overheating, failure to power on, loud fan noise, display errors, or disk recognition issues. These symptoms indicate potential hardware problems worth investigating.
Overheating, no power, loud fans, or disk errors are common repair signals.
Is it safe to open the console if it's under warranty?
Opening the console can void the warranty. Check the manufacturer's policy and consider official service if under warranty.
Opening the device could void the warranty; check policy before proceeding.
Will replacing components affect warranty?
Replacing parts yourself may void the warranty. Review terms and weigh the risk against cost and reliability.
Self-replacing parts could void the warranty; read the terms carefully.
What should I do if the console still won't boot after a DIY fix?
Power cycle, recheck all connections, and verify parts. If issues persist, consult a professional repair service.
If it won't boot after DIY steps, recheck everything or seek pro help.
What tools do I actually need for this work?
A basic precision toolkit with anti-static measures is sufficient for many fixes. Avoid using household tools that aren’t designed for electronics.
Use a proper precision toolset with anti-static precautions.
Watch Video
Key Takeaways
- Inspect vents and clean dust to prevent overheating.
- Label cables to simplify reassembly.
- Test safely; stop if you detect heat, smoke, or abnormal behavior.
- Know when to seek professional repair or warranty service.
- Follow safety guidelines from Home Repair Guide during every step.