Xbox System Repair: Safe, Step-by-Step Guide
Learn to diagnose and safely repair common Xbox system issues with practical, warranty-conscious steps. This guide covers tools, safety, software resets, and testing to restore performance for homeowners and renters.

By following this guide, you will diagnose and perform safe, practical repairs for common Xbox system issues. You’ll learn how to identify power, startup, and performance problems, then apply hardware-safe fixes and software resets. Before you begin, backup game saves and unplug the console, use proper tools, and respect warranty terms to avoid costly voids.
Overview of Xbox System Repair
Xbox system repair encompasses diagnosing and addressing a range of internal hardware and software issues that prevent the console from powering up, booting, or running games smoothly. The goal is to restore functionality without causing additional damage. This guide emphasizes safety, warranty considerations, and practical, non-destructive approaches. According to Home Repair Guide, starting with a clean workspace, proper tools, and a conservative plan reduces the risk of further complications. The Home Repair Guide team found that most routine startup problems originate from power delivery, cooling, or corrupted software rather than a failed motherboard. By understanding common failure modes and using a structured repair approach, homeowners and renters can save time and money while preserving data integrity and resale value. Also remember that each Xbox model has unique screws and casings, so model-specific references are important for a safe teardown.
Tools and Safety Essentials
Before you touch the console, gather a focused toolkit and implement safety practices to protect both you and the device. A clean, static-free workspace reduces the risk of component damage. Wear an ESD wrist strap and use an anti-static mat if available. The essential tools include a Torx security driver (T8 and T9), a small Phillips screwdriver, and plastic opening tools like a spudger. Isopropyl alcohol (90% or higher) and lint-free wipes help with contact cleaning, while microfiber cloths prevent residue. Keep a clean container for tiny screws and separate trays for different assemblies. For some maintenance tasks, a small amount of thermal paste may be necessary if you reseat or replace a heatsink, though this is model-dependent. Finally, have a backup power source and a USB drive with a safe copy of saved data in case you need to perform firmware updates or factory resets. Safety note: never work with the console plugged into power while you’re prying or soldering and avoid forceful prying that could crack plastic casings.
Common Failure Modes in Xbox Consoles
Understanding typical failure modes helps you triage problems quickly. Power issues—the console not turning on, blinking LEDs, or entering a boot loop—often relate to power delivery boards, faulty power supply connections, or damaged cables. Overheating can cause thermal throttling, sudden shutdowns, or fan noise; dust buildup in heatsinks and vents is a frequent culprit. Disk drive problems produce read errors or freezing during load screens, while HDMI or display issues can stem from loose cables or damaged ports. System updates failing or corrupted firmware may cause boot loops or error codes. In many cases, reseating connectors, cleaning contacts, and verifying cable integrity resolve problems without major repairs. Document error codes and timestamps to help track recurring patterns and decide whether professional service is needed. According to the Home Repair Guide analysis, routine maintenance and safe troubleshooting steps cover the majority of consumer-reported problems.
Pre-Repair Backups and Safety Precautions
Back up your data before attempting any repair that touches the system software or storage. Save games and profile data to cloud saves or an external USB drive when possible. If a factory reset becomes necessary, ensure your data is recoverable before proceeding. Power down the console completely and unplug from the wall before inspecting internals. Use an ESD wrist strap and work on a non-conductive surface to prevent static discharge from damaging CPU/GPU components. Keep screws organized by size and location, and recheck all cable connections after you reassemble. If you’re unsure about a step, pause and consult model-specific teardown guides or seek professional help rather than forcing a connector. Home Repair Guide’s guidance emphasizes safety first to protect both you and your equipment.
Step-by-Step Disassembly and Inspection
This section provides a high-level overview of the disassembly and inspection process. Start by powering down and unplugging, then remove the outer shell screws using the appropriate Torx drivers. Gently lift the shell while supporting internal boards to avoid stressing flex cables. Disconnect any visible cables with careful, even pressure and place them in labeled trays. Inspect the motherboard for loose connections, obvious burn marks, or displaced heatsinks. Clean dust from fans and vents and ensure that cooling paths are clear. If you find a loose connector or a damaged cable, reseat or replace it with care. Remember to minimize handling of exposed boards to reduce the risk of static damage. Finally, wipe contact points with isopropyl alcohol for better conductivity before reassembly.
Common Fixes for Software and Hardware
Software issues are often resolved with a clean boot sequence, safe mode options, or a factory reset, depending on the symptoms. For startup problems, you can try a power cycle: unplug, wait 60 seconds, then reconnect and power on. If software corruption is suspected, perform a safe mode boot and reinstall the system update, ensuring you have a backup of saved games. Hardware fixes range from reseating memory modules and cables to replacing a faulty fan or a damaged HDMI port. Avoid DIY soldering or permanent component removal unless you are confident in the repair and the model supports it. When replacing components, verify compatibility and note any warranty implications. Home Repair Guide’s practical approach emphasizes non-invasive steps first, deferring more complex hardware interventions to accredited service.
Testing and Validation After Repair
After reassembly, restore power and observe the startup sequence. Confirm that the console boots normally and reaches the home screen without error codes. Verify the display output by testing HDMI connections on multiple ports and with different cables. Run a few games or apps to check system stability, loading times, and audio/video sync. Listen for abnormal fan noise, check temperature readings if accessible, and ensure there’s no visible dust remaining. If problems persist, consult the error code references and consider performing another software reset or professional diagnostics. Keep your backup data handy in case you need to revert settings or reinstall firmware.
Troubleshooting Pathways and When to Seek Pro Help
Create a decision pathway based on symptoms: if there’s no power, recheck power supply and motherboard connectors; if the console boots but crashes, focus on software resets and thermal management; if display issues persist, investigate HDMI interfaces and cabling. If you encounter recurring errors after multiple DIY attempts, it may be time to seek professional repair services or contact the manufacturer for warranty options. Warranty terms can be sensitive to who performs the repair, so review coverage before opening the console beyond basic service. In cases involving potential electrical damage, persistent data corruption, or hardware faults beyond your comfort level, professional diagnostics can save time and protect your data.
Tools & Materials
- Torx security driver T8(Essential for model screws on many Xbox shells)
- Torx security driver T9(Useful for deeper chassis screws in newer models)
- Phillips screwdriver (precision #1 or #2)(For outer panels and smaller components)
- Spudger (plastic opening tool)(Prevents keyboard or board damage when prying)
- Plastic opening tool(Helpful for seam separation without scratching)
- ESD wrist strap(Ground yourself to prevent static damage)
- Anti-static mat(Optional but reduces static risk in workspace)
- Isopropyl alcohol (90%+)(Clean contacts and surfaces)
- Lint-free microfiber cloth(Avoid fibers that leave residue)
- Thermal paste (optional)(Only if reseating heatsink or replacing a component with thermal interface material)
- Small magnetic parts tray(Keep screws and tiny parts organized)
- External USB drive or cloud backup(Back up game saves and profiles)
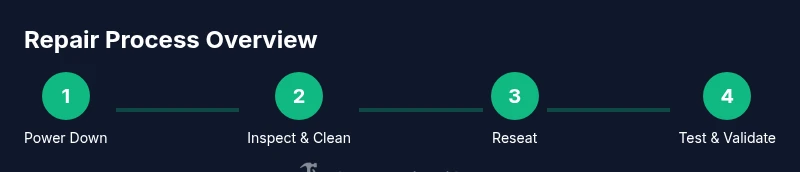
Steps
Estimated time: 3-6 hours
- 1
Power down and unplug
Turn off the console, then unplug from the wall and disconnect all accessories. Wait 60 seconds to discharge residual power before opening the case.
Tip: Never work while powered; static can damage circuitry. - 2
Remove outer shell screws
Use the appropriate Torx driver to remove the outer shell screws in a systematic pattern. Keep track of screw locations to reassemble correctly.
Tip: Place screws in labeled containers by location. - 3
Disconnect internal cables
Gently disconnect visible cables and flex cables using a plastic tool. Avoid pulling on cables that connect to fragile boards.
Tip: Label each connector before removing to simplify reassembly. - 4
Inspect for damage and dust
Visually inspect boards for burns, bulges, or corrosion. Remove dust from heatsinks and vents with compressed air or a soft brush.
Tip: Do not use liquid cleaners on boards; residue can cause shorts. - 5
Reseat connectors and test fit
Reconnect cables firmly, ensuring each connector seats fully. Lightly test fit fans and heatsinks before final assembly.
Tip: Make sure no cables are pinched between boards. - 6
Address observed issues
If a faulty fan, port, or connector is found, replace with compatible parts or reseat with care. Do not attempt risky soldering unless you are qualified.
Tip: Avoid improvising with makeshift adapters. - 7
Software reset if needed
If the issue appears software-related, perform a safe mode boot or factory reset as appropriate, ensuring data backups are available.
Tip: Back up data before resets to prevent loss. - 8
Reassemble and initial test
Reassemble the shell, reconnect power, and perform a careful boot test. Check for error codes and verify display, audio, and controller input.
Tip: If it fails to boot, revisit steps or consult professional support.
FAQ
Is opening my Xbox valid for warranty purposes?
Opening the console can void the manufacturer’s warranty unless you are a authorized service provider. Always check your warranty status and consult official guidance before attempting internal repairs.
Opening your Xbox can void the warranty unless you’re an authorized service provider. Check your warranty first and consider official support if you’re unsure.
Can I repair Xbox hardware myself?
DIY repair is possible for common, non-destructive issues such as cleaning dust, reseating cables, or replacing a simple component. More complex faults or ongoing failures after DIY attempts may require professional diagnostics.
DIY repair is possible for common issues, but complex faults or persistent failures may require professional help.
What not to do during Xbox repair?
Do not force connectors, avoid liquid cleaners on boards, and never operate the unit while opened. Don’t perform risky soldering unless you’re trained; improper methods can permanently damage the motherboard.
Don’t force connectors or operate the unit while opened. Avoid risky soldering unless you’re trained.
When should I seek professional repair?
If you encounter repeated power issues after basic fixes, disassembly resistance during reassembly, or suspected motherboard damage, seek professional diagnostics. Warranty service or official support can be faster and safer for extensive faults.
If problems persist after basic fixes or you suspect motherboard damage, seek professional help.
Will a factory reset erase saved data?
A factory reset can erase installed apps and saved data on the console. Back up saved games and profiles before performing resets to minimize data loss.
A factory reset can erase data, so back up your saves first.
How long does a typical Xbox repair take?
Repair duration varies with complexity. Simple cleaning and reseating might take 1–2 hours, while firmware repairs and component replacements could require several hours to a full day.
Repair time depends on the issue; some fixes take a few hours, others longer.
Watch Video
Key Takeaways
- Identify issue symptoms before disassembly.
- Back up data and protect against static damage.
- Follow model-specific teardown steps carefully.
- Prioritize non-invasive fixes first.
- Test thoroughly after each repair.