Repair for PS4: A Practical DIY Guide
Master practical, safe steps for repair for ps4—from diagnosing power and cooling issues to reassembly and testing. This Home Repair Guide tutorial covers tools, techniques, and safety.

Repair for ps4 involves diagnosing power, video, and cooling problems, then safely disassembling the console, cleaning dust, reseating connectors, and reapplying thermal paste if needed. This guide provides a clear, step-by-step approach, emphasizing safety, warranty considerations, and data protection. By following practical instructions, homeowners and renters can assess common symptoms and decide whether a DIY fix or professional service is the best path.
Understanding repair for ps4: scope and limitations
Repairing a PlayStation 4 involves addressing a range of symptoms—from power issues to overheating and video errors. For homeowners and renters, the decision to DIY versus hire a technician hinges on the fault, tool access, and data risk. This section clarifies what counts as repair, what doesn’t, and how to set realistic expectations. First, be aware that many PS4 problems are caused by dust buildup, thermal paste degradation, loose cables, or aging fans. Some issues are tied to the power supply or the motherboard, which can be more difficult to fix at home. The Home Repair Guide team emphasizes that you should never attempt dangerous repairs if you’re unsure. When in doubt, consult reputable guides, backup your saved data when possible, and consider warranty status. The keyword repair for ps4 suggests a practical approach: fix what you can without compromising the console’s core functionality, and know which symptoms warrant a professional evaluation. For more background, see reputable sources such as the U.S. CPSC safety guidelines and university-level electronics coursework. Home Repair Guide analysis shows that following a structured approach reduces risk and improves chances of a successful outcome.
Safety first: precautions before you begin
Before you touch any internal components, ensure the console is completely powered down and unplugged. Work on a non-conductive surface and keep liquids away. Use an anti-static wrist strap or periodically ground yourself to prevent electrostatic discharge from damaging sensitive boards. Store small screws in a labeled magnetic tray to avoid losing them. Photograph connectors and cable routes as you go; this helps you reassemble correctly. Finally, back up save data if the console boots long enough to do so, because some repairs necessitate data handling. These precautions reduce the risk of electric shock, component damage, or data loss, and they set the stage for a calm, methodical repair process.
Common PS4 symptoms and quick checks
Many failures show up as power issues, video output problems, or overheating fan noise. No power could indicate a blown fuse or faulty power supply; a black screen with no sound may point to HDMI or GPU issues; loud fans often signal dust buildup or degraded thermal interface material. Short rest periods, freezes, or frequent crashes can come from software corruption, requiring a backup and reset, or from hardware faults that require inspection. Start with non-destructive checks: verify the power cord and outlet work, inspect for visible dust around vents, and listen for abnormal fan sounds when the unit is powered on. If symptoms persist after basic checks, move to a controlled teardown following safety guidelines. For more context, Home Repair Guide analyses show that many problems are solvable with cleaning and re-seat steps, avoiding premature component replacement.
Tools and materials you’ll need
A well-prepared toolkit makes repairs safer and more reliable. Essential items include a precision screwdriver set (including small Phillips and Torx bits), an anti-static wrist strap, a magnetic parts tray, isopropyl alcohol (90–99%), lint-free wipes or microfiber cloths, and a small container for screws. If you plan to reapply thermal paste, have a small amount of paste suitable for electronics, a plastic spreader or card, and isopropyl wipes for cleanup. Optional but helpful items are a thin plastic opening tool, a heat-resistant mat, spare cooling fan, or a replacement disc drive, depending on the fault. Organize your workspace to minimize clutter and avoid losing tiny parts.
Diagnostic strategy: prioritizing fixes
Begin with the simplest explanations: dust buildup, loose cables, or degraded thermal paste. Confirm power supply functionality by testing with a known-good outlet and inspecting the internal power connector for damage. Then check the cooling system: are the vents blocked, is the fan spinning freely, and is the heatsink properly seated with intact thermal paste. Use photos to document connector orientation and component placement, which helps you revert if a fix doesn’t resolve the issue. If you identify a failed component such as a fan or disc drive, weigh the cost and difficulty of replacement against the price of a refurbished console. This practical approach aligns with best practices from Home Repair Guide.
Cleaning and thermal management techniques
Dust is the silent killer of gaming consoles. Start by blowing out dust from intake and exhaust vents using compressed air or a gentle blast from a canister, holding the can upright to avoid moisture. Wipe internal surfaces with a lint-free cloth dampened lightly with isopropyl alcohol, and let everything dry completely before reassembly. If the thermal paste has dried, carefully remove old paste with Isopropyl and reapply a thin, even layer before reseating the heatsink. Improved airflow reduces thermal throttling and extends device lifespan. Remember to handle the motherboard and heatsink with care to avoid bending or bending metal tabs.
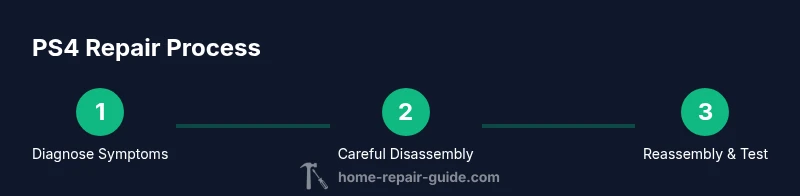
Reassembly and testing: steps to verify the fix
With all components clean and reconnected, reinstall the heatsink, reattach cables in their original orientations, and replace screws in an organized pattern. Reconnect the power and boot the unit to observe POST behavior, checkerboard patterns, or other symptoms you previously noted. If the console boots, proceed to a basic test: verify video output, check for fan noise during startup, and run a light game or system check to ensure stability. If issues recur, re-check cable connections and motherboard mounting, as a loose board can mimic many faults. Always power down before any re-inspection, and keep a close eye on temperatures during initial test runs.
When to call a professional and data considerations
If the fault appears to involve the motherboard, power supply, or data integrity, professional help is wise. Attempting high-risk repairs can cause irreversible damage or void warranties. If you’re uncertain, document symptoms, seek a diagnostic quote, and consider the cost relative to a refurbished unit. Regardless of approach, back up saved games and data whenever possible before disassembly, because some repairs may require software resets or data loss. Home Repair Guide recommends weighing DIY benefits against the risk of costly mistakes and long downtime.
Tools & Materials
- Precision screwdriver set (includes small Phillips and Torx bits)(Essential for internal screws; avoid using general household screwdrivers to prevent stripped heads)
- Anti-static wrist strap(Keeps static from damaging delicate motherboard components)
- Magnetic parts tray(Keeps screws and small parts organized during disassembly)
- Isopropyl alcohol (90–99%)(Used for cleaning surfaces; ensure it dries fully before reassembly)
- Lint-free wipes or microfiber cloth(Prevents fiber residue and scratching during cleaning)
- Thermal paste suitable for electronics(Required if reapplying heat transfer compound; choose a reputable brand)
- Small plastic or nylon pry tools(Helpful for separating clips without damaging plastics)
- Replacement cooling fan or disc drive (optional)(Only if you’ve diagnosed a faulty unit and the part is available)
Steps
Estimated time: 60-120 minutes
- 1
Power down and unplug
Shut down the PS4 completely and unplug the power cord from the outlet. This prevents electric shock and protects components from residual charge. If you can, disconnect any attached cables and remove discs to avoid damage during teardown.
Tip: Wait a full minute after unplugging to allow capacitors to discharge before handling internals. - 2
Open the case with care
Use the appropriate screwdriver bit to remove outer covers and access internal components. Keep screws in labeled containers to match their original locations. Photograph connector orientations as you remove cables.
Tip: Work over a clean, flat surface and keep a parts map to simplify reassembly. - 3
Ground yourself and inspect visually
Put on an anti-static wrist strap and examine the motherboard, cables, and fans for obvious damage, loose connectors, or excessive dust. Document any issues with photos for reference.
Tip: Avoid touching gold contacts directly; handle boards by edges only. - 4
Clean and reseat components
Blow out dust from vents and fans, then clean surfaces with isopropyl alcohol. If the heatsink is covered in dust, clean it and prepare to reapply thermal interface material if needed.
Tip: Do not apply force to dislodge components; if something resists, recheck alignment first. - 5
Check thermal paste and heatsink seating
If thermal paste is dry or uneven, remove old paste and apply a thin, even layer. Reattach the heatsink firmly to maintain good contact with the processor.
Tip: Use a small amount of paste—more is not better and can cause overheating. - 6
Reconnect cables and close the case
Reconnect all cables in their original orientation, secure the motherboard, and reattach the outer shell. Ensure no tools or parts are left inside the chassis.
Tip: Double-check that every connector sits snugly before closing. - 7
Initial boot and test
Power on and observe POST indicators. If the system boots, test basic functions (video output, fan activity) and run a light game or system check to confirm stability.
Tip: If nothing powers up, re-check power supply connections and fuse integrity. - 8
Diagnostics and wait times
Allow the system to run for a short period and monitor temperatures. If overheating recurs, revisit cooling and thermal paste steps or consider a professional evaluation.
Tip: Keep an eye on heat dissipation; sustained high temps indicate insufficient cooling. - 9
Decision point: DIY vs professional
Evaluate whether the fault is within your skill set and budget. If the fault involves the motherboard or power supply, professional service may be the safer option.
Tip: Document symptoms and costs to compare DIY feasibility with a service quote.
FAQ
Is repairing a PS4 at home safe for beginners?
Beginners can perform non-destructive maintenance and basic cleaning, but high-risk repairs should be avoided. If you’re unsure, seek guidance and consider professional service for motherboard or power supply problems.
Beginners can handle easy maintenance, but complex repairs should be done by a pro to avoid damaging essential parts.
Will repairing affect the warranty?
Opening the console can void existing warranties. Check your warranty terms and consider manufacturer-supported repair options if still active.
Opening the console may void your warranty, so check the terms first.
What signs indicate a power supply issue?
A failure to power on, blown fuses, or intermittent power delivery often point to the power supply. Inspect connectors and test with a known-good outlet before replacing.
If it won’t power on or powers off unexpectedly, check the power supply and connections.
Can you fix a disc drive at home?
Disc drive issues can sometimes be resolved by cleaning or reseating the drive, but mechanical failures or firmware problems may require specialized service.
Disc drives can sometimes be repaired at home, but some failures need a pro.
How long does a typical repair take?
DIY repairs can take from an hour to several hours depending on the fault and your familiarity with electronics. Complex faults may require more time or professional service.
It varies a lot—from an hour to several hours, depending on the issue.
Is it safe to use aftermarket parts?
Quality varies with aftermarket parts. Prefer reputable sources and compare against OEM equivalents, as poor parts can cause further damage.
Only use reputable aftermarket parts or OEM equivalents to avoid risk.
Watch Video
Key Takeaways
- Back up your data before starting any repair.
- Diagnose with simple checks before removing components.
- Follow a documented, step-by-step process.
- Keep dust and heat under control for a longer PS4 life.
- Know when to escalate to a professional.