PS5 HDMI Port Repair: Step-by-Step Home Guide
Learn to diagnose and repair a PS5 HDMI port with a safe, practical at-home method. This guide covers common failures, needed tools, a detailed step-by-step process, safety tips, and when to seek professional repair.

To fix a PS5 HDMI port, power down and unplug, inspect the port for bent or loose pins, clean debris, and reseat or resolder loose connections on the motherboard. Use a precision soldering iron, flux, and a steady hand. If the jack or traces are damaged, professional repair may be required to avoid further harm.
What causes PS5 HDMI port failures
In the world of ps5 hdmi port repair, failures are usually linked to physical damage, debris, or connector wear. The HDMI port is a dense, surface-mounted interface on the motherboard; even a small bend or loose pin can disrupt the signal, resulting in no display, intermittent image, or audio dropouts. Repeated plugging and unplugging, heavy cables, or heat can loosen the port housing over time. According to Home Repair Guide, many HDMI-related issues on gaming consoles are the result of minor mechanical stress rather than an invisible electronics fault. Understanding these causes helps you decide whether a DIY approach is practical or a professional repair is warranted.
Symptoms to watch for include: a blank screen with a known-good cable, garbled or color-shifted image, or intermittent signal that flickers as the cable or connector moves. In serious cases—such as a cracked HDMI socket, lifted traces, or burnt smells—the ps5 hdmi port repair typically requires board-level repair or replacement and should be handled by a qualified tech. Before you begin, confirm that the issue travels with the console and isn’t caused by the display, cable, or adapter. A simple swap of any one component can save time and money in a costly diagnostic.
For homeowners and renters, this section establishes the baseline: if you observe obvious physical damage or persistent failures after trying a known-good cable, you should plan your next steps carefully and consider the repair scope you’re willing to tackle.
Safety and prep before you begin
Safety comes first in any electronics repair. Start by powering down the PS5 completely, unplugging the power cord, and disconnecting all accessories. Allow a few minutes for residual energy to dissipate. Work in a static-free environment and use an anti-static mat or at least an ESD wrist strap to prevent damage to sensitive components. If you’re under warranty, note that opening the chassis may void coverage, so weigh the risks against the potential savings of a DIY fix. The Home Repair Guide team emphasizes caution: improper soldering or forceful handling can create new faults far more costly than the original issue. Gather your tools and verify you have a clean, well-lit workspace before removing the outer shell. Once the cover is off, avoid touching the motherboard traces or chips and keep liquids away from the work area.
Preparation also means planning the investigative steps: do you intend to reseat a loose connector, perform a careful reflow, or replace the HDMI port assembly? Clarifying your approach helps keep the repair focused and minimizes the risk of collateral damage.
Diagnosis: pin alignment, port wear, and cable issues
Diagnosing a ps5 hdmi port repair scenario starts with isolating variables. Test with a known-good HDMI cable and a different display to rule out the display chain. Then inspect the HDMI port under magnification for bent, missing, or misaligned pins, or any discoloration indicating heat damage. If pins are slightly misaligned but not broken, a careful realignment using a non-conductive tool can be attempted, but avoid prying on the socket with metal tools. Debris or flux residue should be cleaned gently with 99% isopropyl alcohol and lint-free swabs.
Cable issues are common culprits. If the display works intermittently when you wiggle the cable, the port damage is likely the root cause. In some cases, the port may become loose on the board due to stress, making a secure re-seat or re-soldering necessary. Thoroughly documenting each observation helps you decide whether the repair is within your skill level or if a professional repair is warranted. For ps5 hdmi port repair, the goal is clear: confirm whether the fault lies with the port, the board, or the cable, then choose the least invasive fix that restores reliable signal integrity.
DIY repair options: reseating, soldering, and reflow
DIY options for the PS5 HDMI port range from reseating a loose port to performing delicate soldering or reflow work on the motherboard. If the port is simply loose, a secure reseat of the connector on the board can restore contact without extensive work. This requires steady hands, a fine-tipped soldering iron, and careful flux use to avoid bridges between adjacent pins. For minor damage where pins are bent back into alignment but the socket remains firmly attached, a careful reflow can re-establish connections. Use a hot air tool with a fine nozzle and keep heat exposure to the minimum necessary to avoid delamination of nearby layers. If the port shows visible damage—burn marks, lifted pads, or cracked traces—the more reliable route is port replacement or board-level repair, which may involve more extensive disassembly and expertise.
Key considerations before attempting a DIY fix: ensure you’re comfortable with micro-soldering, understand the risk of voiding warranties, and have all essential tools at hand. The objective is to restore mechanical alignment and electrical contact without creating new shorts or bridges. If you’re unsure, practice on non-critical joints or seek guidance from a detailed service manual. A measured approach minimizes the chance of accidental damage and increases the odds of a successful ps5 hdmi port repair.
Practical tip: work slowly and in a well-lit area, with magnification to avoid accidental bridges. Keep your soldering iron at a controlled temperature suited for lead-free solder to prevent overheating the board.
When to stop and seek professional repair
Not every ps5 hdmi port repair is a DIY-friendly task. If you observe burnt residue, cracked solder joints, lifted pads, or a port that remains loose despite reseating, the risk of damaging the motherboard increases materially with additional heat or pulling on the connector. In these cases, professional repair is the prudent path. A service technician can perform a controlled rework, replace the HDMI daughterboard, or, if necessary, replace the motherboard itself. The decision also hinges on warranty status and cost considerations; even with DIY skills, the chance of causing irreversible harm may outweigh the benefits of attempting a fix yourself. Home Repair Guide advises evaluating the overall condition, the availability of parts, and the potential warranty impact before proceeding with a major repair. Seeking professional help early in a complex case can save time and prevent costly mistakes.
Before you commit, obtain a formal estimate that breaks down parts, labor, and turnaround, and confirm that the service includes a test with multiple HDMI cables and a display. If the console is under warranty or covered by an extended service plan, consult the manufacturer’s guidance first.
Aftercare and testing: ensuring lasting results
After any ps5 hdmi port repair, careful reassembly and rigorous testing are essential to confirm success. Reinstall the outer shell, reconnect power, and boot the PS5 with a known-good HDMI cable and display. Test across several scenarios: 4K60 if supported, 1080p, and standard dynamic range to verify consistent signal integrity for both video and audio. Check for intermittent drops as you rotate or reposition the HDMI cable; if the issue recurs, revisit the diagnosis and consider a different repair approach. Maintain a clean, static-free environment and handle cables gently to minimize future wear. If the repair involved replacing the port or board, monitor the device for heat buildup around the TV side of the connector during extended use. Finally, document the process and store any spare parts and tools properly for future maintenance.
Warranty, data integrity, and long-term care
The ps5 hdmi port repair process can be intricate, and data integrity should not be overlooked. Although HDMI issues rarely affect saved data, a failed repair or inadvertent short can stress the motherboard and potentially cause data access problems. Keep a recent backup of your game saves if possible, and avoid aggressive overclocking or high-heat conditions that may deteriorate solder joints over time. If you notice recurring issues after a repair, contact professional support for a thorough assessment. Maintaining a gentle handling routine and periodic checks will help prolong the life of the HDMI system and reduce the chance of future failures. The Home Repair Guide team emphasizes patience and precision, which often yields reliable, durable results without unnecessary risk.
Tools & Materials
- ESD-safe work surface and anti-static wrist strap(Prevents electrostatic discharge from damaging sensitive components)
- Precision screwdriver set (Torx/Phillips)(Essential for removing console covers and internal fasteners)
- Fine-tipped soldering iron(Used for careful pin-level work on HDMI connector)
- Solder (lead-free, small reel)(Fine gauge (0.5-0.8 mm) preferred for precision joints)
- Flux (no-clean rosin flux)(Improves wetting and reduces bridges)
- Isopropyl alcohol 99%(For cleaning residue and prepping surfaces)
- Magnification tool (loupe or microscope)(Helps inspect pins and pads closely)
- Non-conductive removal tool (spudger)(Used to carefully lift or align components)
- Hot air rework station or hot air gun (optional)(Useful for reflow without heavy contact, exercise caution)
- Replacement HDMI port/daughterboard (optional)(Use if port or pad damage is extensive)
Steps
Estimated time: 60-180 minutes
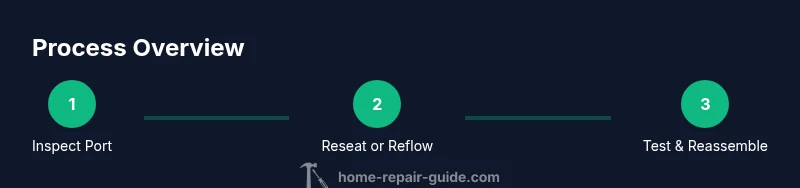
- 1
Power down and expose the port
Shut down the PS5, unplug the power, and disconnect all peripherals. Remove the outer shell to access the motherboard region around the HDMI port. Handle the console on a grounded surface and avoid touching components unnecessarily.
Tip: Keep track of screws and layout to ease reassembly. - 2
Inspect the HDMI port visually
Use magnification to check for bent pins, missing latches, or foreign debris. Note any physical damage to the port housing or surrounding traces. Do not force components; gentle, steady observation is key.
Tip: If you see obvious damage, plan for a port replacement rather than rework. - 3
Test port seating and cable behavior
With the board exposed, reseat the HDMI connector if it appears loose. Check whether the connector wiggles with minimal pressure and whether pins align with the mating cable. Do not apply force that could bend or lift pads.
Tip: Use a non-conductive tool to guide the port without bridging pads. - 4
Prepare for soldering or reflow
Apply flux to the joint area, heat management should be controlled, and prep the soldering iron with a fine tip. If you’re reflowing, keep the airflow gentle and avoid direct contact with plastics. Ensure you have adequate ventilation.
Tip: Practice quick, controlled tacks on a scrap joint first if you’re new to micro-soldering. - 5
Re-seat, reflow, or replace the port
Reseat the connector, apply careful solder to any loose pins, or perform a light reflow to restore contact. If pads are lifted or traces show damage, port replacement or board repair is advised.
Tip: Check for solder bridges after finishing; use a magnifier to confirm clean joints. - 6
Reassemble and test
Carefully reassemble the PS5, reconnect power, and test with a known-good HDMI cable and display. Verify a stable image and sound; test multiple resolutions if possible.
Tip: Document the repair steps and keep spare screws organized to ease future maintenance.
FAQ
Can I fix a PS5 HDMI port at home?
Yes, for minor issues like a loose port or dirty pins you can attempt reseating or careful rework. More serious damage, such as burnt traces or lifted pads, should be handled by a professional.
You can try simple reseating or light rework if the damage is minor, but major damage should be handled by a pro.
Will repairing void my PS5 warranty?
Opening the console or performing soldering may void warranty coverage. Check the terms and consult Sony support or an authorized service provider if you’re unsure.
Opening the device can void the warranty, so verify terms before starting.
What are signs the HDMI port is damaged beyond DIY repair?
Bent pins, visible heat or burn marks, lifted pads, or persistent display failure even with a good cable indicate beyond-DIY repair.
If you see bent pins or burn marks, stop and seek professional help.
Is soldering PS5 hardware safe for beginners?
Soldering is sensitive work; improper temps or bridges can damage the motherboard. If you’re new, practice and consider professional guidance.
Soldering PS5 boards is tricky; consider guidance or professional help.
What tools are required for this repair?
A small precision screwdriver set, ESD protection, a fine-tipped soldering iron, lead-free solder, flux, isopropyl alcohol, magnification, and a spudger.
You’ll need precision tools, flux, and magnification for this repair.
What are alternatives to repair?
If the port or board is extensively damaged, replacement via official service or third-party repair may be the most reliable option.
Board replacement might be the only option for severe damage.
Watch Video
Key Takeaways
- Power down fully before inspection
- Inspect pins and clean debris carefully
- Reseating or gentle reflow can fix minor faults
- Avoid overheating the board; opt for professional help if needed
- Test with known-good cables and displays after repair