Sony TV Repair: A Homeowner's Step-by-Step Guide
A thorough, educational guide to diagnosing and repairing common Sony TV issues at home. Learn safety, tools, basic troubleshooting, firmware steps, and when to call a pro.

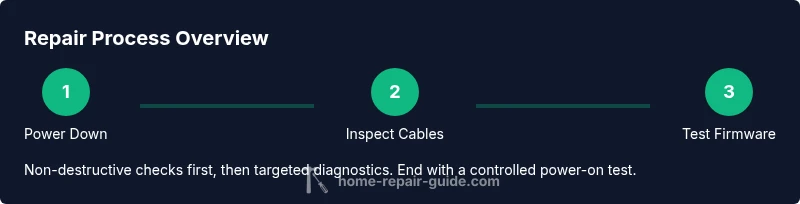
This guide helps you safely diagnose and troubleshoot common Sony TV issues at home, with a practical step-by-step process to reseat cables, test power and firmware, and decide when professional service is wiser. You’ll learn essential safety practices, how to gather the right tools, and how to document symptoms for accurate repairs.
Why Repairing a Sony TV at Home Can Be Worth It
According to Home Repair Guide, repairing a Sony TV at home can save time and money and extend the device’s life, provided you follow safety steps. The decision to DIY should weigh the fault's risk level against your comfort with electronics and the TV’s warranty status. This article is designed for homeowners and renters who want to understand when a fix is feasible and how to approach it in a careful, methodical way. By learning the basics, you can often resolve minor issues without the expense of a full service call, while still recognizing when a professional is the safer choice.
Sony TVs are robust pieces of equipment, but they share common failure points with other modern displays. When you decide to tackle a repair, prioritize non-invasive checks first, document what you observe, and progress gradually. The goal is to restore function while protecting yourself and the device. This approach aligns with the practical, no-nonsense guidance you’ll find in Home Repair Guide’s tutorials.
Common Sony TV Issues and Root Causes
Sony TV failures commonly fall into a few categories: power/standby problems, display/backlight faults, signal or input issues, and software/firmware glitches. Symptoms like the unit not turning on, no picture, or no sound often point to the power supply, main board, or backlight circuitry. In many cases, reseating connectors and performing a safe firmware refresh can resolve software-related faults. Home Repair Guide analysis shows that addressing symptoms methodically—starting with power and then narrowing to the display or audio system—reduces wasted effort and avoids unnecessary part replacements.
Understanding these categories helps you triage effectively. If you document when the fault occurs, how long it lasts, and whether it changes with certain inputs, you’ll have a clearer picture when you consult manuals or a technician.
Safety and Preparation Before You Start
Working inside a Sony TV involves components that can retain dangerous voltages even after unplugging. Always unplug the power cord, wait for capacitors to discharge, and wear an anti-static wrist strap when handling boards. Create a clean, well-lit workspace and keep track of screws and small parts. Use a soft mat and take photos before detaching cables so you can reassemble accurately. If anyone in the home is using high-powered electrical equipment, postpone repair work until it’s safe. By laying groundwork first, you minimize risk and set up a controlled environment for troubleshooting.
This stage is also your opportunity to confirm warranty status and model compatibility for any firmware or service manuals you may use. Keeping notes about model numbers and observed symptoms will pay off later in the process.
Essential Tools and Materials You'll Need
A focused toolkit reduces time and risk when repairing a Sony TV. Essential items include a Philips and flat-head screwdriver set, a plastic spudger, anti-static wrist strap, microfiber cloth, and a small tray to organize screws. A multimeter is helpful for voltage checks, but not strictly required for beginners. Keep a USB drive with model-specific firmware if you plan to perform software updates, and have a soft, non-marring surface to protect the screen when removing the back cover. Optional items include a heat-safe silicone mat and a service manual.
Having the right tools on hand before you begin makes the process smoother and minimizes the chance of damaging sensitive components.
Basic Diagnostic Workflow for Sony TVs
A rational diagnostic workflow saves time and reduces the chance of collateral damage. Start with safety: unplug, inspect the external power cord, and check the wall outlet. Next, observe standby indicators on the front panel and listen for any unusual sounds when powering on. If the unit powers but shows no image, test the backlight by shining a bright light on the screen; you should see a faint image if the panel is working but backlight is failing. It’s often useful to photograph the screen when you first power on to document symptoms, which helps you compare before/after states as you test potential fixes.
A systematic approach keeps you organized and reduces guesswork, especially when you’re dealing with complex boards inside the chassis.
Troubleshooting: Power and Standby Issues
Power and standby problems are among the most common Sony TV repair scenarios. Start by testing the power supply board for bulging capacitors or signs of overheating. Reseat any loose connectors between the power board and the main board, then recheck the remote sensor and standby circuits. If the TV remains completely dead, you may need to test the AC input with a voltmeter or consult the service manual for model-specific tests. Remember to discharge any stored energy before handling internal components. A careful, stepwise approach reduces risk and improves your odds of a successful DIY fix.
If you’re unsure about electrical testing, skip to the sections that cover non-destructive steps and seek professional help sooner rather than later.
Troubleshooting: No Picture or No Sound
When there is no picture or no sound, the fault could lie in the T-con board, main board, or speaker connections. Re-seat ribbon cables from the T-con to the panel, and check HDMI/AV input signals from other devices to confirm the issue isn’t the source. If sound exists but video is missing, inspect the backlight, inverter, and video processor on the main board. Firmware corruption can also cause intermittent video or audio dropouts, which may be resolved by a safe firmware refresh using the correct file from Sony’s official site. Documenting symptoms before and after each step helps you or a technician pinpoint the root cause more quickly.
Firmware Updates and Software Maintenance
Software issues are a frequent cause of smart TV instability. Before attempting a firmware refresh, verify you have the exact model number and the latest file from Sony’s official support site. Copy the file to a USB drive and follow the on-screen prompts precisely to avoid bricking the device. If your model supports network updates, enabling automatic updates can help prevent future issues. Always perform firmware updates with the TV powered by an appropriate power source and avoid interruptions during the process. If a firmware update fails, you may need to revert to a known-good version under guidance from Sony support.
Regular software maintenance helps keep the TV responsive and reduces the chance of recurring glitches.
When to Call a Professional and How to Choose One
If the issue involves high-voltage components, screen panel repairs, or you have not replaced a part before, it is safer to contact a certified technician. A qualified Sony TV repair specialist can diagnose issues with precision, source the correct parts, and ensure warranty coverage remains intact. When choosing a pro, ask about their experience with Sony models, provide the exact model number, and request a written estimate that includes labor and parts. The Home Repair Guide Team recommends asking for references and confirming that the technician follows electrical safety standards. For complex or risky faults, professional service is the prudent path to avoid injury or further damage.
Tools & Materials
- Phillips screwdriver set(Include #0 and #2 sizes; magnetic tips help)
- Flat-head screwdriver(Small precision driver for plastic screws)
- Plastic spudger(Non-conductive pry tool to avoid PCB damage)
- Anti-static wrist strap(Keeps static from damaging components)
- Microfiber cloth(Clean screens without scratches)
- Small parts tray(Keep track of screws and connectors)
- Digital multimeter(Useful for voltage checks, not required for beginners)
- USB drive with firmware file(Only if performing model-specific firmware updates)
Steps
Estimated time: 60-120 minutes
- 1
Power down and unplug
Turn off the TV and unplug the power cord from the wall. Wait at least 60 seconds to allow residual charge to dissipate. This reduces the risk of electric shock when you open the cabinet.
Tip: Use a non-conductive tool to unplug the cable and avoid touching internal components. - 2
Inspect external connections
Check all external cables (HDMI, coax, antenna) and ports. Reseat any loose connectors and test with a known-good cable where possible.
Tip: Take photos of connections before removal to ensure correct reassembly. - 3
Test the wall outlet and power cord
Move the TV to a known-good outlet if possible or test the outlet with a tester. Look for signs of damage on the cord such as cracks or scorch marks.
Tip: If the outlet trips a breaker, stop and consult a pro. - 4
Check standby indicators and inputs
Observe the standby LED behavior and ensure the remote is sending signals. If indicators are abnormal, the fault may be on the main board or power supply.
Tip: Document LED patterns for technicians. - 5
Perform a firmware refresh (if applicable)
Obtain the exact model firmware from Sony’s official site, copy it to a USB drive, and follow the on-screen prompts carefully to update the system.
Tip: Only use firmware intended for your exact model to avoid bricking. - 6
Test the display path and backlight
If you suspect display issues, check the backlight by illuminating the screen with a bright light. If you see a faint image, the backlight or inverter may be faulty.
Tip: Backlight tests can be delicate; proceed slowly to avoid panel damage. - 7
Reseat internal ribbon cables
Power down, open the back cover, and gently reseat cables between the main board, T-con, and backlight driver. Reassemble the rear panel after rechecking connections.
Tip: Handle boards by the edges; avoid touching ICs or copper traces. - 8
Final power-on test
Reconnect the power, power on the TV, and verify basic functions: picture, sound, and remote control response. If problems persist, consult the service manual or a technician.
Tip: Keep a log of symptoms and steps you performed for future reference.
FAQ
Can I fix a Sony TV at home?
Yes for basic, non-destructive issues and when you’re comfortable with electronics. Avoid high-voltage components and consult a professional for warranty-covered or risky faults.
Yes, you can handle basic fixes at home, but avoid high-voltage parts and a risky fault; consult a pro for warranty or safety concerns.
What are the most common Sony TV issues?
Power/standby problems, no picture, no sound, or backlight failures are among the most frequent Sony TV faults. Firmware glitches also appear with smart features.
Power problems, no picture, no sound, backlight issues, and occasional firmware glitches are the typical Sony TV faults.
Do I need a service manual for Sony TV repair?
A service manual or model-specific guide helps with accurate diagnostics and safe disassembly. Use official Sony resources or reputable repair databases.
A model-specific guide helps with diagnostics and safe disassembly; use official Sony resources.
Is it safe to open the TV cabinet?
Opening the cabinet is safe only after you unplug the TV and discharge capacitors. Wear an anti-static strap and avoid touching circuitry directly.
Only after unplugging and discharging; wear anti-static gear and handle parts carefully.
When should I replace the TV rather than repair?
If the fault involves the display panel, power supply with severe damage, or persistent software issues after updates, replacement may be more cost-effective over time.
If panel damage or ongoing failures persist after updates, replacement may be more economical.
How much does professional repair typically cost?
Costs vary by fault, parts, and labor. Get a written estimate and compare it against the price of a replacement TV to decide the best option.
Costs vary; get a written estimate and compare with replacement cost to choose the best option.
Watch Video
Key Takeaways
- Diagnose safely with unplug-first steps
- Document symptoms to guide repairs
- Start with power/standby checks, then display and firmware
- Use model-specific firmware only
- Call a professional for high-voltage or panel faults