Samsung TV Repair: A Practical DIY Guide
Learn to diagnose, troubleshoot, and safely repair common Samsung TV issues at home with practical steps, tools, safety tips, and cost considerations.

You will learn how to diagnose and safely repair common Samsung TV issues at home. You'll need basic tools, a safe workspace, and model-specific service information. This guide provides a step-by-step diagnostic workflow, common fixes, and safety warnings to help you complete tv samsung repair tasks. Whether you're tackling power, display, or audio problems, start with safety and documentation. This approach reduces risk and helps you decide when to seek professional help.
Understanding Samsung TV repairs: purpose and scope
Samsung TV repair can address a variety of issues, from no power to distorted images, faint sound, or input lag. This guide focuses on practical, at-home troubleshooting for common faults while respecting safety boundaries. You’ll find a logical path: identify symptoms, verify power and inputs, reseat connectors, and swap or rehabilitate components only when you have solid documentation. The goal is to empower homeowners and renters to perform safe diagnostics, make informed repair decisions, and minimize the risk of further damage. Throughout, we refer to the tv samsung repair topic in plain terms so you can follow along even if you’re new to electronics.
According to Home Repair Guide, a methodical, well-documented approach improves outcomes and reduces risk, especially for consumer electronics. This article emphasizes safety, traceable steps, and cost-awareness so you can decide whether to proceed with an at-home repair or seek professional help. The guidance favors practical fixes over risky, invasive teardown unless you have the right tools and training.
Symptom-first troubleshooting: map issues to likely causes
When a Samsung TV exhibits a problem, start by noting the exact symptom and recent changes (updates, new inputs, or environmental factors). Below are common symptoms and their typical, non-invasive causes:
- No power or standby light: check the power cord, outlet, and remote control commands; ensure the TV isn’t in sleep mode.
- No display or backlight: potential power supply or backlight circuit issue; inspect for bulb failure in older LEDs or panel-related faults.
- Audio present but no video: check HDMI/AV inputs and the main board connections; verify panel isn’t muted or in a display-off mode.
- Color distortion or image instability: could be a loose LVDS cable, degraded TCON board, or improper color calibration.
- Remote control or menu lag: test with a fresh source, reseat control cables, and rule out software glitches.
In many cases, a simple symptom aligns with a straightforward fix, but always consult official service information for your model if you’re unsure. tv samsung repair often begins with careful observation and documentation.
Safety first: unplug, discharge capacitors, and environmental safety
Never work on a powered TV. Unplug the unit and allow it to sit for several minutes to discharge residual energy. Capacitors in the power supply can retain a dangerous charge even after unplugging, so avoid touching solder joints or hot components until you’re sure they’re safe. Work on a dry, non-conductive surface with adequate lighting. Keep liquids away and ensure children or pets aren’t nearby. If you smell burnt components or notice visible damage, stop and reassess before continuing with any test or repair steps. tv samsung repair should always prioritize safety over speed.
According to Home Repair Guide analysis, adhering to safety protocols reduces the risk of electric shock and equipment damage, especially for consumer electronics repair. This emphasis on safe practices helps beginners avoid common mistakes and protects both person and device.
Essential tools and workspace setup
Assemble a simple, orderly work area with the TV unplugged and resting on a stable surface. The right tools reduce the chance of further damage. Required items include a basic screwdriver set (PH2 and slotted), a plastic pry tool, a multimeter, and an anti-static wrist strap to prevent static discharge. Optional items like spare fuses and a spare power board should only be used if you’ve confirmed a failed component. Label cables and screws during disassembly to simplify reassembly. A clean, organized workspace is key to a successful tv samsung repair.
Diagnostic workflow: test power, inputs, display, and sound
Develop a repeatable process to identify the root cause. Start with power checks: confirm the standby light behavior and verify wall outlet voltage with a multimeter. Then inspect input connections and test with multiple sources (antenna, HDMI, or streaming devices). If the screen powers on but shows no image, check the backlight connectors, the TCON board, and LVDS cables. For sound issues, verify speakers and audio routing in the OSD. Document readings and steps taken so you can compare results over time. tv samsung repair benefits greatly from a structured, documented diagnostic approach.
Common fixes you can perform safely
Some faults are reversible with straightforward actions: reseat loose cables, reflow a cold solder joint (only if you’re trained), and replace visibly blown fuses on the power board with the exact rating. Avoid replacing parts you cannot test or identify. Use ESD-safe tools, and never bypass fuses or safety features. If a connection was loose, re-seat and secure it with the appropriate locking mechanism. For display or LED backlight issues, assess cabling integrity rather than jumping to component replacements. These steps cover many tv samsung repair scenarios without requiring full-board replacement.
Replacing the power supply board or other components
If diagnostics point to a failed power supply or controller board, carefully plan replacement. Power board work involves high voltages; if you’re not confident, seek professional help. When proceeding, source the exact replacement part for your model and verify compatibility using the service manual or manufacturer parts list. Do not reuse damaged connectors or mismatched components, and ensure proper insulation and static protection during any disassembly or reassembly. Remember that some issues might be easier addressed with a full unit replacement rather than a single-board repair.
Reassembly, calibration, and functional testing
After repairs, reassemble with care: reconnect all cables in their original locations, replace the back panel screws, and ensure the screen is clear of any tools. Plug the TV in and perform a power-on test, watching for the standby LED behavior and startup sequence. Run through inputs, color calibration, and a short video to confirm picture and sound, then check for any residual artifacts or overheating. If the TV heats excessively or shows abnormal behavior, power down and recheck connections. Document the test results for future reference and warranty records.
When to seek professional service and warranty considerations
Some tv samsung repair tasks exceed typical DIY scope, especially high-voltage power electronics or panel-level faults. If you encounter recurring failures after a repair, parts availability is limited, or you’re uncomfortable with the safety risks, contact a qualified technician. Review your warranty terms; many warranties exclude user-caused damage but may cover manufacturer defects. If possible, obtain a written estimate and a clear scope of work before proceeding. In some cases, replacement units or extended warranties offer more value than continuing repairs.
Tools & Materials
- Phillips head screwdriver (PH2)(Essential for most back-panel screws)
- Flathead screwdriver(Useful for prying without damage)
- Torx screwdriver set(Some models use Torx fasteners)
- Plastic pry tools(Non-conductive to avoid screen damage)
- ESD-safe wrist strap(Prevent electrostatic discharge)
- Multimeter(Test voltages and continuity on power rails)
- Soldering iron and desoldering braid(Only if you’re experienced with board work)
- Replacement fuses and compatible parts(Only after confirming a fault and rating)
- Anti-static mat(Optional safe workspace surface)
Steps
Estimated time: 60-120 minutes
- 1
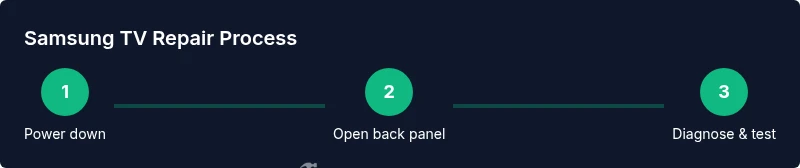
Power down and unplug
Shut off the TV and unplug from the wall. Wait 5–10 minutes to allow residual energy to discharge before handling any internal components.
Tip: Keep the TV on a stable surface and away from liquids. - 2
Open the back panel
Use the appropriate screwdriver to remove the back-panel screws. Keep screws organized and photograph cable routing for reassembly.
Tip: Only remove panels you’re instructed to access; avoid exposing the screen directly. - 3
Document model and symptoms
Locate the model label and note symptoms with timestamps. This will guide targeted testing and help if you need to buy parts.
Tip: Having a clear symptom log prevents guesswork later. - 4
Check for obvious damage
Inspect for bulging capacitors, burnt components, or loose connectors. Do not touch hot or charged parts.
Tip: Take photos of any suspicious areas before touching them. - 5
Test power rails with a multimeter
With the TV disconnected, carefully test accessible power rails and continuity as per the service manual. Record readings.
Tip: Use a non-contact method first to locate energized areas, then probe with proper safety precautions. - 6
Reseat all cables and connectors
Disconnect and reconnect main cables, LVDS, and board-to-board connectors to ensure proper seating.
Tip: Locking tabs must click into place; avoid forcing connectors. - 7
Check fuses and obvious components
Inspect fuses on the power board with a multimeter. Replace only with the same rating; never bypass fuses.
Tip: If a fuse repeatedly blows, stop and reassess the fault. - 8
Assess backlight and panel wiring
For backlight or display issues, verify backlight cables and panel connections are secure and not damaged.
Tip: Backlights operate at high voltages; exercise caution during checks. - 9
Decide next steps based on findings
If issues persist after checks, evaluate repair viability versus replacement and document all findings.
Tip: Part availability and expected labor costs influence the decision. - 10
Reassemble and perform a test run
Reinstall the back panel, plug in, and power up. Observe startup sequence and test inputs, audio, and display.
Tip: Stand back and watch for unusual smells or smoke during the first test. - 11
Test comprehensively before final assessment
Run multiple sources (HDMI, apps, tuner) to ensure consistent performance across modes.
Tip: Document test results for warranty or future repairs. - 12
Record outcomes and plan next steps
Note what was fixed, what remains, and estimated costs if you continue troubleshooting.
Tip: Retain any removed parts and receipts for reference.
FAQ
Can I fix a Samsung TV without professional tools?
Yes for basic checks like reseating cables and inspecting obvious damage. Avoid working near high-voltage sections unless you have training and the proper equipment.
Yes for basic checks, but avoid opening or testing high-voltage parts unless you’re trained.
What should I check first if the TV won't power on?
First verify the power cord and outlet, then check for a standby light indicator and any external power supply issues before diving deeper.
Check the power cord and outlet first, then look for a standby light to guide your next steps.
Is replacing a power supply board risky?
Yes. It involves high voltages and static-sensitive components. Only proceed if you have the right manuals and safety practices.
It's risky; use caution and consult manuals before attempting.
How much does Samsung TV repair typically cost?
Costs vary widely depending on parts, labor, and model. Get a written estimate and compare with a new unit option before proceeding.
Costs can vary; always get an estimate and weigh against replacement.
When should I replace instead of repair?
If the repair is expensive or parts are hard to source, replacement may be wiser than continuing repairs.
If it’s costly or parts are scarce, replacement might be the smarter option.
Will warranty cover home repairs?
Most warranties cover manufacturer defects, not user-caused damage. Check terms and your specific policy.
Warranty usually covers defects, not user-caused damage; review your terms.
Watch Video
Key Takeaways
- Begin with safety and documentation.
- Follow a structured diagnostic workflow.
- Don’t bypass safety devices or fuses.
- Assess repair viability before ordering parts.