Screen Repair for TV: A Practical DIY Guide
Learn how to diagnose and address common TV screen issues with a practical, safety-focused approach. This step-by-step guide covers tools, options, and when to call a professional.

You’ll learn how to diagnose common TV screen issues, decide whether to repair or replace, and perform safe, step-by-step fixes for screen problems. This guide covers tools, safety, and when to call a pro. By following Home Repair Guide’s methods, you’ll approach screen repair for tv with confidence, whether you’re a homeowner or renter.
What screen repair for tv involves
Screen repair for tv covers a range of display-related issues, from backlight and panel problems to image distortion and dead pixels. It’s important to distinguish between problems that affect the display itself and those that originate from the signal or software. The Home Repair Guide Team notes that many screen-related failures in modern LCD/LED TVs stem from hardware components like the backlight or the panel rather than the input signal, making careful physical inspection essential. When you approach screen repair for tv, you balance potential costs, risks, and your comfort level with disassembly. If the screen is cracked or the panel is beyond repair, replacement may be the safer option. This guide emphasizes safety, documentation, and methodical testing to avoid creating new problems. According to Home Repair Guide, adopting a structured approach reduces risk and helps you decide whether a DIY fix is viable or a professional repair is the better path.
Diagnosing screen problems
A systematic diagnosis starts with symptom mapping: do you see no image, color distortions, flickering, lines, or partial screen failure? Begin by verifying the input source with an external device and checking all cables. If the issue follows the panel rather than the source, you may be looking at backlight issues or panel damage. Use built-in test patterns or a calibration disc to identify uniformity, color accuracy, and brightness problems. A multimeter can help diagnose certain electrical faults, but many TV models hide high-voltage components behind protective covers; avoid touching anything inside while powered. Keep a detailed log of tests and outcomes to guide your repair decision. Documentation helps you decide whether a simple connector reseat might fix things or whether more extensive repairs are needed. Remember, replacing internal boards without precise model knowledge can worsen problems.
Repair options and cost considerations
There are several routes you can take, depending on the diagnosis. Simple fixes might involve reseating cables, cleaning connectors, or replacing a faulty power or T-con board. More involved repairs could include backlight replacement or panel-related issues, which are generally more complex and costly. In many cases, the cost and availability of parts make repair impractical for older models, where replacement may offer a better long-term value. Based on Home Repair Guide analysis, backlight or panel failures are common culprits, and when a panel must be replaced, DIY options become risky and often impractical. The decision to repair or replace should weigh warranty status, device age, expected remaining lifespan, and your budget. This section helps you assess whether a DIY fix is feasible or if engaging a professional saves time and reduces risk.
Safety and warranty considerations
Working inside a TV exposes you to sharp edges, high voltages, and charged capacitors. Always unplug the set and discharge any stored energy before touching internal components. Use an anti-static wrist strap and work on a non-conductive surface. If the screen is cracked or shattered, there is a real risk of further damage or personal injury, and many manufacturers void warranties if the device has been opened by an unqualified person. Before starting any repair, check the warranty status and review service options with the manufacturer or retailer. If the model is relatively new and under warranty, contacting the brand’s service center is usually the safest option. Safety first—if you’re unsure about any step, pause and seek professional assistance. The Home Repair Guide Team emphasizes conservative, safety-first planning when dealing with TV screens.
Tools and materials you’ll need
Having the right tools before you begin saves time and minimizes risk. This section outlines essentials and helps you plan a safe repair workflow. Key items include a screwdriver set compatible with your TV model, a plastic spudger for prying without damage, an anti-static wrist strap to prevent static discharge, and a clean microfiber cloth for surface care. Use a magnifying glass for inspecting connectors and a digital multimeter if you’re diagnosing electrical faults. Keep a magnetic parts tray to organize small screws and label cables to ensure proper reassembly. For backlight or panel repairs, you may need replacement light strips or a compatible T-con/logic board once you’ve confirmed the failure mode. Always source parts that match your exact model number and serial information. Proper care and planning reduce misdiagnosis and prevent accidental damage.
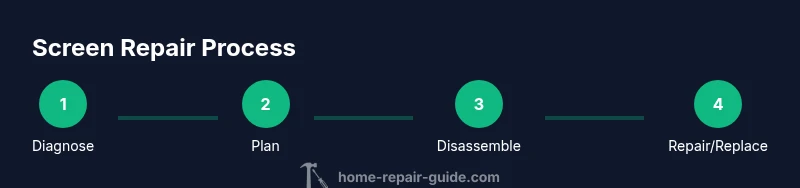
Step-by-step overview (high-level)
This section provides a high-level workflow to guide your repair planning without diving into high-risk disassembly. Start by confirming the symptom, documenting model details, and assessing warranty coverage. Next, prepare a safe workspace, disconnect power, and inspect visible connectors for wear or looseness. If you determine the issue lies with a connector, reseat it carefully and re-test. For suspected backlight or panel problems, consider whether replacement is feasible given your model and budget. Finally, reassemble the device and perform a careful test with multiple input sources. This overview helps you map a path from diagnosis to action while avoiding unnecessary steps.
Maintenance and preventive care
After completing repairs, adopt a routine that extends the life of your TV screen. Keep the display at a comfortable brightness level to reduce stress on the backlight, use surge protection to guard against power spikes, and vent the enclosure to prevent overheating. Regularly inspect connectors for signs of loosening, and avoid moving the TV while powered or plugged in. Gentle cleaning with a microfiber cloth prevents dust buildup that can interfere with pixel performance. If you plan to move the unit, disconnect cables carefully and store accessories with your TV to minimize the risk of misalignment or loss. Proactive maintenance reduces the frequency of screen-related issues and helps preserve your investment.
Tools & Materials
- Phillips screwdriver (PH2)(Essential for most TV back-panel screws)
- Torx screwdriver set (T8/T10)(Common for service screws on many TVs)
- Plastic opening tool / spudger(Prevents scratches during prying)
- Anti-static wrist strap(Prevents static damage to internal components)
- Microfiber cloth(For cleaning surfaces without scratches)
- Magnifying glass(Helpful for inspecting connectors)
- Digital multimeter(Use only if you’re comfortable diagnosing electrical faults)
- Magnetic parts tray(Keeps screws organized)
- Replacement backlight strip / LED string (model-matching)(Only if you’ve confirmed backlight failure)
- Replacement T-con or main logic board (model-matching)(Only after precise diagnosis and part confirmation)
- Isopropyl alcohol 70% or higher(For cleaner connections; ensure device is unplugged)
Steps
Estimated time: 2-4 hours
- 1
Power down and unplug the TV
Ensure the TV is completely disconnected from power and unplugged from any power strip or surge protector. Press the power button once after unplugging to discharge residual energy, then wait 60 seconds before opening the enclosure. This minimizes the risk of electric shock.
Tip: If the TV has a built-in standby light, note its behavior before unplugging. - 2
Remove the back panel safely
Use the appropriate screwdriver to remove the back-panel screws. Keep track of screws and their positions. Gently lift the panel away, avoiding any cables connected to the chassis.
Tip: Take photos of screw positions before removal to simplify reassembly. - 3
Identify accessible connectors
Inspect for loose, bent, or corroded connectors. Reseat any suspect cables by unplugging and re-plugging with a firm, straight push. Do not force connectors that resist insertion.
Tip: Work on a clean, static-free surface and avoid touching circuit traces. - 4
Run a visual inspection for obvious damage
Look for cracked screens, bulging capacitors, or discoloration on the PCB. If the panel is cracked or the backlight wiring shows damage, discontinue DIY repair and consider professional service.
Tip: Cracked panels often require panel replacement and carry safety risks. - 5
Test with caution and document results
If you have identified a probable fault, document your test results and proceed with a targeted fix. For backlight issues, confirm whether individual LEDs or tubes are failing. Avoid powering the unit while the backlight is disconnected.
Tip: Keep a written log of symptoms and steps taken. - 6
Apply a cautious fix or reseat connectors
If a connector was loose, reseat it firmly and test the unit with a known-good input. For backlight issues, swapping a single component may help, but avoid wire splicing or permanent modifications without model-specific guidance.
Tip: Only perform fixes you are confident will not damage the panel. - 7
Decide on the repair path
If symptoms persist after reseating and cleaning, determine whether replacement parts are available and cost-effective. If the repair exceeds the value of the TV or requires specialized equipment, consider professional service.
Tip: When in doubt about backlight or panel work, consult a pro. - 8
Reassemble and test thoroughly
Reconnect everything, replace the back panel, and power on the TV. Check multiple input sources to ensure the issue is resolved and monitor for any abnormal behavior.
Tip: Test with both streaming and physical inputs for a comprehensive check.
FAQ
Is screen repair for tv worth it for an old model?
It depends on the model's age, the expected remaining life, and the cost of parts versus replacement. If the TV is several years old, replacement often offers better value. For newer models with a known repair path, DIY or professional repair might be worth considering.
For older models, replacement is often more cost-effective. If the TV is newer and repairable with available parts, a professional fix may be worthwhile.
Can I fix a cracked screen myself?
A cracked screen usually requires panel replacement and is not a safe or practical DIY repair for most homeowners. Contact the manufacturer or a certified service technician. DIY attempts can void warranties and pose safety risks.
Cracked screens are generally not DIY-friendly; seek professional service and check your warranty.
What is backlight failure and how is it repaired?
Backlight failure means the screen appears very dark or completely dark. Repair often involves testing and replacing the LED string or backlight assembly, which can be complex and model-specific; some units are not economical to repair.
Backlight failure means a dim or dark picture; repairs require specific parts and care, and often professional service.
Do I need to void my warranty if I open the TV?
Opening a TV can void existing warranties and may violate service terms. Always check the warranty policy and consider official service options before proceeding. If the TV is under warranty, contact the brand’s service center first.
Opening the TV might void your warranty; check the policy and contact the brand if it’s still under coverage.
What are common signs that indicate a panel problem?
Common signs include persistent screen area defects, color distortion, flickering corners, or a blank/black screen with no input. If symptoms persist after checking inputs and cables, a panel issue is likely and may require professional assessment.
Look for persistent defects or color issues that don’t follow the input source; this often points to panel problems.
Is it safe to test TV inputs with the panel opened?
No. Do not power the TV with the back panel removed. High voltage and capacitors can remain charged. Only test externally after ensuring all safety steps are followed and panels are properly reassembled.
Never power the TV with the panel off; risks remain even when unplugged. Follow safety steps and close the case before testing.
Watch Video
Key Takeaways
- Diagnose before disassembly to avoid unnecessary work
- Backlight and panel issues are the most challenging and costly
- Safety first: unplug, discharge, and use proper PPE
- Decide between DIY fixes and professional repair based on model age and cost
- Maintain thorough documentation for future service