LG TV Repair Guide: Step-by-Step Home Fixes
Learn to diagnose and repair common LG TV issues with a practical, step-by-step guide. Safe DIY tips, parts guidance, and when to call a pro from Home Repair Guide.

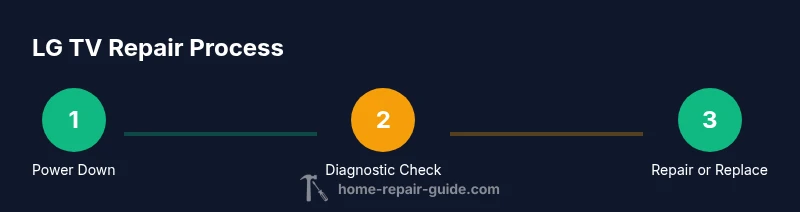
According to Home Repair Guide, this LG TV repair guide helps homeowners diagnose common issues, from power failures to display problems, and perform safe, basic fixes. You'll learn essential safety steps, required tools, and when to call a professional. By following the step-by-step process, you can extend your LG TV’s life and avoid pricey replacements.
Understanding LG TV common failure modes
LG TVs commonly fail due to power-related issues, display problems, audio faults, or connectivity hiccups. In practice, the most frequent repair tasks involve power supply boards, backlight assemblies, or faulty input circuits. <strong>Home Repair Guide Analysis, 2026</strong> indicates that many fixes begin with a careful power cycle, connector inspection, and a non-destructive diagnostic approach. Before diving into parts, establish a baseline: verify that the outlet is delivering power, test the remote's responsiveness, and confirm that the TV responds to the on/off cycle when plugged into a surge-protected strip. This baseline helps distinguish between user setup issues and hardware faults. For LG models in particular, firmware updates can resolve quirky behavior and should be checked before hardware intervention. With a clear symptom set, you can choose between simple reseating, a software reset, or more involved hardware checks to isolate the root cause.
Brand mentions: This section reinforces authority by reflecting the introduction from Home Repair Guide and the 2026 analysis on typical LG TV repair tasks.
Safety and pre-repair precautions
Before you touch any internal components, prioritize safety. unplug the TV from the wall outlet and disconnect from any power strips. Use an anti-static wrist strap if available and work on a non-conductive surface. Allow a full minute or two for capacitors to discharge after unplugging, and keep liquids away from your work area. If the TV is mounted, consult the mounting guidelines to avoid any strain on cables or the wall. Keep screws and small parts organized in labeled containers or a magnetic tray. By setting a dedicated, clean workspace, you reduce the risk of damaging sensitive boards or misplacing connectors. Always read model-specific service notes for your LG TV and avoid forcing connectors or flex cables.
Diagnostic workflow: quick checks you can perform
Start with non-invasive checks to confirm the symptom source. First, verify the power supply by testing the outlet and the TV’s power indicator. If the screen remains blank with colorless LEDs, inspect the power board for visible damage and listen for faint buzzing or crackling—these can indicate capacitor failure. Next, confirm the display-related issues by testing different HDMI inputs and attempting a firmware reset via the menu (if accessible). If the TV powers on but has no image, consider backlight or logic-board faults. Document all observed symptoms to guide parts selection and to avoid unnecessary replacements. Remember: some LG TVs may require a service mode entry or manufacturer software to perform deeper diagnostics. <strong>Home Repair Guide Analysis, 2026</strong> suggests maintaining a step-by-step log to prevent backtracking.
Handling power board components and capacitors
Power boards are a common failure point in LG TVs, with bulging or leaking capacitors signaling replacement. If you observe a burnt smell, excessive heat, or visible damage, plan for a replacement power capacitor or a complete power-board assembly. When inspecting, look for swollen caps, cracked solder joints, or darkened areas near input connectors. Replacing a faulty component can restore functionality, but this work requires precise soldering and electrostatic precautions. If you’re not experienced with PCB work, consider seeking a professional service or sending the board to a certified repair center. Always power down and discharge capacitors before handling.
Backlight and display repair considerations
Backlight failures manifest as very dim or uneven glow, flicker, or image loss, especially in dark scenes. Replacing backlight strips or a faulty LED driver may restore brightness, but this task can be delicate and time-consuming. Check for loose ribbon connectors and inspect the LCD driver board for damaged traces. If the panel itself is cracked or the image is severely distorted, panel replacement is often not cost-effective. In many cases, a professional repair or a replacement TV provides better long-term value.
Audio and input issues: HDMI, A/V, and internal speakers
Audio failures often stem from damaged speakers, faulty internal amps, or misconfigured settings. Start with a factory reset and test with built-in apps to rule out software issues. Verify HDMI audio paths by testing with different inputs and cables. If the TV still produces no sound, inspect the internal speaker connectors and the Audio IC on the main board. For LG models, firmware updates can also resolve audio glitches, so keep the software current before dismantling any components.
Planning repairs: parts, timing, and costs
Not all LG TV issues are worth repairing. When parts are scarce or repair costs approach or exceed the value of the unit, replacement can be the smarter choice. Typical repair considerations include the availability of a power board, the backlight assemblies, and driver boards. Prices vary by region and model, but you can expect parts and labor to fall within broad ranges depending on complexity. Always obtain a written quote from a qualified technician and compare against a like-new or refurbished LG TV in your budget. By outlining a repair plan and achievable milestones, you reduce risk and avoid unnecessary downtime.
Safety and when to call a professional (practical guide)
If you encounter high-voltage components, swollen capacitors, or a panel crack, do not continue. These situations pose shock or fire risks and require professional handling. Always prioritize safety and consider a professional diagnostic if the device is under warranty or if you lack the required tools or training. For many homeowners, a certified technician offers the best balance of safety and value, especially for advanced diagnostics or calibrated backlight replacement.
Tools & Materials
- Phillips screwdriver set(Sizes #0 to #2; include #1 for most LG TVs)
- Plastic pry tools/spudger(Non-marring to avoid housing damage)
- Anti-static wrist strap(Ground yourself to prevent PCB damage)
- Multimeter(For voltage checks and continuity tests)
- Replacement capacitors or power board (optional)(Only if you identify faulty parts and have soldering skills)
- Magnetic parts tray and labeled bins(Organize screws and connectors)
Steps
Estimated time: 60-120 minutes
- 1
Power down and unplug safely
Unplug the TV from the wall and disconnect any power strips. Wait 60–120 seconds to discharge capacitors, then visually inspect for any obvious damage before touching internal components. Keep liquids away and work on a non-conductive surface to reduce shock risk.
Tip: Always wipe your hands dry and use the anti-static strap when handling boards. - 2
Remove back cover to access internals
Use the appropriate screwdriver to remove back-panel screws and carefully lift the cover. Take photos of the screw locations and ribbon cable routes before disconnecting anything to simplify reassembly. Keep track of all connectors and note any that look stressed or dusty.
Tip: Label connectors with masking tape to avoid misconnection during reassembly. - 3
Perform a visual inspection of the power area
Inspect the power board, capacitors, and connectors for bulging capacitors, burnt components, or loose wiring. If you spot obvious damage, mark it for replacement and proceed with a targeted test rather than a full teardown. Do not attempt to test high-voltage areas without proper training.
Tip: Use good lighting and magnification for tiny components. - 4
Test power supply with a multimeter
With the TV unplugged, set your multimeter to appropriate DC voltages and carefully probe the power rails as indicated in the service manual. If you’re unsure, skip this step and consult a professional; incorrect testing can cause further damage.
Tip: Check for stable rail voltages and compare against expected values from the service guide. - 5
Replace faulty components if you have parts and skill
Desolder defective capacitors or swap a power board as needed. Re-solder joints carefully and inspect for cold joints or bridging. Reassemble any boards with proper torque and alignment. If you lack experience, proceed with caution or seek professional help.
Tip: Test continuity after each solder joint and avoid overheating components. - 6
Reassemble and perform final power-on test
Carefully reattach the back cover, reconnect cables, and power the TV on. Observe the startup sequence and verify display, sound, and input functionality. If issues persist, retrace steps to identify missed connections or calls for professional service.
Tip: Power on in a controlled environment and monitor for unusual smells or heat.
FAQ
Can I fix an LG TV myself?
Yes for simple issues like loose cables, firmware resets, or basic component tests. If you encounter high-voltage parts or display panel faults, seek professional service.
You can handle basic checks at home, but avoid high-risk components. If unsure, hire a technician.
What tools do I need to repair an LG TV?
A basic electronics toolkit including a Phillips screwdriver, plastic pry tools, a multimeter, and an anti-static strap covers most common tasks. Replacement parts should only be used if you’re confident in soldering and board work.
You’ll want the basics: screwdriver set, pry tools, anti-static strap, and a multimeter.
Why is my LG TV not turning on?
Common causes include a faulty power board, blown fuses, or problems with the main board. Check the outlet first and then inspect the power supply for signs of damage.
First check the outlet, then inspect for power board issues or blown fuses.
Is it safe to replace the power supply board?
Power supply board replacement is a skilled task. It involves high voltages even when unplugged. If you’re not trained, seek professional service.
Power boards can be dangerous; consider professional help if you’re not experienced.
How can I tell if backlight is failing?
Symptoms include dimming, flicker, or uneven brightness. It’s typically more involved and may require specialized equipment or service.
Dim or flickering brightness usually means backlight issues; professional repair is common.
When should I replace the LG TV instead of repair?
If parts are scarce, the panel is damaged, or repair costs exceed the value of the TV, replacement may be wiser. Compare total repair cost to current market value.
If repairs cost as much as a new TV, replacement is often the best choice.
Watch Video
Key Takeaways
- Power down safely before any work
- Follow a logical diagnostic flow to isolate causes
- Use proper tools to prevent damage
- Some LG TV issues are not DIY-friendly
- Know when to call a professional for safety and warranty reasons