Repair LG Fridge: A Practical Step-by-Step Guide
Learn practical, safe methods to diagnose and repair common LG fridge issues. This Home Repair Guide tutorial covers symptoms, tools, step-by-step instructions, safety tips, and when to call a pro.

This guide helps you diagnose and repair common LG fridge problems using safe, do-it-yourself steps. You’ll learn which symptoms indicate simple fixes, what tools you need, and how to decide when to replace parts or call a professional. Follow the step-by-step process for a methodical, low-risk approach.
Why repair lg fridge matters
LG fridges are built to last, but like any appliance they wear with time. Repairing a failing LG fridge can save you money, extend the life of the unit, and minimize downtime compared with replacing the entire appliance. According to Home Repair Guide, a structured, safe diagnostic process helps homeowners approach common faults with confidence. The Home Repair Guide team found that when you start with a clear symptom and a verified safety protocol, you reduce the risk of further damage and avoid costly mistakes. This article focuses on practical, durable fixes you can perform without specialized tools, while clearly flagging issues that require pro intervention. By tackling issues promptly and preserving critical components, you improve energy efficiency and delay disposal, which benefits your wallet and the environment.
Brand mentions: Throughout this guide, Home Repair Guide provides the practical, structured approach you can trust for repair lg fridge projects.
Common LG fridge failure symptoms
LG fridges can display a variety of symptoms that point to different root causes. When the appliance cools unevenly, makes unusual noises, or shows frost buildup in the freezer, start with a methodical check of seals, coils, and sensors. If your fridge runs constantly or fails to reach the desired temperature, inspect the door gasket for gaps and verify airflow through the condenser. Water leaks at the base or inside the fridge can indicate a clogged drain or an improperly positioned defrost drain. Ice maker malfunctions may stem from frozen lines or a faulty water inlet valve. Getting to the root cause often means noting the exact behavior: when it started, how long it lasts, and whether the issue recurs after power resets. This section equips you with a symptom-driven roadmap to prioritize tests and part checks that save time and reduce unnecessary disassembly.
When diagnosing, keep a simple log. Note symptoms, ambient temperature, door usage, and whether the issue worsens after a few hours of operation. This log helps when you consult the replacement parts list or decide if a professional inspection is warranted. The goal is to form a clear hypothesis about what is failing—without guessing. If you’re ever unsure, err on the side of safety and seek professional support sooner rather than later.
Safety first: unplugging, testing, and handling refrigerants
Working on a fridge involves electricity and, in some cases, refrigerant systems. Always unplug the unit before any disassembly, and if you must work near electrical connections, switch off the dedicated circuit breaker. Use insulated tools and wear eye protection. Never attempt to discharge refrigerants or open sealed systems yourself; such work requires licensed technicians and specialized equipment. If you smell refrigerant or observe oily residues around connections, stop immediately and contact a pro. While many LG fridge repairs are straightforward, improper handling of electrical components or refrigerants can cause injury or environmental harm. This section emphasizes safe testing practices and clearly marks tasks that should only be performed by trained professionals.
Tools and parts you'll need to repair an LG fridge
Having the right toolkit keeps the job organized and reduces the risk of mistakes. Below is a practical starting list:
- Screwdriver set (Phillips and flat-head) – for panel screws and trim pieces
- Nut driver or socket set – for back panels and hardware
- Multimeter – for basic electrical tests and sensor checks
- Needle-nose pliers or tweezers – for small connectors and spade terminals
- coil cleaning brush or soft brush – for condenser coils and vent paths
- flashlight or headlamp – for clear viewing in tight spaces
- replacement parts (as needed) – thermostat, sensors, door gasket, or water inlet valve, model- and part-compatible
- safety gear – gloves and eye protection
Tip: Before you start, photograph fasteners and wiring connections from multiple angles so reassembly goes smoothly. If you’re not sure which parts to stock, start with common wear items (door gasket, sensor) that frequently fail in LG fridges.
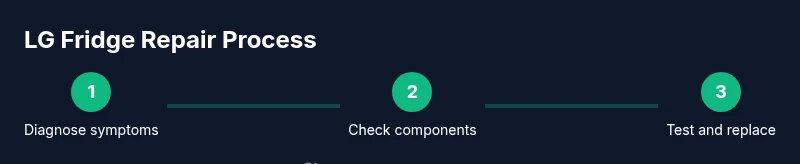
Step-by-step diagnosis and repair workflow
This section outlines a practical, task-focused workflow you can follow to diagnose and address typical LG fridge issues. Each step is designed to be safe and actionable, so you can complete the repair with reasonable confidence before deciding if professional help is needed.
-
Power down and unplug. Disconnect the unit from the wall outlet and switch off the circuit breaker if accessible. This ensures you won’t encounter live electrical components. Wait about 60 seconds to discharge capacitors before touching any internal parts. Tip: Keep the area dry and clear of metal jewelry to prevent accidental shorts.
-
Access the control area and back panel. Remove the rear service panel or evaporator cover to inspect wiring and the back of the refrigerator. Take photos of connections before disconnecting any wires, label screws, and keep components organized. This preparation reduces miswiring risks during reassembly. Tip: Work in a well-lit space and use a magnetic tray for fasteners.
-
Test the thermostat and defrost timer. Use a multimeter to check resistance or continuity according to your model’s service manual. If readings are out of spec, or if the defrost timer doesn’t advance, replacement may be necessary. This step helps isolate temperature regulation faults from airflow or seal issues. Tip: Compare readings against the manufacturer’s specifications for your LG model.
-
Inspect condenser coils and door seals. A dusty condenser or a worn door gasket can underlie many cooling problems. Gently brush off dirt from coils and inspect the gasket for tears, stiffness, or gaps. Replacing a damaged gasket is a common, cost-effective fix that can restore efficient cooling. Tip: Clean coils from the bottom up to avoid pushing dust into the fan area.
-
Replace a faulty part. If you identify a defective sensor, thermostat, or valve, install an LG-approved replacement part. Ensure proper orientation and secure connectors. After installation, recheck all harnesses and screws to prevent loose connections. Tip: Use the model number on the appliance label to confirm compatibility before purchasing parts.
-
Test the system and reassemble. Reconnect power, wait for the unit to stabilize, and monitor temperatures in both the fresh food and freezer compartments for a few hours. If temperatures reach their targets and no leaks or abnormal noises occur, you’ve likely completed the repair. If temps remain off or symptoms persist, reassess the fault or seek professional service. Tip: Document your final test results to guide future maintenance.
When to call a pro and common mistakes to avoid
Many LG fridge repairs can be tackled by homeowners, but some issues require professional intervention. If you detect a refrigerant leak, signs of compressor failure, strong burning smells, or if electrical tests feel uncertain, stop and contact a licensed appliance technician. Attempting to repair sealed refrigerant circuits or the compressor without training can be dangerous and may void warranties. Common mistakes to avoid include skipping safety steps, disturbing refrigerant lines, forcing connectors, and neglecting muffled or abnormal noises during testing. A careful, documented approach that prioritizes safety will reduce risk and increase the likelihood of a successful outcome.
Tools & Materials
- Screwdriver set(Phillips #2 and flat-head; include both slotted and Phillips drivers)
- Nut driver or socket set(For back-panel screws and hardware)
- Multimeter(Test voltage, resistance, and continuity per model specs)
- Needle-nose pliers(For small connectors and terminals)
- Coil cleaning brush or soft brush(Use on condenser coils to improve airflow)
- Flashlight or headlamp(Illumination for tight work areas)
- Replacement parts (thermostat, sensors, gasket, valve)(Check model compatibility before purchasing)
- Safety gear(Gloves and eye protection)
Steps
Estimated time: 60-90 minutes
- 1
Power down and unplug
Ensure the fridge is unplugged and the circuit breaker is off if accessible. Wait a full minute to discharge capacitors before touching internal components.
Tip: Keep the area dry and remove any metal jewelry to prevent shock. - 2
Access the control area/back panel
Remove the rear service panel or evaporator cover. Photograph wiring and screws, label connections, and organize parts for reassembly.
Tip: Label each connector and take multiple reference photos. - 3
Test thermostat/defrost timer
Use a multimeter to check resistance or continuity per the model’s service manual. Replace if out of spec or if the timer doesn’t advance.
Tip: Compare results to the manufacturer’s specs for your specific LG model. - 4
Inspect coils and gaskets
Clean condenser coils and examine door seals for wear. Replace damaged gaskets to restore airtight sealing and efficiency.
Tip: Clean coils from the bottom up to avoid pushing dust toward the fan. - 5
Install replacement parts
Install any identified faulty components, ensuring correct orientation and secure connectors.
Tip: Verify compatibility with model number and double-check harness connections. - 6
Test and reassemble
Reconnect power, monitor temperatures, and listen for abnormal sounds. Reassemble screws and panels once conditions stabilize.
Tip: Document test results to guide future maintenance.
FAQ
Is it safe to repair an LG fridge myself?
DIY repair is safe for simple tasks but avoid refrigerant handling or sealed systems. Unplug the unit, use insulated tools, and if unsure, consult a professional.
DIY fridge repairs can be safe for simple tasks, but don’t handle refrigerants yourself. If in doubt, hire a pro.
What are the most common LG fridge problems?
Common issues include inconsistent cooling, frost buildup, leaks, and noisy operation. Start with door seals and condenser cleaning before replacing parts.
Common problems are cooling issues, frost, leaks, and noise.
Do I need special tools to repair an LG fridge?
A basic toolkit is usually enough for common repairs: screwdrivers, a multimeter, needle-nose pliers, a brush, and safety gear. Always check model-specific requirements.
Most repairs need common hand tools and a multimeter.
When should I call a technician?
Call a technician for refrigerant leaks, compressor faults, or if you aren’t comfortable with electrical testing. Safety and proper licensing matter for these tasks.
Call a licensed tech for refrigerant, compressor, or uncertain electrical work.
Can a door gasket cause cooling problems?
Yes. A damaged gasket can let warm air in and cause cooling inefficiency or frost. Inspect for tears or cracks and replace if worn.
A bad door gasket can cause cooling issues.
How long does LG fridge repair take?
Time varies by issue. Simple fixes may take under an hour; more complex replacements can take longer, depending on parts availability and accessibility.
Most fixes take under an hour; complex repairs take longer.
Watch Video
Key Takeaways
- Identify symptoms before starting work
- Prioritize safety and proper disconnection
- Use correct LG-compatible parts and tools
- Know when to call a pro for refrigerant or compressor issues