Whirlpool Ice Maker Repair: Step-by-Step Guide
Learn to diagnose and repair a Whirlpool ice maker with a clear, safe, step-by-step approach. Identify common causes, test components, and restore reliable ice production in your kitchen.

With this guide, you will diagnose and repair common Whirlpool refrigerator ice maker issues, from no ice to mis-sized cubes. You’ll learn safe troubleshooting steps, identify defective components (water inlet valve, ice maker mold, and control module), and the tools required. This how-to covers both quick fixes and when to call a pro, ensuring safe, durable results.
Whirlpool ice maker basics
According to Home Repair Guide, Whirlpool ice makers are designed to produce a steady ice supply with modular components that are serviceable in most home kitchens. The key parts include the ice maker mold, the mold thermostat, the fill tube, the water inlet valve, the ejector blades, and the control module. Ice production starts when the thermostat signals the mold to fill, the water inlet valve opens to fill the mold, and the ejector pushes formed ice into the dispenser. If any of these steps fail, you may see no ice, delayed ice, or small, hollow cubes. Understanding these parts helps you identify the likely failure point and decide whether a quick fix or a part replacement is needed. Note that Whirlpool models vary slightly in layout, so consult your model’s service manual when possible. In this guide we use general, model-agnostic troubleshooting principles so homeowners and renters can proceed safely. The Home Repair Guide team emphasizes safety first: unplug before inspections, and never work with live electrical parts exposed.
Common failure modes in Whirlpool ice makers
Whirlpool ice makers can fail for several reasons. No ice or very small ice cubes often indicate water supply problems, such as a blocked or frozen fill tube or a clogged water filter. A jammed ejector or a frozen mold can prevent cubes from dropping, while a faulty ice maker module or worn thermostat can halt the freezing cycle. Leaks are commonly caused by loose fittings on the water line or a failing inlet valve. Whichever symptom you see, start with the simplest potential cause (water supply and resets) before moving to component replacements. Remember that model differences exist, so reference your manual for specific parts and connections. For homeowners, this knowledge helps prioritize the repair path and minimize unnecessary parts purchases.
Safe diagnostic workflow and data collection
Begin by confirming the exact model of your Whirlpool unit and gathering any service manuals or model-specific diagrams. Before touching anything, unplug the refrigerator and shut off the upstream water supply to prevent leaks. Inspect the water line for kinks, pinches, or frost, and verify water is flowing to the ice maker when the cycle initiates. Listen for the sound of water entering the mold during a cycle, and check for frost along the fill tube. If you have a multimeter and basic electrical knowledge, you can test for voltage at the ice maker connector and check continuity on accessible switch components. Record symptoms, cycle times, and any error codes displayed by the control panel. This careful data collection helps you verify whether the fault lies in the water supply, the mold assembly, or the control circuitry. The Home Repair Guide approach emphasizes methodical testing and safety-first procedures to avoid unnecessary disassembly.
Parts, replacements, and compatibility
Common replacement parts for Whirlpool ice makers include the water inlet valve, the ice maker module (the control unit that drives cycle timing), and the ice mold assembly. In many cases, a worn mold thermostat or a clogged ice mold can be addressed with a kit that includes the mold and thermostat, or a complete ice maker replacement kit. Before ordering parts, check your model number and refer to the user manual or manufacturer site for a parts compatibility list. If you’re comfortable with electrical testing, you can verify that the valve coil resistance falls within the expected range; if it’s open or shorted, a valve replacement is often warranted. Keep spares to a minimum—match parts to your exact model number to avoid compatibility issues. The goal is to restore a reliable ice cycle while avoiding unnecessary part swaps.
Safety considerations and when to call a pro
Repairing an ice maker involves live electrical components and water lines. Always disconnect power and close the water supply before any disassembly. Use protective gloves and eye protection when handling sharp metal edges or exposed wiring. If you encounter refrigerant lines, large refrigerant compressors, or signs of a significant leak, do not proceed; call a licensed technician. If you’re uncomfortable with electrical testing, prefer non-destructive checks, or your model uses a complex control board with diagnostic codes, a professional service visit is the safest path. For many homeowners, a staged approach—verify water supply, reset and test, replace small components—helps avoid unnecessary risk while delivering results.
Maintenance and prevention after repair
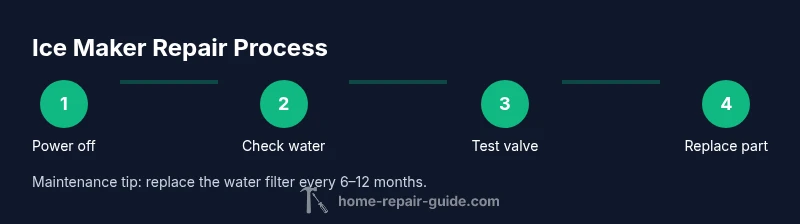
To minimize future ice maker calls, replace the water filter on schedule (typically every 6–12 months depending on usage and water quality). Periodically clean the ice mold and fill tube to prevent mineral buildup, especially in areas with hard water. Confirm the ice maker continues to cycle properly by running a few production cycles and observing cube quality and drop integrity. If you notice recurring issues, consider installing a water line filter or checking the water pressure to ensure a steady supply. Regular maintenance and careful observation are the best defense against future ice maker failures.
Tools & Materials
- Safety gloves(Protect hands from sharp edges and water exposure)
- Flathead screwdriver(For prying covers and small screws)
- Phillips screwdriver(Common fasteners on ice maker housings)
- Nut driver or socket set(Mounting screws and valve fittings)
- Multimeter(Test voltage and continuity on accessible parts)
- Pliers (needle-nose)(Manipulate small wires/connectors)
- Towel or absorbent rag(Catch spills and keep area dry)
- Bucket or shallow pan(Capture water during line work)
- Flashlight or headlamp(Improve visibility inside cabinet)
- Replacement ice maker kit or parts(Only if a specific component is confirmed faulty)
- Water isolation valve wrench(If precise valve adjustments are needed)
- Electrical tape or heat shrink(Secure wires after repairs)
Steps
Estimated time: 45-90 minutes
- 1
Power down and safety check
Unplug the refrigerator and shut off the upstream water valve. Remove any nearby obstructions to create a safe working area and verify no power is present before touching wiring.
Tip: Never work on energized components; moisture and electricity are a dangerous mix. - 2
Verify water supply and accessibility
Inspect the water line for kinks or leaks and ensure water can reach the valve. If the line is frozen, thaw it safely using warm air from a hair dryer, never hot water.
Tip: Run water at the faucet to confirm steady flow before proceeding. - 3
Inspect ice maker housing and mold
Remove the ice maker cover and check for frost buildup or a jammed ejector. Clean any mineral deposits and test the mold heater if present.
Tip: Keep components dry during inspection to avoid corrosion. - 4
Test ice maker cycle manually
Gently engage the ice maker actuator or use the service panel to start a cycle. Listen for the fill valve opening and watch for ice mold filling.
Tip: Use eye protection and avoid forcing parts beyond their travel limits. - 5
Check water inlet valve operation
If accessible, measure coil resistance and verify the valve opens when powered. A stuck valve generally requires replacement.
Tip: Disconnect power before testing valve coils. - 6
Assess mold thermostat and controls
Some models rely on the mold thermostat or control board timing. Look for error codes and inspect connectors for corrosion or looseness.
Tip: If you observe burnt connectors or melted insulation, stop and seek professional help. - 7
Replace defective components
Install the new valve, mold assembly, or module as needed. Re-seal fittings, reassemble housing, and restore power.
Tip: Use the exact model-compatible parts and torque fittings to the manufacturer’s specification. - 8
Test full operation and purge
Run multiple cycles to ensure ice production returns to normal. Discard the first batch after a repair to clear any debris from the line.
Tip: Document cycle times and ice quality for future reference.
FAQ
What are the most common Whirlpool ice maker failures?
Most frequent issues involve water supply problems, clogged lines, a stuck ejector, or a faulty ice maker module. Start by confirming water flow, cleaning the mold area, and resetting the cycle before replacing parts.
Most Whirlpool ice maker failures come from water supply problems, clogged lines, or a faulty ice maker module. Start with water flow, clean, and reset the cycle before replacing parts.
Can I fix an ice maker without replacing parts?
Yes, many issues respond to simple steps like cleaning, thawing frozen lines, or resetting the ice maker. If the cycle still fails, a faulty valve or module may require replacement.
Yes, many issues can be fixed with cleaning, thawing lines, or resetting. If it still fails, a valve or module may need replacement.
Is it safe to test the ice maker while it's connected to power?
Only perform electrical tests after ensuring the unit is fully unplugged. For any live testing, consult a professional technician.
Only test electrical parts after unplugging the unit. If you’re unsure, call a pro.
How do I know if I should replace the water inlet valve?
If the valve coil shows open or short resistance or if water flow does not respond to valve activation, replacement is often required.
If the valve doesn’t respond or shows abnormal coil resistance, replace it.
Should I call a professional for Whirlpool ice maker repairs?
If you encounter refrigerant lines, complex control boards, or repeated failures after basic checks, professional service is advised.
Call a pro if you deal with refrigerant lines, control boards, or repeated failures after basic checks.
What maintenance can prevent ice maker problems?
Regularly replace water filters, clean the mold and fill tube, and inspect water lines for leaks to prevent clogs and scale buildup.
Keep filters fresh, clean the mold, and check for leaks to prevent future problems.
Can I diagnose model-specific issues without manuals?
Model-specific service manuals provide wiring diagrams and diagnostics. If unavailable, rely on general troubleshooting steps and model-agnostic checks.
If you don’t have the manual, stick to general troubleshooting steps and model-agnostic checks.
What is the typical lifespan of Whirlpool ice maker components?
Component lifespans vary by use and water quality, but valves and mold assemblies commonly endure several years with proper maintenance.
With proper care, components like valves and molds last several years.
Watch Video
Key Takeaways
- Identify the root cause before replacing parts
- Always disconnect power and water during service
- Follow model-specific guidelines for compatibility
- Test cycles after each repair to verify recovery
- Preventative maintenance reduces future failures