Whirlpool Fridge Repair: Step-by-Step Guide
Learn how to diagnose and repair common Whirlpool refrigerator issues with a comprehensive, safe, step-by-step approach designed for homeowners and renters.

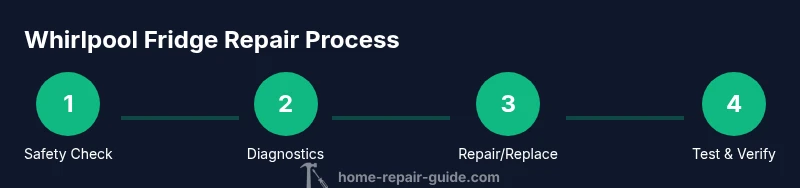
You're about to learn how to diagnose and repair common Whirlpool fridge issues yourself, safely and effectively. This guide covers typical failures like cooling problems, startup errors, and ice maker malfunctions, plus step-by-step checks you can perform before calling a technician. By following these procedures, homeowners can save time and reduce service costs while maintaining appliance safety. According to Home Repair Guide, start with safety checks and a basic diagnostic routine to avoid unnecessary part replacements.
Understanding Whirlpool fridge repair: common issues and why DIY matters
Whirlpool refrigerators are built with reliability in mind, but like any appliance, they develop issues as they age. The most common problems tend to fall into a few broad categories: temperature control and cooling problems, unusual noises or vibrations, and ice maker or water dispenser malfunctions. For homeowners, a methodical approach often resolves many issues without professional service. By diagnosing the symptoms, you can identify whether the problem is a simple fix—like a dirty condenser coil or a loose door gasket—or something more complex that requires specialized tools or a replacement part. This article focuses on practical, safe fixes you can perform with common household tools, prioritizing safety and accuracy over guesswork. Home Repair Guide’s analysis shows that many Whirlpool failures are caused by routine maintenance lapses, such as clogged coils or worn door seals, rather than catastrophic component failures. Using a structured plan helps you minimize downtime and extend your appliance’s life.
Safety first: electricity, refrigerant, and ice maker cautions
Working on a refrigerator involves electrical components and refrigerant systems. Always unplug the unit before inspecting any internal parts to prevent shock. If you suspect a refrigerant leak or you notice oily residue around fittings, contact a licensed technician—refrigerant handling is restricted for safety and environmental reasons. Wear eye protection and gloves when handling coils, fans, or exposed metal parts. If your Whirlpool fridge has an ice maker that suddenly stops producing ice, avoid tapping or forcing parts, as this can damage the mechanism or cause jams. By observing these cautions, you reduce the risk of injury and avoid accidental damage that could lead to costly repairs.
Before you start: essential tools and preparation
Prepare a clean, organized workspace and gather the essential tools before diving in. A basic multimeter, screwdriver set (Phillips and flat-head), a flashlight, and a flashlight are often enough for many small checks. You may also want a microfiber cloth, a small vacuum or brush for coil cleaning, and replacement gaskets or components if you confirm a fault. Document the refrigerator’s model and serial number for parts compatibility. Having a spare parts list on hand can speed up ordering if a replacement is needed. Home Repair Guide recommends keeping a digital photo journal of the wiring and assemblies before disassembly to assist with reassembly.
Diagnostic approach: reading codes, temperature checks, and noise cues
Start with a visual inspection: check the back of the fridge for dust buildup on the condenser coils, ensure the doors seal tightly, and verify airflow around the vents. If your model has a digital display, note any error codes and consult the user manual or Whirlpool’s support site for code meanings. Use a thermometer to measure the interior temperature at several points to evaluate cooling performance. Listen for unusual noises like buzzing or humming, which can indicate a failing compressor, a stuck fan, or a faulty relay. For ice makers, confirm water supply lines are unobstructed and that the ice maker mechanism cycles normally. A structured diagnostic routine helps you distinguish between recurring minor issues and genuine mechanical faults.
Common failure modes and quick fixes
Cooling problems are frequently caused by dirty condenser coils, a dirty air filter, or a failed fan. Clean coils with a soft brush or vacuum, ensuring the fridge is unplugged and the coils are dry before reassembling. Door gaskets that don’t seal properly can let in warm air, so inspect for tears and replace them if necessary. Ice maker jams are often caused by mineral buildup or misalignment; clear the bin and check the mechanism’s movement. If the evaporator fan isn’t running, check the motor and wiring for continuity with a multimeter. Many issues can be addressed with routine maintenance rather than expensive component replacements.
Step-by-step repair workflows: when to replace a part vs. DIY clean
Not every problem requires a major repair. Start with cleaning and reseating components, then test. If the cooling problem persists after coil cleaning and door seal replacement, you may need to address the defrost system, thermostat, or fan motor. Isolated electrical faults, such as a failed start relay or control board issue, require careful testing and sometimes professional replacement. When replacing parts, confirm compatibility with your Whirlpool model and follow the manufacturer’s torque specs and safety guidelines. If you reach the limits of your comfort level, consult a professional to prevent risk and ensure proper refrigerant handling and electrical safety.
Maintenance and prevention to extend Whirlpool fridge life
Regular maintenance reduces the likelihood of sudden failures. Schedule a periodic coil cleaning, check door seals for flexibility, and keep the fridge level to avoid uneven door closing. Replace water filters as recommended by Whirlpool to preserve water quality and ice maker performance. Clean the condenser and evaporator coils every 6–12 months, depending on usage and environment. A simple maintenance routine—combined with careful monitoring of temperatures and door seals—can significantly extend the life of your Whirlpool fridge and keep food cold safely.
When to call a pro: safety, complexity, and costs
If you encounter refrigerant leaks, a malfunctioning compressor, or a fault-code you can’t resolve, it’s prudent to contact a licensed technician. Refrigerant handling requires certification and specialized equipment, and incorrect repairs can create safety hazards or environmental harm. If your model uses advanced electronics or you’re unsure about electrical testing, seek professional service rather than attempting risky repairs. The cost of professional repair can be offset by the potential risk of DIY mistakes, especially when refrigerants are involved. Home Repair Guide emphasizes weighing the complexity and safety concerns against DIY benefits.
Sourcing parts safely and avoiding scams
Begin by confirming the exact Whirlpool model number and cross-reference it with OEM parts from reliable retailers. Compare parts from authorized dealers to aftermarket components, and beware of unusually low prices that may indicate counterfeit parts. Read reviews for sellers and ensure return policies are clear. If you’re unsure about a part’s compatibility, contact the retailer with your model information. For critical components like defrost thermostats or control boards, opt for genuine OEM parts to maximize reliability and performance.
Tools & Materials
- Multimeter(Used to test continuity on sensors and controls)
- Screwdriver set (Phillips and flat-head)(Medium and precision sizes for interior panels)
- Needle-nose pliers(Helpful for clothing wiring and clamps)
- Soft brush or small vacuum(For cleaning condenser coils and vents)
- Nut driver or socket set(For certain screw types on panels)
- Torx driver(Some Whirlpool models use Torx screws)
- Replacement door gasket(Only if you identify a worn seal during inspection)
- Thermometer (probe or infrared)(To verify interior temperatures at multiple points)
- Replacement part(s) (OEM preferred)(Only after diagnosing a faulty component)
Steps
Estimated time: 60-120 minutes
- 1
Unplug and safety check
Disconnect the fridge from power and verify that you won’t encounter live electrical parts during inspection. This protects you from shocks and prevents accidental compressor restart while you’re working.
Tip: Use a non-contact voltage tester to confirm the outlet is de-energized. - 2
Access and inspect coils
Move the fridge away from the wall (careful not to damage flooring) and locate the condenser coils on the back or underneath. Vacuum or brush away dust to improve heat exchange and cooling efficiency.
Tip: Do not use water directly on coils; ensure coils are dry before reassembly. - 3
Check door seals and gasket
Carefully inspect the door gasket for tears or deformation. A poor seal allows warm air inside, making the compressor work harder and causing temperature swings.
Tip: Clean the gasket with mild soap and water; replace if visibly damaged. - 4
Test temperature and fans
With the unit unplugged, access the evaporator and fan area if comfortable. Reconnect power and listen for fan operation after opening the door. If the fan doesn’t run, test continuity of the fan motor and related wiring.
Tip: If you hear unusual noises, stop and recheck connections before applying power. - 5
Check ice maker and water line
Inspect the ice maker mechanism for jams and verify water line is connected and not kinked. Clear any mineral buildup and ensure the ice maker cycles freely.
Tip: Turn off the water supply while testing to avoid leaks. - 6
Evaluate defrost system
If frost is excessive, the defrost heater and thermostat may be faulty. Refer to your model’s wiring diagram and test components for continuity where safe.
Tip: Defrost problems can mimic cooling issues; test in a sequence to isolate the fault. - 7
Consider control board or relay
Electronic controls or start relays can fail with age. Use the multimeter to assess supply voltages and continuity to sensors. Replace only if you confirm a fault.
Tip: Keep a log of voltage readings to compare against expected values from the service manual. - 8
Run a test cycle and monitor
After reassembly, plug in the refrigerator and let it run a test cycle. Use a thermometer to confirm interior temps stabilize within the manufacturer’s specified range.
Tip: Document the temperature readings and cycle duration for future reference.
FAQ
What are the most common Whirlpool fridge problems?
Typical Whirlpool fridge issues include inadequate cooling, defrost system faults, noisy operation, and ice maker jams. Many of these stem from dirty coils, worn seals, or minor sensor faults that are addressable with routine maintenance.
Common Whirlpool fridge problems usually involve cooling or ice maker issues, often fixable with maintenance.
Can I fix a Whirlpool fridge myself?
Many minor issues can be addressed with basic tools and careful diagnosis, such as coil cleaning or seal replacement. Complex electrical faults or refrigerant work should be handled by a professional.
You can fix many small issues, but for electrical or refrigerant problems, call a pro.
Is it safe to repair refrigerant systems yourself?
No. Handling refrigerant requires certification and specialized equipment. DIY attempts can be hazardous and illegal in many regions.
Refrigerant work should be left to licensed technicians.
How long does a typical Whirlpool fridge repair take?
A simple fix like coil cleaning or gasket replacement may take 1–2 hours. More complex repairs, such as a faulty defrost timer or control board, can require several hours or a service call.
Most basic repairs take a couple of hours, more complex ones may take longer or need a technician.
Where can I buy Whirlpool replacement parts safely?
Purchase from authorized Whirlpool parts retailers or OEM distributors. Ensure compatibility by matching the model number and part number before ordering.
Buy OEM parts from authorized retailers by matching your model number.
Should I move the fridge away from the wall for maintenance?
Yes. Gently pull the unit away from the wall to access back panels and coils, ensuring you don’t bend the supply cord or damage flooring.
Yes—gently pull it out to access the back and coils.
What maintenance steps reduce future failures?
Regular coil cleaning, door seal inspection, proper temperature settings, and periodic filter changes help prevent common failures and extend the life of the fridge.
Regular cleaning and seal checks go a long way to preventing future issues.
Watch Video
Key Takeaways
- Unplug the fridge before any inspection.
- Clean coils and replace worn gaskets to restore efficiency.
- Isolate issues with a systematic diagnostic approach.
- Call a pro for refrigerant or compressor problems.