Repair Refrigerator Ice Maker: A Homeowner's Step-by-Step Guide
Learn to diagnose and repair a malfunctioning ice maker in your refrigerator with Home Repair Guide. Safe, practical steps, tool lists, and maintenance tips to keep ice flowing.

In this guide you will learn how to diagnose and repair a malfunctioning ice maker in a refrigerator, including safety precautions, essential tools, and a clear, step-by-step process. By following these steps, homeowners can identify common causes like clogged water lines, frozen ice molds, or a faulty fill valve, and perform safe fixes themselves when possible. For more complex issues, consult the detailed steps below and use manufacturer parts when needed.
Why ice maker issues happen
Ice makers fail for a few common reasons, and most problems are solvable with careful troubleshooting. A jammed ice mold, a frozen fill tube, a clogged water inlet filter, or a stuck ice maker arm can prevent ice production or dispensing. In many homes, inconsistent ice production traces back to the water supply line or an out-of-calibration float switch. The Home Repair Guide team has found that the majority of failures stem from simple, addressable causes rather than a full ice maker replacement. Understanding how the system works helps you target the right component without unnecessary guesswork. Throughout this guide, focus on safety, model-specific instructions, and using quality parts to ensure lasting results. The keyword to watch for is repair refrigerator ice maker—precision fixes save time and money while protecting your appliance.
The ice maker system explained
A refrigerator ice maker is a compact assembly inside or near the freezer that combines a mold, motorized ejector, water inlet valve, and a control mechanism. Water from the household line fills the mold during a cooling cycle, freezes into ice, and the ejector arm releases the cubes into the bin. A defective water inlet valve or a clogged water line can starve the mold of water, resulting in little or no ice. Conversely, a jammed mold or a malfunctioning motor can prevent the ejector from pushing cubes out. Temperature, water pressure, and the ice maker’s electronic controls all influence performance. Understanding how these parts interact makes pinpointing problems faster and safer.
Safety first: what you need to know before starting
Before you touch any components, unplug the refrigerator and shut off the water supply to the ice maker. This prevents electric shock and water leaks while you inspect or disassemble parts. Keep towels handy to manage drips and place a shallow tray under the connection if you’re removing flexible hoses. If you’re working behind the appliance, ensure there’s adequate clearance to avoid damaging coils or the condenser. Wear eye protection and avoid using metal tools on plastic fittings to prevent scuffs or cracks. If any step feels risky, stop and consult a professional. A careful start reduces the chance of electrical or water damage and makes the repair refrigerator ice maker task safer.
Diagnostics: quick checks to identify the problem
Start with visual cues and tactile checks. Remove the ice bin and inspect the mold for cracks or cracks in the filling valve assembly. Look for ice clumps that indicate a jam, and check the ejector blade for obstruction. Confirm the water supply line is connected and not kinked or frozen. If you hear a motor hum but no action, the ejector mechanism may be stuck. Check the control panel for error codes if your model provides them. These checks often reveal whether the issue is a clogged line, a frozen mold, or a faulty valve. Based on Home Repair Guide analysis, many repairs resolve by addressing ice jams or water flow rather than replacing the unit.
How temperature, water supply, and ice mold interact
Ice production depends on three interacting factors: freezer temperature, water supply pressure, and the integrity of the ice mold. If the freezer is too warm, the mold may not freeze the water correctly, leading to smaller or absent ice. A restricted or leaking water supply valve lowers water pressure, preventing the mold from filling properly. Ice mold damage or debris can also prevent proper freezing or release. When diagnosing, verify the freezer is at the correct temperature (typically around 0°F/-18°C) and test water flow from the valve. Correct balance among these three elements is essential for consistent ice production. If you adjust one variable, re-test to confirm the others are still functioning correctly.
Tools and preventative maintenance: what you’ll need
Preparing for repairs means gathering the right tools and keeping up with routine maintenance. You’ll want a screwdriver set, channel or needle-nose pliers, a small adjustable wrench, a towel or shallow tray, and a clean cloth. If your model uses a replaceable filter, consider replacing it during maintenance. Keep a model-specific parts guide handy to source an authentic ice maker kit or valve. Regular maintenance—like cleaning the ice mold, checking for mineral buildup, and replacing a clogged filter—prevents many issues. Home Repair Guide emphasizes using manufacturer-approved parts for durability and safety, and documenting any fixes for future reference. Repair refrigerator ice maker tasks become straightforward when you have the right tools and a preventive plan.
Clean and thaw: when to do it
Frozen lines and ice jams are common culprits. If you notice frost buildup around the ice mold or a slow or nonexistent ice cycle, thawing may be needed. Start by unplugging and, if safe, removing ice from the mold. For mild freezing, a warm, damp towel applied to the exterior of the mold area can help loosen ice. Do not use heat sources that could damage plastic or electrical components. After thawing, reassemble and run several test cycles to evaluate performance. Regular cleaning of the mold and interior water channels can reduce the frequency of thaw-related repairs and improve reliability over time.
Replacing parts: when and what to buy
Certain failures require component replacement rather than reassembly. Common replacement parts include the ice maker motor assembly, the water inlet valve, and the mold assembly. If you observe cracks in the mold, persistent leaks at the valve, or intermittent ice production despite cleaning, replacement is likely necessary. Source parts through the manufacturer or an authorized retailer to ensure compatibility with your model. Before purchasing, note your fridge’s model number and the exact part number shown in the service guide. The goal is to restore full function with parts designed for your system.
How to test cycles and confirm operation
After reassembly or part replacement, power the unit back on and run multiple ice-making cycles to ensure consistent output. Observe the fill process to confirm water enters the mold smoothly and the freeze cycle completes without interruption. Listen for the ejector as it pushes ice into the bin; any grinding or odd sounds could indicate friction or misalignment. If cycles fail, recheck the assembly alignment and connections. A few complete cycles without issues are a good sign that the repair refrigerator ice maker task was successful. If problems persist, re-diagnose with a fresh set of checks or seek professional help.
Common mistakes to avoid
Rushing a repair often leads to damaged components or unsafe connections. Avoid forcing ice out of the mold with metal tools, which can crack the mold or bend the ejector. Don’t ignore small leaks around tubing or the valve—tiny drips can indicate a failing seal. Refrain from working with energized components if you’re unsure about wiring or control boards. Always document the model and the steps you took, so future maintenance or fixes can be performed more efficiently. A calm, methodical approach typically yields the best long-term results.
Seasonal maintenance checklist
Create a simple maintenance cadence to extend ice maker life. Monthly: clean the ice mold and filter (if applicable), inspect the water line for kinks, and ensure the freezer temperature remains stable. Quarterly: unplug and thaw any minor frost buildup, then test one or two ice cycles to confirm operation. Annually: replace the water filter, inspect the ice mold for wear, and verify electrical connections are tight and clean. This routine reduces the risk of unexpected failures and aligns with Home Repair Guide recommendations for durable improvements. Regular maintenance saves time and reduces the need for major repairs.
Quick reference: basic troubleshooting flow
If ice maker is not producing ice, start with: (1) Is the freezer temperature correct? (2) Is the water line connected and free of kinks? (3) Is the ice mold frozen and free of debris? (4) Is the inlet valve functioning? (5) Is the ejector motor moving freely? If any step fails, resolve that issue before moving to the next. This streamlined flow helps you quickly determine whether the problem is due to water supply, freezing, or a mechanical fault, keeping you focused and efficient during a repair refrigerator ice maker task.
Tools & Materials
- Screwdriver set (Phillips and flathead)(Phillips #1-3 and flathead ~3/16 inch)
- Nut driver or socket set(For mounting screws on ice maker and valve)
- Adjustable wrench(To disconnect water line fittings)
- Needle-nose pliers(Grip small parts and clamps)
- Towel or shallow tray(Catch drips from the line during disassembly)
- Multimeter (optional)(Test electrical continuity if needed)
- Replacement water filter (optional)(Replace if your model uses one)
- Replacement ice-maker parts (optional)(Motor assembly or inlet valve as needed)
- Owner's manual or model-specific service guide(Useful for part numbers and wiring diagrams)
Steps
Estimated time: 60-90 minutes
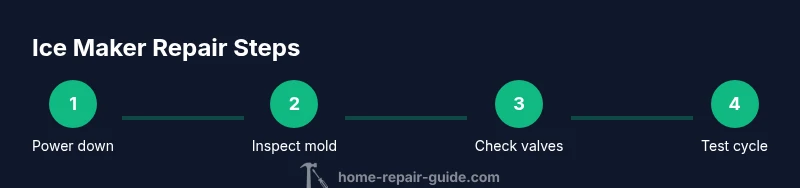
- 1
Power down and isolate
Unplug the refrigerator from the wall and shut off the dedicated water supply valve to stop any further water flow. Move the unit slightly away from the wall to access connections safely. This keeps you from accidentally energizing the unit while you inspect components or disconnect lines.
Tip: Have a helper steady the fridge and keep towels within reach. - 2
Inspect ice mold and bin for jams
Remove the ice bin and examine the mold for ice buildup or cracks. Gently loosen any jammed ice with a plastic tool; avoid metal that could damage plastic or the mold. If you see a stiff mold, allow it to thaw slightly after power is disconnected before attempting removal.
Tip: Do not use force; forcing can crack the mold. - 3
Check water line and inlet valve
Trace the water line to the valve; inspect for kinks, leaks, or frost. If accessible, detach the line from the valve to inspect the connector and look for mineral buildup. Reattach securely if no damage is found.
Tip: Place a towel under the valve area to catch any residual water. - 4
Test the ice maker cycle
Reconnect power and, if your model has a test button, activate it to observe the cycle. Watch the fill valve and mold filling; listen for the ejector mechanism. If the motor hums but does not move, the ejector may be jammed or the motor may be failing.
Tip: Take notes on any abnormal sounds or stalls for later reference. - 5
Thaw frozen components
If you detect frost around the mold or along the line, thaw the area using a warm towel rather than direct heat. Avoid hot air or open flames. After thawing, reassemble and run several cycles to confirm performance.
Tip: Thawing can reset minor jams but does not fix a faulty valve or motor. - 6
Replace defective parts if needed
If you found a cracked mold, a stuck valve, or a failed motor, replace with compatible parts per your model. Use manufacturer-approved components to ensure fit and warranty compatibility. Keep all part numbers and receipt for records.
Tip: Double-check compatibility with your fridge model before purchase. - 7
Reassemble and run tests
Reconnect the water line, return the ice bin, and restore power. Run 2–3 full ice-making cycles to verify consistent operation and to check for leaks. If issues recur, revisit each previous step or seek professional service.
Tip: Document every step you took to speed future repairs.
FAQ
Why is my refrigerator ice maker not making ice?
Ice makers stop producing ice for several common reasons: a frozen mold, a clogged water line or filter, a faulty water inlet valve, or a jammed ejector. Starting with a visual check and a quick cycle test helps identify the cause. If the issue persists after basic checks, more in-depth diagnostics may be needed.
If your ice maker isn’t producing ice, start by checking for a frozen mold, clogged water line, or a faulty valve. Run a quick cycle test to confirm what’s failing.
What should I check first when the ice maker stops?
Begin with safety: unplug the unit and shut off the water supply. Then inspect the mold for ice build-up, ensure the water line isn’t kinked, and verify the valve is receiving power. These steps cover the majority of common failures before you consider parts replacement.
First, unplug it and shut the water off, then check for ice in the mold and the water line for kinks.
Can I fix an ice maker myself or should I hire a pro?
Many ice maker problems can be addressed by a capable homeowner with basic tools and careful steps, especially issues like jams, line kinks, or clogged filters. More complex problems like a faulty control board or defective valve may require professional repair or replacement parts from the manufacturer.
Yes, you can fix many issues yourself if you’re comfortable with basic tools; for complex electronics, consider a technician.
What tools do I need for repairing an ice maker?
Essential tools include a screwdriver set, adjustable wrench, needle-nose pliers, a towel, and a replacement water filter if applicable. A multimeter is optional for checking electrical components. Refer to your model’s manual for specific part numbers and alignment.
You’ll typically need screwdrivers, pliers, a wrench, towels, and possibly a multimeter for electrical checks.
How long does an ice maker repair typically take?
Simple fixes like clearing a jam or thawing a line may take 30–60 minutes. More complex replacements of valves or the ice maker assembly can extend to 1–2 hours. Plan for interruptions and have ready access to model-specific parts before starting.
Most basic fixes take under an hour; more involved replacements may take a couple of hours.
Is a noisy ice maker a sign of failure?
A loud or grinding noise can indicate a jam, a misaligned mold, or a failing motor. If the noise persists after clearing jams and verifying alignment, it’s best to stop and check for damaged components or consult a professional.
A loud noise usually means something is stuck or worn; check for jams and then consider professional help if it continues.
Watch Video
Key Takeaways
- Diagnose ice maker issues with a methodical flow rather than guesswork
- Power off and isolate water supply before any inspection
- Replace worn parts with manufacturer-approved components
- Test multiple cycles to confirm operation and catch leaks
- The Home Repair Guide team recommends regular maintenance to prevent future jams