Ice Maker Repair for LG Refrigerators: A Practical Guide
Learn how to diagnose and repair the ice maker in LG refrigerators with practical, safe, step-by-step guidance from Home Repair Guide. Practical tips, common issues, and when to call a pro.

This guide helps you diagnose and repair the ice maker in an LG refrigerator, covering common failures like no ice, slow production, or jams. You’ll learn safe power-down, basic diagnostics, and when to replace parts versus calling a pro. A quick check list helps you decide your next best steps.
Understanding why ice maker issues happen in LG refrigerators
Ice maker problems in LG refrigerators usually stem from three broad categories: water supply issues, mechanical jams, and sensor or control failures. When the ice maker stops producing, the first step is to check whether water is reaching the ice maker and whether the mold and ejector wheel are free of ice blocks. According to Home Repair Guide, most homeowners can address the majority of everyday jams or clogs with basic tools and careful inspection. The keyword here is systematic testing: verify water flow, inspect the fill tube for kinks, and ensure there are no ice blocks in the mold. Keeping a mental map of the ice maker’s parts—water valve, fill tube, ice mold, ejector arm, and sensor—helps you decide which component is likely at fault without unnecessary part swaps. As you work through diagnostics, remember that LG models vary; consult the model-specific manual if available. Regular upkeep reduces future failures and preserves ice quality over time.
Safety first: before you start
Safety is non-negotiable when working on an appliance. Start by unplugging the refrigerator and shutting off the water supply to the ice maker to prevent leaks. Wear gloves to protect your hands from sharp edges on the ice maker housing and use a towel or shallow tray to catch any drips. If your model uses line pressure, release any built-up pressure slowly to avoid splashing. Keep the work area dry and well-lit. Work slowly, and never attempt repairs with a damaged power cord or exposed wiring. Home Repair Guide emphasizes keeping your workspace organized to prevent misplacing small parts during reassembly. If you encounter refrigerant lines or a damaged water valve, stop and contact a qualified technician.
Tools and materials you’ll need
A basic toolkit covers most LG ice maker repairs. You’ll want a Phillips #2 screwdriver, a flat-head screwdriver, needle-nose pliers, a multimeter for electrical tests, a small flashlight, towels, and a non-conductive pry tool if needed. Have a replacement ice maker module or water valve on hand only if you’ve diagnosed a faulty part. Optional items include a drip pan and a spare ice mold if your model has a detachable mold. Gather a clean container to test drain flow and a towel to absorb spills. Safety gear like gloves and eye protection adds a layer of protection during disassembly. With these tools, you’ll be prepared for most routine repairs without unnecessary delays.
Common problems and quick checks
No ice production can result from a clogged fill tube, a frozen ice mold, a stuck ejector, or a faulty water valve. If ice falls slowly or not at all, inspect the water line for kinks or leaks and confirm the water supply is on. Look for frost buildup around the ice mold which can indicate a temperature issue or a faulty heater. A jammed ice maker often stems from ice buildup inside the mold or in the ejector mechanism; gently removing ice with a plastic tool can restore operation. If the sensor or control board is suspected, you may notice erratic ice cycles or a blinking light pattern. Start with the simplest checks—water supply, frost buildup, and ejector movement—before testing electrical components. Home Repair Guide notes that many fixes come down to cleaning, realigning parts, or replacing a compatible valve or module.
Diagnostic flow: identifying root causes without guesswork
Approach diagnostics as a decision tree. Step one: confirm power and water supply to the ice maker. Step two: remove the ice bin and inspect the mold for ice build-up; if you see ice in the mold, run a controlled defrost cycle or manually clear the blockage. Step three: test the fill valve by listening for a hum when the valve energizes and verify water flow with a clear tube if possible. Step four: inspect the ejector arm and gears for wear or binding; lubricate or replace worn parts as needed. Step five: if the model includes a temperature sensor or microcontroller, use a multimeter to check continuity and resistance against the service manual’s ranges. If you’re unable to identify a clear fault, consult a professional or contact LG support for model-specific guidance.
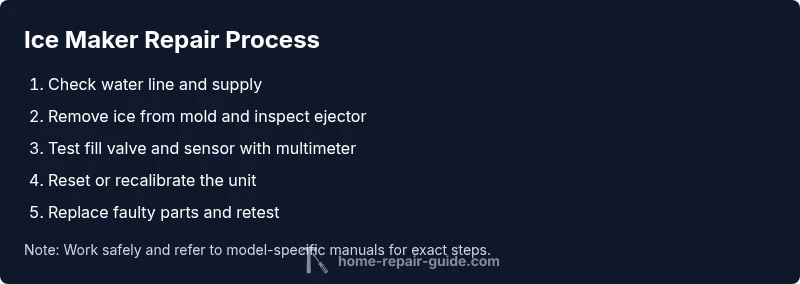
Step-by-step overview before you start
Before attempting each step, power down the unit and disconnect from power. Start by verifying water supply; then inspect the ice mold and fill tube for ice blockages. If you identify a faulty valve or sensor, replace only the component that’s confirmed by measurements. Always reassemble with fittings snug but not overtightened, and perform a controlled test to confirm function before fully returning the unit to use. If you encounter resistance during disassembly, pause and reassess—forcing parts can cause further damage. Document the model number and part numbers you replace for future maintenance.
Maintenance tips to prevent future ice maker failures
Regular maintenance goes a long way toward reliable ice production. Clean the ice maker every few months using a mild detergent and warm water; rinse thoroughly to avoid soap residue. Schedule periodic checks of the water line for leaks and freeze-thaw cycles that can damage tubing. Keep the freezer temperature consistently around the manufacturer’s recommended setting to prevent frost buildup. Replace any worn gaskets or seals to prevent air leaks that alter the ice-making temperature. Using distilled water reduces mineral buildup in the mold and valve, extending the life of the ice maker. Finally, keep your LG refrigerator’s firmware updated if your model supports software updates.
When to replace vs repair: decision factors
Repairing is often cost-effective for minor jams, frost buildup, or a stuck ejector. If testing reveals a defective water valve, sensor, or motor that would require multiple replacements or substantial disassembly, replacement may be the better long-term option. Additionally, if the ice maker consistently fails after repairs or you notice recurring ice quality issues, upgrading to a newer LG model with improved efficiency might be worth considering. Always compare the cost of parts and labor against a replacement unit’s price and energy efficiency benefits. Home Repair Guide recommends weighing safety, reliability, and the cost of continued maintenance when making this decision.
Tools & Materials
- Phillips head screwdriver #2(For most screws on LG ice maker assemblies)
- Flat-head screwdriver(Useful for prying apart panels without damage)
- Needle-nose pliers(Handle clips and small connectors)
- Multimeter(Test sensors or thermostat if present)
- Replacement ice maker kit (LG-compatible)(Only if diagnosed as failed module or valve)
- Towels or absorbent cloths(Catch drips and keep area dry)
- Bucket or shallow tray(Collect water during drain tests)
- Safety gloves(Protect hands from sharp edges)
Steps
Estimated time: 45-90 minutes
- 1
Power down and access the ice maker
Unplug the refrigerator and shut off the ice maker's water supply. Remove the ice bin to access the mold and ejector without obstruction. This step is essential to safely inspect parts and avoid water leaks during testing.
Tip: Keep a towel handy for any water that may spill when you remove the bin. - 2
Check the water supply line
Inspect the supply line for kinks, leaks, or freezing. If the line is kinked, straighten it carefully; if it’s frozen, thaw with a warm (not hot) environment and test water flow.
Tip: Test water flow by briefly energizing the valve and watching for a steady stream. - 3
Inspect the ice mold and ejector
Remove any ice blocks from the mold and ensure the mold cycles freely. Check the ejector arm for binding or wear and confirm it returns to home position smoothly.
Tip: Do not use excessive force; if components resist, loosen screws slightly and recheck alignment. - 4
Test the fill valve and sensor circuitry
With the unit powered, listen for the fill valve activation and verify water flow. Use a multimeter to check resistance on sensors or thermistors according to the service manual.
Tip: If you’re not confident testing electronics, focus on mechanical checks first to avoid damage. - 5
Reset or recalibrate the ice maker
Some LG models support a reset sequence or recalibration via control panel. If your model lacks a reset button, power down for 5 minutes, then power back on and re-test.
Tip: Document any LED blink codes in case they recur during testing. - 6
Replace faulty components when necessary
If diagnostic results show a faulty valve, motor, or sensor, replace with compatible LG parts. Reassess after replacement and perform a full cycle test.
Tip: Only replace one part at a time to clearly identify the fault source. - 7
Reassemble, run a cycle, and monitor
Reassemble panels, reconnect water supply, and run an ice-making cycle. Check for leaks and ensure ice quality is consistent.
Tip: Run at least 2-3 cycles to confirm stability and repeat performance checks after 24 hours.
FAQ
What are common causes of an LG ice maker not dispensing ice?
Common causes include a clogged fill tube, jammed ice mold, faulty sensor, or a malfunctioning water valve. Start with the simplest checks—water supply, blockages, and ejector movement.
Common causes are clogs, jams, or sensor faults. Start with simple checks of water supply and ice mold.
How do I reset the LG ice maker?
Power down the fridge, unplug for about five minutes, then plug back in and power up. If your model has a reset button, press and hold it for a few seconds according to the manual.
Reset by unplugging for five minutes, then replugging. If there’s a reset button, hold it as directed in the manual.
When should I replace the ice maker module?
If diagnostics show a failed motor, valve, or sensor that cannot be repaired cost-effectively, replacement is often the best option.
If tests show a failed module or valve that can’t be repaired, replacement is usually best.
Is it safe to repair an LG ice maker myself?
DIY can be safe if power is disconnected and you follow a model-specific manual. If you encounter refrigerant lines or complex electronics, stop and call a pro.
DIY is safe if you disconnect power and follow the manual. If you hit refrigerant lines or complex electronics, call a pro.
What tools are essential for ice maker repair?
A Phillips #2 screwdriver, needle-nose pliers, a multimeter, towels, and safety gear cover most common repairs.
Essential tools are a screwdriver, pliers, a multimeter, towels, and safety gear.
How long does a typical ice maker repair take?
Most basic fixes take 30-60 minutes, while more complex diagnostics and part replacements can take 1-2 hours depending on access and model.
Most fixes take about half an hour to an hour, more complex jobs can take up to a couple of hours.
Watch Video
Key Takeaways
- Diagnose with a systematic, stepwise approach
- Keep safety the top priority during repairs
- Use model-specific parts and manuals for accuracy
- Regular maintenance prevents most common issues
- Decide between repair and replacement by cost and reliability