Whirlpool Microwave Repair: A Complete How-To
Learn how to diagnose and safely repair common Whirlpool microwave problems. This comprehensive guide covers safety, tools, troubleshooting, and maintenance for homeowners and renters.

In whirlpool microwave repair, common problems include heating failures, door issues, and turntable jams. This guide helps you safely identify symptoms, gather the right tools, and perform careful, manufacturer-friendly repairs. Always unplug before inspecting and never bypass safety interlocks. This quick overview prepares you for hands-on work while reducing risk.
Understanding Whirlpool Microwave Repair: Common Symptoms and Safety
In whirlpool microwave repair, recognizing common symptoms and safety boundaries is essential. According to Home Repair Guide, failures typically fall into a handful of familiar categories, such as the unit not heating, the display acting oddly, the door not latching, or the turntable sticking. Before you touch the interior, unplug the appliance and move it to a well-lit workspace away from water. Microwave components can pose shock and fire risks even when the unit is unplugged, so proceed with care.
Next, evaluate the symptom with a quick checklist: does the oven hum but not heat, does the timer advance as expected, is there visible arcing or smoke, or does the door lock fail to latch? Document the symptom and any recent changes (new power strip, relocation, or cleaning with moisture). If the microwave has been subjected to power surges, the control board may be the culprit. In general, avoid attempting to service high-voltage parts such as the magnetron unless you have proper training. For most homeowners, diagnosing the problem and replacing a simple fuse or door switch is a safe first step. The Home Repair Guide team emphasizes starting with the least invasive fixes and consulting the model’s service manual for wiring diagrams and safety notes.
Tools, Safety, and Prep Youll Need
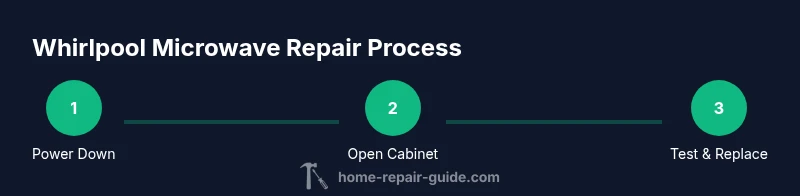
Before opening the cabinet, assemble the following tools and materials. Having the right equipment reduces guesswork and keeps you safe.
- Non-contact voltage tester (required): verify there are no live circuits before touching wiring.
- Screwdriver set (Phillips and flat) (required): for removing outer panels and fasteners.
- Nut driver or socket set (required): helps with stubborn cabinet screws.
- Multimeter (required): test continuity and resistance on switches and boards.
- Replacement components (door switch, fuse, thermal fuse, diode) (required): match exact model numbers.
- Protective gloves (required): shield hands from sharp edges and hot parts.
- Safety goggles (required): protect eyes from debris.
- Service manual or model-specific wiring diagram (required): guides wiring and connector identification.
- Cleaning supplies (optional): microfiber cloth and gentle solvent for interior.
Disassembly and Safety Protocols
Disassembly begins with a confirmed power-off state. Remove the outer cover by locating and removing all retaining screws, then carefully lift the panel without tugging on internal wiring. Keep track of screws and small parts using labeled containers. Avoid touching the high-voltage area near the magnetron and capacitor; these parts can retain dangerous charges even after unplugging. If you must disconnect connectors, take a photo first to preserve wiring order. Always work on a non-conductive surface and use insulated tools when handling metal edges.
Diagnosing Common Faults in Whirlpool Microwaves
Diagnosing whirlpool microwave repair issues centers on a few frequent culprits: the door switch, the control board, the high-voltage diode and transformer path, the magnetron, and fuses or thermal fuses. Use the multimeter to test door switches for continuity with the door closed and to verify resistance on the control board traces. Inspect the high-voltage path only when the unit is unplugged and capacitors are discharged. Signs of magnetron failure include weak or no heating and unusual humming; a blown fuse or thermal fuse will typically cut power or trigger a fault code. Always cross-check with the model's service manual for exact specs.
Step-by-Step Repair Scenarios (Selected Models)
When whirlpool microwave repair is necessary, you may encounter a few scenarios. Scenario A: A blown door switch causing the oven to fail to start. Replace the switch with an exact match, reassemble, and test with a few warm cycles. Scenario B: A blown fuse or thermal fuse that prevents power from reaching the control board. Replace with an OEM part and verify safety fuses. Scenario C: Suspected magnetron failure with full power draw but no heating. This is a more advanced repair and may require professional service or a factory-approved replacement; do not attempt to service the magnetron unless trained. Scenario D: A faulty control board producing random fault codes. Replacing the board requires correct model-compatible parts and careful re-wiring per the service manual.
When to DIY vs Call a Pro and Warranty Considerations
DIY whirlpool microwave repair can save money for simple problems like door switches or fuses, but complex issues involving the magnetron or main control board carry higher risk. If the unit is under warranty, consult the warranty terms before opening the cabinet because unauthorized repairs can void coverage. For safety or uncertain symptoms, especially when dealing with high voltage, it is prudent to contact a qualified appliance technician. Keep records of all parts, tests, and service calls to support any warranty claims.
Maintenance to Prolong Whirlpool Microwave Life
Preventive maintenance reduces the likelihood of future failures and keeps whirlpool microwave repair needs infrequent. Regularly clean the interior after cooking with a damp cloth, avoid running empty or overloading, and inspect door seals for damage. Schedule a periodic safety check that includes testing door switch operation and looking for signs of arcing or loose connections. By storing model numbers and service manuals, you can quickly reference wiring diagrams if a problem arises.
Tools & Materials
- Non-contact voltage tester(Verify safety before touching any wiring.)
- Phillips and flat-head screwdrivers(Magnetic tips help with small screws.)
- Nut driver or socket set(Needed for cabinet screws.)
- Pliers and wire cutters(Useful for connectors and small wires.)
- Multimeter(Test continuity and resistance.)
- Replacement door switch, fuse, thermal fuse, diode(Use OEM parts matched to model.)
- Heat-resistant gloves(Protect hands when handling hot parts.)
- Safety goggles(Eye protection during disassembly.)
- Service manual or model-specific wiring diagram(Guides exact wiring and diagrams.)
- Microfiber cloth and mild cleaner(Keep the interior clean during reassembly.)
Steps
Estimated time: 60-90 minutes
- 1
Power down and prep
Unplug the microwave, move it to a clear, dry workspace, and gather all tools. Ensuring a clean starting point reduces risk of dropped screws or misplaced parts.
Tip: Double-check model number and part compatibility before purchasing replacements. - 2
Open cabinet safely
Remove the outer screws and lift the cover gently. Keep track of screws and connectors, labeling them if needed.
Tip: Take a photo of wiring before disconnecting any plugs to simplify reassembly. - 3
Locate key components
Identify the door switch, control board, magnetron, diode, and fuses. Mapping connectors helps you plan testing steps without causing damage.
Tip: Use a service manual to confirm expected connector positions. - 4
Test door switch and board
With the unit unplugged, test door switches for continuity and check the control board paths with a multimeter. Verify readings against the service manual specs.
Tip: Do not force connectors; release locking tabs gently. - 5
Inspect high-voltage path and fuses
Inspect the high-voltage diode and fuse for continuity or signs of damage. Discharge capacitors only if you have training; otherwise avoid touching high-voltage parts.
Tip: Wear insulated gloves and never touch the magnetron coils directly. - 6
Replace faulty parts and reassemble
Install the correct door switch and fuse, reattach the cabinet, and ensure all connectors are seated. Tighten screws evenly to avoid panel flex.
Tip: Test fresh assemblies with a brief hot-cycle in a safe area. - 7
Final test and safety check
Plug the microwave back in and run a few short cycles to confirm heating, door operation, and no unusual sounds or smells.
Tip: If you observe sparks or smoke, power down immediately and seek professional help.
FAQ
Can I repair a Whirlpool microwave myself?
You can handle simple fixes like a door switch or fuse if you follow safety guidelines and use the correct parts. Complex issues involving magnetrons or control boards are high risk and may require a professional.
Yes for simple issues, but for magnets and boards, hire a pro.
What are the most common Whirlpool microwave problems?
Heaters not working, doors not latch properly, turntables stuck, and control panels acting up are frequent complaints. Each problem usually points to a small set of components like the door switch, fuse, or control board.
Common issues are heating failures, door latches, and control panel glitches.
Is it safe to test the magnetron without professional training?
Testing or replacing the magnetron involves high voltages and requires specialized training. Do not attempt this unless you are qualified, as improper handling can cause electric shock or fire.
No, magnetron work should be done by a trained tech.
How can I tell if the door switch is bad?
If the microwave doesn’t start when the door is closed, and the switches show no continuity, the door switch is a likely culprit. Compare results with the model's wiring diagram.
If the unit won’t start with the door shut, check the door switch.
Will repairing void my warranty?
Opening the cabinet can void warranties if done without authorization. Check the terms and consider authorized service to protect coverage.
Opening the unit can void warranty; check terms first.
When should I replace the microwave instead of repairing it?
If the magnetron or control board fails repeatedly or the repair cost nears replacement price, replacement becomes more economical. Consider safety and warranty in your decision.
If major parts fail or costs rise, replacement may be more economical.
Watch Video
Key Takeaways
- Identify the symptom to guide repairs.
- Unplug and follow safety steps before touching any wiring.
- Start with simple fixes before component replacement.
- Consult the service manual for model-specific guidance.