Repair a Microwave: A Practical Step-by-Step Guide
A practical, safety-first guide to diagnosing and repairing common microwave issues at home. Learn when to repair, how to inspect components, essential tools, and maintenance tips to extend your appliance’s life.

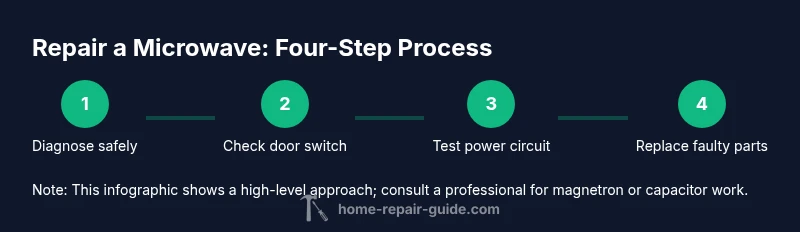
By following this guide, you’ll safely diagnose common microwave issues, determine repair feasibility, and perform basic at-home fixes or part replacements. You’ll unplug the unit, inspect the door switch and fuses, test basic electrical paths with a meter, and know when to call a professional for high-voltage components. Safety and proper testing are emphasized throughout.
Why repair a microwave
According to Home Repair Guide, choosing to repair a microwave rather than replace it can save money, extend the life of a common kitchen workhorse, and reduce waste. In many households, microwaves are subjected to heavy usage, and small faults—like a door latch misalignment or a blown fuse—are fixable with basic tools and careful testing. A repair-first mindset also aligns with practical home-maintenance habits that spare homeowners from premature disposal and help you understand how the appliance functions. This approach supports responsible consumption and helps you build confidence handling everyday electrical tasks. By learning to troubleshoot safety-related issues and component faults, you empower yourself to make informed decisions about whether to repair or replace. The Home Repair Guide team emphasizes patience, accuracy, and adherence to safety protocols when working with appliances powered by electricity.
Safety first: when to repair vs replace
Safety should govern every step of a microwave repair. Unplug the unit before touching any internal components. If the magnetron or high-voltage capacitor shows signs of damage, or if the appliance is outside warranty, weigh the cost and risk of repair against a full replacement. Home Repair Guide analysis shows that most home repair tasks focus on door switches and thermal fuses, which are safer and cheaper to address. However, working inside a live microwave can expose you to lethal voltages and sparks. Always wear eye protection and avoid attempting any repair if you lack the proper tools or training. When in doubt, consider a professional diagnostic to prevent fire hazards or electrical shock.
Common microwave issues and quick checks
Common problems include the unit not heating, the turntable not rotating, or the display and timer behaving erratically. Start with simple checks: verify the receptacle is live, inspect the power cord for damage, and test the door switch with a multimeter if you’re comfortable. Look for burnt smells, melting insulation, or buzzing noises that indicate deeper electrical faults. If the fuse trips repeatedly, or you notice sparking inside, stop and seek professional service. Document any symptoms with dates and photos to assist a technician in diagnosing the root cause more efficiently.
Understanding the inner components you may encounter
A microwave contains several high‑voltage parts that require special care. The magnetron generates microwaves, the high‑voltage diode and capacitor help feed the tube, and the transformer powers control circuits and display circuitry. The door switch assembly ensures the oven only operates when the door is closed. The glass tray and waveguide are mechanical/flow components that should be kept clean and unobstructed. Handling HV components, like the magnetron, requires training; never attempt to disassemble or discharge these parts without proper knowledge, since this can cause severe injury or a fire hazard.
Steps to safely diagnose and plan repairs
Begin with a methodical plan: confirm power is disconnected, inspect exterior for damage, then move to interior components that commonly fail. Create a checklist to track which parts you test and the results. If you encounter burnt wiring, exposed conductors, or a capacitor that shows signs of bulging, stop immediately and seek professional help. Use a service manual for your model as a reference when identifying parts, and photograph connections before disassembly to aid reassembly. Finally, decide whether replacement parts can be sourced safely and economically, or if the unit should be retired.
How to prevent future problems and maintain your microwave
Preventive maintenance reduces the likelihood of recurring faults. Regularly wipe the interior after use to prevent residue buildup that can affect magnetron performance, avoid placing metal objects inside, and inspect the door seal for cracks. Periodically check the power cord for wear and keep the unit away from moisture. If you notice unusual noises, overheating, or intermittent operation, stop using the appliance and conduct a focused inspection or consult a professional. A well-maintained microwave is safer and longer-lasting.
Tools & Materials
- Screwdrivers (Phillips and flat-head)(Insulated handles; sizes #1 and #2 for appliance screws)
- Multimeter(For voltage and continuity testing; set to appropriate ranges)
- Non-contact voltage tester (optional)(Useful to verify no live wires before touching components)
- Insulating gloves(Class II or higher; protect hands when near HV components)
- Safety goggles(Eye protection during disassembly and testing)
- Soft cloth and mild cleaner(Clean surfaces without leaving residue)
- Manual/service guide for your microwave model(Model-specific guidance improves accuracy)
- Replacement parts kit (as diagnosed)(Door switch, fuse, or other parts only after confirmation)
- Torx/hex bits (as needed)(Some models use Torx screws)
Steps
Estimated time: 60-90 minutes
- 1
Power down and unplug
Ensure the microwave is unplugged from the power source. If the unit was recently in use, wait a moment to allow residuals to settle, and keep hands away from the interior until you confirm there is no stored energy.
Tip: Use a non-contact voltage tester to confirm no live current before opening the cabinet. - 2
Open housing and locate safety components
Remove outer screws to access the internal cavity. Identify obvious safety components such as the door switch, thermal fuse, and fuses. Take photos for reassembly to avoid mixing up connectors.
Tip: Keep track of screws and components to prevent misassembly. - 3
Inspect door switch and wiring
Test the door switch with a multimeter for continuity when the door is closed. Look for damaged wire insulation or loose connectors. Re-seat or replace damaged wires as needed.
Tip: Document connections before disconnecting anything and reassemble with the switch firmly engaged. - 4
Check fuses and thermal fuse
Test the main fuse and any thermal fuse for continuity. Replace only with the same rating and type. If fuses repeatedly fail, investigate upstream causes rather than simply replacing fuses.
Tip: Never bypass a fuse; it protects you and the appliance from fire. - 5
Decide on HV components and next steps
HV components like the magnetron or high-voltage capacitor require specialized knowledge. If these parts show damage or you are uncertain, stop the repair and consult a pro. Consider model-specific guidance and warranty implications.
Tip: Label all connectors and keep track of wires for safe reassembly.
FAQ
Is it safe to repair a microwave myself?
Basic external checks and door-switch fixes can be safe if you unplug and follow safety steps. High-voltage components require professional handling.
Basic checks are safer, but avoid high-voltage parts and consult a professional for complex repairs.
What parts are commonly replaced in microwave repairs?
Door switches and thermal fuses are the most frequent, affordable fixes. More complex parts like the magnetron should be evaluated by a technician.
Door switches and fuses are common fixes; magnetrons usually need a pro.
How long does microwave repair take?
Simple checks may take 30-60 minutes; more involved issues can require 1-2 hours depending on diagnosis and parts.
Most fixes finish within an hour or two, depending on the issue.
Can I test a microwave after repair?
Yes, but only after reassembly and ensuring there are no exposed wires. Perform a cautious test with no metal objects inside.
Test only after reassembly and safety checks.
Should I repair or replace my microwave?
If the magnetron or HV components are faulty, or repairs would approach the cost of a new unit, replacement may be the smarter option.
Often, when HV parts fail, replacement is the wiser choice.
What safety precautions should I take?
Always unplug before touching internals, wear eye protection, and never discharge HV components without proper training.
Unplug, wear protection, and avoid HV components unless trained.
Watch Video
Key Takeaways
- Unplug before inspection and start with simple checks.
- Use a model-specific parts list and avoid improvising.
- Replace like-for-like fuses or switches with matching ratings.
- Call a professional for high-voltage components (magnetron/capacitor).