Microwave Oven Repair Near Me: A Practical How-To
Learn safe, practical steps to diagnose and fix common microwave issues near you. This guide covers safety, tools, diagnostics, cost considerations, and when to replace, with expert guidance from Home Repair Guide.

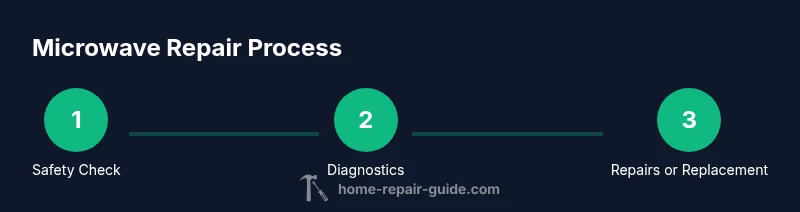
You will learn to diagnose common microwave issues and perform safe, basic repairs near you. This guide covers safety prerequisites, essential tools, practical diagnostic steps, and how to decide between repair and replacement. By following the steps, you can save time, reduce waste, and avoid costly service calls, with guidance from Home Repair Guide.
Overview: How microwaves work and common failure modes
Microwave ovens are compact kitchen electronics that combine a high-voltage supply, a magnetron, a waveguide, and a control board to heat food quickly. A typical failure pattern includes the unit not heating at all, intermittent heating, unusual smells, arcing, or the turntable stopping. Understanding these basics helps you identify which issues might be safely addressed at home and which require professional service. According to Home Repair Guide, most problems stem from a single weak link rather than multiple simultaneous faults, which makes a guided diagnosis practical for many homeowners. The magnetron is a central heat source but is typically isolated behind a metal shield for safety; most repairs in the home involve non-destructive checks like door switches, fuses, interlocks, and simple loose connections. Before diving in, ensure you unplug the unit, protect your eyes, and work on a non-conductive surface. This section maps common failure modes to DIY-friendly checks, so you can decide the right next step without guessing.
Safety first: What you can and cannot do at home
Microwave repair involves high voltages and metal components that can retain dangerous charges. While some basic checks are safe, many internal parts should remain untouched unless you have proper training. Always unplug the microwave completely and allow a minute or two for capacitors to discharge; use a non-conductive tool if you must touch any interior part. Wear safety glasses and insulated gloves when inspecting door switches or wiring, and never operate the unit with the cover removed. If you see a burnt smell, melted plastic, or arcing sounds, stop immediately and seek professional service. Home Repair Guide emphasizes that risk awareness protects your home and the appliance, and when in doubt, opt for a professional repair near you.
Diagnostic approaches you can perform without disassembly
Start with the door interlock test: a microwave will not start if the door switch is faulty. With the unit unplugged, you can gently depress the door latch and listen for a click, then verify whether the switch actuates when the door closes by wiggling the door slightly and observing the magnetron's behavior when you connect the power. Check the fuse if accessible from the exterior, but never test high-voltage parts with a live circuit. A common issue is a blown thermal fuse that triggers after overheating; signs include no heat and an occasional reset treatable by a technician. Use a multimeter to check continuity on safe, low-voltage circuits like the control board wiring, but skip any tests on high-voltage components if you’re not trained. If the microwave heats inconsistently or stops mid-cycle, suspect a failing temperature sensor or control board. Document symptoms with dates and photos to share with a repair professional near you; this helps estimate costs and decide between repair and replacement.
When to replace vs repair and how to estimate costs
Costs vary and depend on the fault and availability of parts. In general, a simple door switch replacement or fuse is a low-cost DIY fix, while a faulty magnetron or control board can be expensive and may justify replacement. Home Repair Guide notes that while some repairs keep the unit in service for years, others cost more than a new model. Always weigh labor, parts, and disposal costs against new appliance prices. If you’re renting, check the landlord’s policy on appliance repairs and insurance coverage. For cost guidance, obtain a no-obligation quote from a local repair service and compare it to the price of a new unit with similar power and features. If the repair approach would surpass half the cost of a new unit, replacement often makes more sense.
Basic maintenance tips to extend life and prevent future issues
Regularly clean vents, control panels, and the interior with mild soap and water; never submerge electrical components. Keep the door seals clean and intact, as a degraded seal can cause energy loss and overheating. Use microwave-safe containers and avoid metal objects inside, which can cause arcing and damage. If you notice condensation buildup, address it promptly to prevent mold. Schedule periodic checks or a home safety audit to catch signs of wear before a breakdown.
Tools & Materials
- Screwdriver set (Phillips and flat-head)(Precision set for small screws inside cabinets; #2 Phillips preferred)
- Voltage tester(Check for live circuits before touching any interior parts)
- Insulated gloves(Protect hands when handling hot surfaces or exposed wiring)
- Safety glasses(Eye protection during inspection and disassembly)
- Multimeter (digital)(Helpful for continuity checks on low-voltage circuits)
Steps
Estimated time: Total time: 60-120 minutes
- 1
Power down and unplug the unit
Unplug the microwave from the wall outlet and wait 60 seconds to allow any residual charge in capacitors to dissipate. Set the unit on a non-conductive surface and wipe away any moisture. This step reduces the risk of electric shock during inspection.
Tip: Always unplug before handling any interior parts; treat all exposed circuits as live until proven otherwise. - 2
Inspect the door latch and interlock
A faulty door switch is a leading cause of non-start or improper heating. With the unit unplugged, gently press the door latch and listen for a distinct click; use a multimeter to confirm continuity when the door is closed. If the switch doesn’t engage, this is a good candidate for repair or replacement.
Tip: Door switches are inexpensive and often fix intermittent starts; don’t overlook this component first. - 3
Check exterior wiring and visible components
Look for damaged insulation, burnt smells, or loose connectors at the control panel and power cord. Rattling shields or a loose harness can cause intermittent operation. Do not force plugs or pull wires loose; document any looseness and proceed cautiously.
Tip: Take photos of wiring before disconnecting to aid reassembly. - 4
Evaluate high-heat safety paths (thermistor/thermal fuse)
If the unit heats inconsistently or stops heating after a short period, a faulty thermal fuse or temperature sensor may be involved. These parts are safety-critical. Only perform non-destructive tests on safe components; avoid disassembling areas containing high-voltage circuits.
Tip: If in doubt, skip high-voltage tests and consult a pro. - 5
Test control board signals and basic functions
Reassemble the outer shell and test basic functions with the door closed. Use the keypad to run a simple test sequence if your model offers it, and observe for abnormal delays or error codes. This helps determine if the fault lies with the control board.
Tip: Document any error codes to streamline professional diagnostics. - 6
Decide on repair vs replacement
If the repair involves rare parts, high labor, or uncertain safety, compare the repair cost to a new unit of similar specs. Consider warranty status and energy efficiency. If repairs exceed about half the price of a new model, replacement may be the wiser choice.
Tip: Always favor safety and long-term efficiency over a quick fix.
FAQ
Can I fix a microwave myself?
Yes for simple, non-safety-critical issues like a door switch or exterior wiring. Avoid high-voltage components unless you’re trained and equipped.
Yes, you can fix simple issues like door switches, but avoid high-voltage parts unless you’re trained.
Is it safe to repair a microwave with a damaged door seal?
A damaged seal can cause leaks and arcing. It’s best to replace the door seal or have a pro assess the unit.
A damaged door seal can be unsafe, so replace it or get a professional opinion.
How much does microwave repair typically cost?
Costs vary; minor fixes may be inexpensive, while major component failures can approach the price of a new unit. Obtain quotes and compare to replacement options.
Costs vary a lot depending on the fault; get quotes and compare to buying a new microwave.
What should I do if the microwave is smoking?
Turn off and unplug immediately. Do not try to extinguish with water inside the unit. Contact a professional and replace if necessary.
If it’s smoking, unplug now and call a pro.
When should I replace rather than repair?
If repair costs are high or the unit is old, replacement is often more cost-effective and energy-efficient. Consider warranty status and future reliability.
If repairs cost more than half the price of a new unit, replacement is often better.
Watch Video
Key Takeaways
- Unplug before any inspection or repair.
- Door interlock faults are a common DIY target.
- weigh repair costs versus replacement before committing.
- When unsure, seek professional help from Home Repair Guide.