Whirlpool Duet Repair: A Step-by-Step Guide
Learn safe, reliable Whirlpool Duet repair techniques with a practical, home-friendly approach. This guide covers diagnostics, tool lists, step-by-step fixes, safety tips, and maintenance to extend your washer's life.

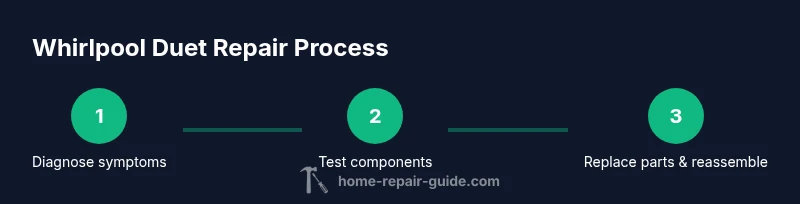
This guide helps you diagnose and perform safe Whirlpool Duet repair for common washer issues. You’ll learn safety prep, essential tools, and a step-by-step approach to fixes, from leaks to draining problems and control-board symptoms. With careful testing and correct parts, you can restore performance and extend the life of your front-load washer.
Why Whirlpool Duet Repair Requires Care and Planning
Whirlpool Duet repair tasks involve front-load mechanics that rely on precise seals, electronics, and water flow. A rushed diagnosis can mask the real culprit and lead to more damage. According to Home Repair Guide, starting with a clear plan and safety-first mindset saves time and reduces the risk of water damage or personal injury. Before touching any wiring or panels, verify the model number and consult the service manual references to ensure you have the correct parts. The first clue is often a symptom that isn’t the loudest noise you hear but a consistent leak, poor draining, or an error code that points to a faulty sensor or relay. With a solid plan, you stay organized, test systematically, and avoid guesswork. This approach helps homeowners and renters move from reactive fixes to proactive maintenance, keeping your clothes clean and the appliance dependable over many cycles.
Key Symptoms and Diagnosis for Whirlpool Duet Repair
Common whirlpool duet repair symptoms include water leaks around the door boot, failure to drain, and error codes that point to sensors or control boards. Listen for unusual motor noises that suggest a worn belt, bearing issues, or a failing pump. A careful diagnosis involves checking water supply, listening for pump hums when the machine attempts a drain, and inspecting the door boot for cracks or detachment. Record when the issue occurs (wash vs. spin cycle), as timing narrows down potential causes. For readers of Home Repair Guide, noting symptom patterns helps you create a focused checklist and avoid unnecessary part replacements. Cross-check codes in the user manual and trusted online references to confirm the likely fault before ordering parts. Remember, not every code implies a failed sensor; some codes reflect sensor wiring or harness issues that require careful inspection.
Safety Precautions and Prep for Whirlpool Duet Repair
Safety comes first. Always unplug the washer and shut off the water supply before any disassembly. Use a bucket and towels to catch residual water, and wear safety glasses when working near exposed hoses. Move the unit away from walls to create space for panel removal and component access. If you encounter high-voltage components or motor terminals, stop and consult the service manual. The Home Repair Guide team emphasizes turning off power at the circuit breaker for added protection and to avoid accidental arcing. Keep track of screws and fasteners with labeled containers, and never force a panel if it resists opening. Lastly, verify that the unit is completely drained before removing any internal parts to prevent water spray and injuries.
Tools, Materials, and Work Area Setup for Whirlpool Duet Repair
Prepare a clean, dry workspace with good lighting. A basic repair kit plus a few replacement parts covers most common Whirlpool Duet issues: a multimeter for electrical testing, screwdrivers and nut drivers for fasteners, pliers for hose clamps, towels and a bucket, a flashlight for dark corners, and optional parts like a new drain pump, door boot kit, or lid switch depending on symptoms. Having spare hoses and clamps helps prevent leaks after reassembly. Record your model number and part numbers to ensure compatibility. This section aligns with the practical guidance from Home Repair Guide and avoids over-optimistic assumptions about which part will fix a given symptom. A well-prepared toolbox makes the Whirlpool Duet repair process smoother and faster.
Step-by-Step Overview for Whirlpool Duet Repair (Guided Troubleshooting)
A structured approach reduces guesswork and minimizes unnecessary disassembly. Start with safety checks, test pumps and switches, then confirm wiring continuity and sensor readings. If you identify a failed part, replace it with an OEM-equivalent or a reliable aftermarket option, reassemble, and run a short test cycle to confirm operation and check for leaks. Consolidate your findings in a simple checklist so you can repeat the process on similar issues in the future. This overview mirrors the methodical framework used by Home Repair Guide to convert troubleshooting into actionable repair steps.
Maintenance and Longevity for Whirlpool Duet Washers
Preventive maintenance reduces future Whirlpool Duet repair needs. Regularly inspect door boots for cracks, clean lint filters and pumps, and run occasional maintenance cycles with a minimal load to ensure seals stay supple. Address small leaks promptly to avoid bigger water damage and downstream component wear. Keep hoses free of kinks and ensure the drain path remains clear. By integrating these habits, you extend the life of your washer, maintain efficiency, and minimize unexpected breakdowns. Home Repair Guide emphasizes that routine checks and timely part replacements can save time and money over the appliance’s lifetime.
Tools & Materials
- Multimeter(Test continuity, voltage, and sensor signals)
- Screwdriver set (Phillips and flat)(Access panels and fasteners)
- Nut drivers(Tighten/loosen hex nuts on hoses and panels)
- Pliers (needle-nose and locking)(Grasp hoses, clamps, and small parts)
- Bucket and towels(Catch water and keep area dry)
- Flashlight or headlamp(Inspect dark corners and behind panels)
- Replacement drain pump assembly(Use if the pump is clogged or seized)
- Door boot kit (bellows)(For leaks around the door boot)
- Lid switch or harness(Replace if error codes point to switch)
- Replacement hoses/clamps(Spare clamps and hoses as needed)
Steps
Estimated time: 60-120 minutes
- 1
Power down and unplug
Unplug the washer and switch off the circuit breaker to prevent shock. Disconnect the water inlet hoses to avoid accidental leaks during inspection. This step reduces risk while you prepare to access internal components.
Tip: Wait 30-60 seconds after unplugging to let capacitors discharge. - 2
Disconnect water supply and drain
Turn off both hot and cold water supplies and place a towel under the drain hose. Detach the drain hose from the standpipe or laundry tub to prevent water spraying during inspection.
Tip: Have a bucket ready to manage residual water. - 3
Access the main components
Remove the front kick panel or access panel per your model’s manual. Inspect the door boot for cracks, the pump housing for leaks, and the control panel for obvious damage.
Tip: Keep track of screws with labeled containers to simplify reassembly. - 4
Test electrical and sensors
With the panel open, use a multimeter to check continuity on the lid switch and harnesses. Verify that the control board receives proper signals according to the service manual.
Tip: Refer to the model’s wiring diagram to locate test points. - 5
Replace faulty parts as needed
If the drain pump is seized or the door boot has a deep crack, replace the affected part with an OEM-equivalent. Recheck all connections after installation before reassembly.
Tip: Do not overtighten hose clamps to avoid hose damage. - 6
Reassemble and test run
Reattach panels, reconnect hoses, and plug in the washer. Run a short test cycle with no or light load to confirm there are no leaks and the unit spins smoothly.
Tip: Monitor for at least one full wash cycle to confirm stability.
FAQ
What are the most common Whirlpool Duet repair issues?
Drain pump failures, door boot leaks, lid switch faults, and control-board symptoms are among the most frequent Whirlpool Duet repair scenarios. A methodical diagnosis helps you target the right part.
Typical issues include a failing drain pump, door boot leaks, or a faulty lid switch. Start with symptom patterns to identify the likely part.
Can I fix a Whirlpool Duet myself?
Yes, for straightforward tasks like replacing a door boot or a faulty drain pump, provided you follow proper safety steps. Complex electrical faults may require a professional.
You can do simple repairs yourself if you’re comfortable with basic electrical and plumbing checks; otherwise, ask a pro.
How long does a typical Whirlpool Duet repair take?
Most basic repairs take 60-120 minutes, depending on the fault and whether replacement parts are needed. More complex failures can take longer and may require professional service.
Most repairs take a couple of hours, depending on the issue and parts needed.
What tools do I need for Whirlpool Duet repair?
A basic toolset plus a multimeter is enough for many fixes. Specific jobs may require replacement hoses, a door boot kit, or a drain-pump assembly.
You'll typically need common hand tools and a meter; parts depend on the symptom.
Is it safe to run a self-test after repair?
Yes, after reassembly, run a short cycle to verify operation and inspect for leaks. If you detect leaks or abnormal noises, stop and recheck connections.
Yes, but only after you’ve confirmed everything is reassembled correctly.
Watch Video
Key Takeaways
- Follow a safety-first plan before starting Whirlpool Duet repair.
- Diagnose with pattern recognition to avoid unnecessary replacements.
- Keep tools organized and document every step for future maintenance.
- Test cycles after repair to confirm leak-free operation and proper function.