Whirlpool Dryer Repair Technician: Step-by-Step Guide
A comprehensive guide to hiring and working with a Whirlpool dryer repair technician, covering symptoms, diagnostics, safety, costs, and smart questions to ask for reliable, lasting repairs.

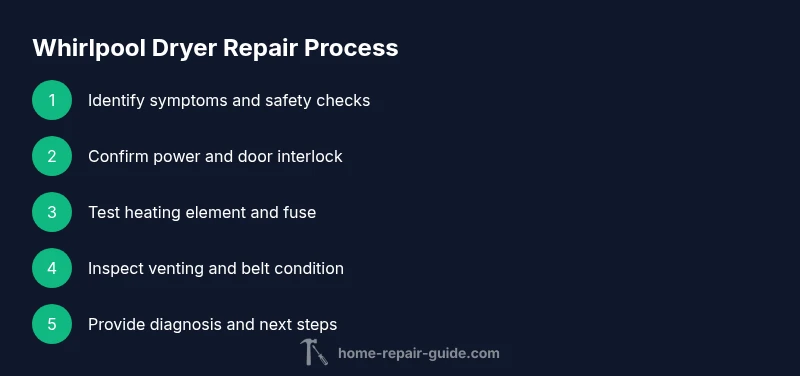
Key note: If your Whirlpool dryer won’t heat, won’t start, or makes unusual noises, you likely need a Whirlpool dryer repair technician. This quick guide outlines the decision steps: confirm safety, assess symptoms, decide between DIY and pro, and prepare your questions before scheduling a visit. Following these steps helps you minimize downtime and ensure a safe, lasting repair.
Assessing Symptoms and Safety
According to Home Repair Guide, start by identifying what isn’t working and ensuring you and your family are safe around a potentially energized appliance. A Whirlpool dryer repair technician is typically needed when simple checks do not restore operation or when multiple symptoms occur. Common signals include the dryer failing to heat, not tumbling, a loud rumble during operation, or the unit tripping a breaker. Before you call a pro, unplug the dryer and disconnect the power cord from the outlet, then inspect the cord for wear. Never bypass a missing ground pin or operate the unit while any cover is removed; moving parts can cause injury.
Document the symptoms with brief notes, take pictures of any visible damage, and note model/serial numbers from the data plate. If you can safely reach the back or vent, check for obvious obstructions, but do not disassemble belts or the drum unless you have proper training. The Home Repair Guide team emphasizes safety first—if you are unsure, stop and schedule a professional assessment.
When to Call a Whirlpool Dryer Repair Technician
There are times when DIY troubleshooting is appropriate, but some signs indicate you should hire a Whirlpool dryer repair technician promptly. If the dryer refuses to start despite power and door switch tests, or if you notice unusual electrical smells, sparks, or a burning sensation, stop use and contact a professional right away. A technician can diagnose heating element failures, control board malfunctions, or sensor issues that can pose fire risks. Even if the unit appears to operate, a persistent clunking noise, grinding, or drum not turning may point to worn rollers, belt failures, or a misaligned drum that requires specialized tools and parts. Home Repair Guide's guidance suggests scheduling service when simple lint cleanup or vent clearing does not restore performance, or if you discover a history of repeated outages.
What a Technician Will Do: Diagnostics and Tests
During a typical service visit, a Whirlpool dryer repair technician conducts a structured sequence of checks. They will verify continuous power, test the door interlock, and examine the start switch. They’ll inspect the thermal fuse, heating element, thermostat, and high-limit switch, and assess the dryer’s venting for blockages. A licensed pro also uses a multimeter to measure resistance and continuity and may run a diagnostic test via the dryer’s control board. The goal is to pinpoint the fault—whether it is a failed belt, a sensor, a timer, or a sensor board—without unnecessary part replacements. Expect professional to explain findings, show worn parts, and provide a written estimate before proceeding with repairs.
Common Whirlpool Dryer Issues and Likely Causes
On many Whirlpool models, heat problems are caused by a blown thermal fuse or a faulty heating element. A no-heat condition can result from a failed high-limit thermostat or a clogged vent. If the drum won’t turn, internal belt or pulley wear is often to blame, sometimes exacerbated by a worn drum glide or idler pulley. Odd noises may indicate worn bearings or a loose drum. A professional will also assess the control board for software glitches that mimic mechanical faults. While some issues are straightforward to diagnose, others require specialized tools and parts from Whirlpool or aftermarket suppliers.
DIY Troubleshooting You Can Safely Perform
Certain basic checks can be done without exposing yourself to major hazards. Always unplug the unit and let it cool before touching components. Clean the lint screen and vent duct—blocked airflow can cause overheating and trigger safety switches. If your model has a simple thermal fuse, you can check for continuity with a multimeter after turning off power; however, do not replace parts based on a visual inspection alone. Resetting the control panel by unplugging for a few minutes can clear minor software glitches. If you identify a gas or electrical smell, leave the area and call a pro immediately.
Cost, Fees, and Scheduling: Budgeting for Service
Costs for a Whirlpool dryer repair can vary based on location, parts, and the nature of the fault. Expect a diagnostic fee in the range of broad estimates; labor rates typically fall within tens of dollars per hour, plus the cost of replacement components such as belts, pulleys, sensors, or control boards. A common scenario is a diagnostic visit followed by a parts-inclusive repair, which could range from a few hundred dollars to several hundred dollars depending on the model and required components. Always request a written estimate that itemizes labor, parts, and any additional fees, and confirm warranty coverage if you recently purchased the appliance.
How to Find a Qualified Whirlpool Dryer Repair Technician
To find a trustworthy Whirlpool dryer repair technician, start with Whirlpool-authorized service providers and brand-certified technicians. Check the service history with the Whirlpool brand, ask for license numbers and insurance, and request proof of training or certification. Read reviews from other homeowners and ask for a detailed written estimate. For reliability, prioritize technicians who provide a warranty on parts and labor and who clearly explain the diagnosis and recommended steps. If a repair requires a major component, compare with a new unit and discuss options with the technician.
Questions to Ask Before You Hire
Prepare a short list of questions to ensure the technician is right for your Whirlpool dryer repair. Ask about credentials, estimated time on-site, and whether they use genuine Whirlpool parts. Confirm warranty terms, return policies, and the possibility of price escalation if additional issues are found after breakdown assessment. Request a written scope of work and a detailed itemized quote, including diagnostic fees, labor, and replacement parts. Also ask about disposal of old parts and whether the technician will test the dryer after repair to verify proper operation.
What Happens During On-Site Repair Visit
On arrival, the technician will present credentials, review the observed symptoms, and confirm safety steps. They’ll re-check power, test components, and confirm the faulty part. If replacement is necessary, they should show the old part, explain why it failed, and provide a price for the new part and the service call. After replacement, they will reassemble, perform a run test, and guide you on proper operation. Expect to receive a written invoice and potential warranty details for labor and parts.
Preventive Maintenance and Long-Term Care
After the Whirlpool dryer repair, preventive maintenance helps extend the unit’s life and reduce future service calls. Schedule periodic vent cleaning, keep the lint trap clean, and check seals around the door. Periodically inspect the drive belt for signs of wear and listen for changes in drum operation. Maintain an unobstructed exhaust duct and ensure the dryer is level to avoid vibration. A simple maintenance routine, performed annually or per manufacturer recommendations, can help you avoid unexpected breakdowns and keep your Whirlpool dryer performing optimally.
Tools & Materials
- Multimeter with continuity testing(Essential for basic electrical checks and fuse tests)
- Screwdriver set (Phillips and flat)(Torque and size vary by model; have both on hand)
- Nut drivers and pliers(Common fasteners on panels and vent connections)
- Voltage tester / non-contact tester(Safe power verification before touching wires)
- Flashlight or headlamp(Insufficient lighting leads to missed obstructions)
- Replacement drive belt (if needed)(Verify belt size for Whirlpool model)
- Replacement fuses or thermostats (if needed)(Only install if you’ve diagnosed a failure)
- Whirlpool dryer model manual or data plate(Model number aids parts lookup)
- Dust mask and gloves(Safety and cleanliness during vent inspections)
- Old towels or rags(Catch debris and protect surfaces)
Steps
Estimated time: 2–4 hours for diagnosis and basic checks; additional time for on-site repair depends on parts availability
- 1
Prepare and verify safety
Unplug the dryer and disconnect power. Gather model details and symptoms, and set a clean workspace. This prevents shocks and ensures you have the right replacement parts if needed.
Tip: Always confirm power is off with a non-contact tester before touching any wires. - 2
Check basic operation
Test the door switch, start button, and thermal fuse with a multimeter. If the dryer won’t power on, the issue is likely electrical rather than mechanical.
Tip: Document readings and compare with the datasheet expectations for your model. - 3
Inspect venting and lint trap
Remove lint from the trap and check the vent for obstructions. Restricted airflow can cause overheating and trigger safety features.
Tip: Use a flashlight to look inside the duct and clear any buildup with a vent brush. - 4
Assess heating and airflow
If there is power but no heat, test the heating element and thermistor with the multimeter and inspect the thermal fuse for continuity.
Tip: Only perform continuity checks with the appliance disconnected from power. - 5
Inspect mechanical components
For drums that won’t turn or make grinding noises, check the belt, idler pulley, and drum rollers for wear.
Tip: Handle with care to avoid belt snapping or misalignment. - 6
Decide DIY vs. pro
If tests indicate a complex component or unsafe wiring, contact a Whirlpool dryer repair technician for a formal diagnosis.
Tip: When in doubt, default to professional service to prevent risk of fire or electric shock. - 7
Prepare for the service call
Keep notes of symptoms, readings, and photos ready. Have model/serial numbers and warranty details accessible.
Tip: Ask for a written estimate with parts, labor, and diagnostic fees before any repair. - 8
Follow up after service
Test the dryer after repairs are completed and request a warranty card for parts and labor.
Tip: Save the invoice and note any recommended maintenance intervals.
FAQ
Do I need a Whirlpool-certified technician to repair my Whirlpool dryer?
Certification isn’t always required, but it greatly improves accuracy and safety for Whirlpool models. A certified technician is more likely to have access to genuine parts and model-specific service procedures.
certification helps ensure accuracy and safety, especially with Whirlpool models.
What is a typical diagnostic fee for a dryer issue?
Most shops charge a diagnostic fee to identify the fault. If you proceed with repairs, the diagnostic fee is often applied toward the final invoice. Ask for a written quote before any work begins.
Expect a diagnostic fee; get a written quote before repairs.
Can I replace a dryer belt myself?
Replacing a drum belt is doable for some handy homeowners, but it requires correct alignment and a safe power-disconnect. If you’re unsure, let a Whirlpool dryer repair technician handle it to avoid damage or injury.
You can DIY if you’re comfortable, but consider professional help for safety.
How long does a typical on-site repair take?
On-site repairs vary by issue and parts availability but usually range from a couple of hours to a full day for complex replacements. A written estimate will include the expected duration.
Most repairs take a few hours, but some can take longer depending on parts.
What safety precautions should I take before the technician arrives?
Clear the area around the dryer, unplug the unit, and ensure pets or children are kept away during the visit. Have model information ready to help the technician quickly identify parts.
Unplug the dryer and keep kids away; have model details ready.
Watch Video
Key Takeaways
- Identify symptoms and prioritize safety before any work
- Know when to DIY vs. when to hire a Whirlpool dryer repair technician
- Request a written estimate with clear parts and labor details
- Verify credentials, parts, and warranty before permitting repairs
- Follow post-service testing and maintenance recommendations
- Keep preventive maintenance on a regular schedule to extend dryer life