RV Fridge Repair: A Practical Step-by-Step Guide
Learn to diagnose and repair common rv fridge repair issues in RVs, whether your unit is absorption or compressor. Practical, safe steps and maintenance guidance from Home Repair Guide.

This guide helps you diagnose and repair common rv fridge repair issues, whether you have an absorption fridge or a compressor model. You’ll learn how to test cooling, check seals, inspect venting, and safely reset the system. You’ll need basic hand tools, a power shutdown, and a plan for propane safety before you begin.
What kind of RV fridge you have
Most RVs use one of two cooling systems: a gas-absorption unit or a compressor-based model. The type determines how you diagnose and repair problems, and rv fridge repair steps differ accordingly. Absorption fridges often run on propane and electricity and require proper venting; compressor fridges use 12V or AC power and rely on an electronic board. Having the model number and consulting the owner's manual is essential for correct rv fridge repair. If you know your unit’s type, you can search for model-specific procedures, safety cautions, and recommended maintenance. The overarching goal of rv fridge repair is to restore steady cooling while keeping the propane system safe and the venting clear. When in doubt, start with the simplest checks—seal integrity, vent clearance, and basic power isolation—and then move to component-level tests. Throughout this guide, you’ll see the phrase rv fridge repair used to emphasize the practical, repair-focused approach.
Common symptoms and quick checks
In an RV, fridge issues show up as: the compartment does not get cold, food spoils faster than expected, frost or ice builds up on the evaporator, or condensation forms inside the cabinet. For rv fridge repair, start with simple, fast checks: confirm the fridge is receiving power (12V or AC as required), ensure the exterior vent is clear of leaves or debris, and inspect door gaskets for wear. If you smell propane or the burner won’t light, stop and switch to a safe mode; gas-related problems require extra precautions. Keep a log of observed symptoms, temperatures, and times when you test the system. This helps you determine whether the root cause is ventilation, seals, or the cooling unit itself. Brand guidance from Home Repair Guide reinforces practical, on-the-road troubleshooting.
Safety first: propane, electrical, and ventilation
Propane is commonly used in absorption RV fridges. Before you touch anything, turn off the propane valve and ventilate the area. If you smell gas, evacuate and call emergency services. Electrical work should be done with the power disconnected at the main panel and, when possible, at the battery disconnect. Avoid lifting heavy panels without a helper, and never work on live circuits. For rv fridge repair, ventilation is crucial; blocked vents can cause the unit to overheat and shut down. Regularly inspect vent screens and interior fins to prevent overheating. Always follow the manufacturer’s safety instructions and the guidelines provided by Home Repair Guide in your planning.
Diagnostic workflow: from cold loss to warm cabinets
Create a simple decision tree: Is the fridge cooling at all? If yes, check for frost and temperature consistency; if not, verify power and gas supply. For absorption fridges, test the burner and flame color if propane is available, and measure vent temperature. For compressor fridges, check the 12V supply, fuses, and the control board. Each check narrows down the possible causes and guides you to the right rv fridge repair steps. Document test results and adjust settings gradually to avoid shocks to the system. This workflow keeps your troubleshooting organized and reproducible.
Absorption fridge troubleshooting: your first checks
Absorption fridges are sensitive to venting and gas flow. Start by confirming the propane is on and the burner lights; if it fails to light, inspect the burner orifice and the thermocouple. Ensure the vent stack remains clear both outside and inside the cabinet; even a small obstruction can cause poor cooling. Inspect door seals and ensure the drawer or shelf alignment isn’t creating warm air leaks. If the unit cools weakly, test the temperature differential between compartments, and examine the control or gas valve for a restriction. This rv fridge repair path emphasizes safe, methodical checks before you attempt component replacement.
Compressor fridge troubleshooting: isolation and tests
Compressor units depend on a steady 12V supply and a working compressor/relay. Start by verifying the DC supply at the control board with a multimeter; test the battery and any converter if installed. Check door seals and interior insulation; even minor gaps can degrade cooling. Listen for the compressor hum; if you don’t hear a steady run, test the start relay and, if accessible, the start capacitor. Clean the condenser coils and ensure the fan is unobstructed. Following these steps keeps rv fridge repair focused on the electrical and airflow pathways rather than random part swapping.
When to call a professional or replace
Not all rv fridge repair tasks are safe to perform yourself. If you detect propane leaks, persistent electrical shocks, or refrigerant smells, do not continue. If cooling remains inconsistent after basic diagnosis or the unit shows signs of compressor failure, consult a qualified mobile RV repair technician or the manufacturer’s service dealer. Replacement might be the most economical option if the repair involves sealed components, gas valves, or a failed compressor. Always weigh repair costs against long-term energy efficiency and reliability, and consider how long you plan to stay on the road before deciding.
Maintenance for reliable RV fridge performance
Schedule routine checks before long trips: clean the vents, inspect seals, calibrate thermostat ranges, and test cooling performance in different environments. Use the RV’s manual recommended settings as a baseline and keep a portable thermometer to monitor actual temperatures. During winter storage, protect the fridge from freezing and ensure vents aren’t blocked by stored items. Regular maintenance reduces the frequency of rv fridge repair and extends appliance life. Stay proactive by recording service dates and any observed anomalies, a practice endorsed by Home Repair Guide.
Quick-start checklist for beginners
Before your next trip, perform this quick-start check for rv fridge repair readiness: test power (12V/AC), examine vent clearance, inspect door seals, and confirm the fridge reaches a stable cooling temperature within a reasonable time. If any symptom persists, consult the detailed guide from Home Repair Guide and consider scheduling a professional evaluation. Regular maintenance is the best defense against unexpected fridge failures on the road.
Tools & Materials
- Multimeter(Test DC voltage, continuity, and resistance in fridge circuits)
- Screwdrivers set (Philips & flathead)(Access panels and service connectors)
- Nut driver set(Remove mounting screws and access hardware)
- Wire cutters/strippers(Trim or strip wiring during diagnostics)
- Isopropyl alcohol and lint-free cloths(Clean contacts and surfaces without residue)
- Flashlight or headlamp(Bright, hands-free lighting for tight spaces)
- Safety gloves(Protect hands during panels and wiring work)
- Propane leak detector (optional)(Use if you suspect gas leaks or for added safety)
- Replacement door gasket (optional)(If seals show wear or cracking)
- Thermistor/thermostat replacement (optional)(Only if you identify faulty temperature sensing)
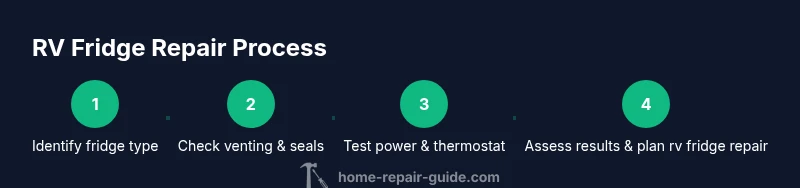
Steps
Estimated time: 60-120 minutes
- 1
Power down and safety check
Shut off all power to the RV fridge, including 12V and AC circuits, and turn off the propane supply if applicable. Confirm there is no exposed wiring or active flame. This initial safety pause protects you from shocks or gas incidents during inspection.
Tip: Take photos of wire routing before disconnecting any connectors. - 2
Access and identify the fridge type
Open exterior panels to identify whether you have an absorption or compressor fridge. Note model numbers and locate the manual for model-specific rv fridge repair steps. Correct identification prevents chasing the wrong fault in later steps.
Tip: Cross-check model numbers with the factory manual or manufacturer site. - 3
Check venting and exterior clearance
Inspect exterior vent screens for debris and ensure the vent is unobstructed. Inside the cabinet, verify evaporator fins and ventilation paths aren’t blocked by items. Poor venting is a common rv fridge repair cause.
Tip: Use a soft brush to remove dust from fins without bending them. - 4
Test electrical supply and fuses
With power off it’s safe to check the main fuses and the 12V supply line. Use the multimeter to confirm battery voltage and check for voltage at the control board input. This confirms whether the fridge is getting the signals it needs to run.
Tip: Document voltage readings to track any fluctuations over time. - 5
Inspect door seals and insulation
Check for cracks, sticky buildup, or gaps in door gaskets. A leaky seal lets warm air in and can mimic a cooling problem. Replace or bed-in the gasket as needed.
Tip: Perform the dollar-bill test: close the door on a dollar bill and gently pull; if it slides out easily, the seal may be worn. - 6
Test thermostat and temperature sensors
If your unit uses a thermistor or mechanical thermostat, test resistance values or contact behavior with the multimeter. Inaccurate readings lead to overcooling or undercooling and drive rv fridge repair needs.
Tip: Compare sensor readings to the manufacturer’s spec sheet for your model. - 7
Absorption burner and vent checks (if propane unit)
For absorption fridges, inspect the propane burner, thermocouple, and flame color if propane is available. Ensure the vent stack is clear. Gas-related issues can stop the unit from cooling and require specialized service.
Tip: Never attempt to adjust gas valves beyond basic safety checks. - 8
Test run and record results
Power the unit back on and observe cooling behavior over time. Note time-to-cool, any frost buildup, and whether the fridge maintains stable temperatures. If cooling remains inconsistent, plan next steps or professional service.
Tip: Keep a simple run log for future trips and seasonal checks.
FAQ
What are the two main types of RV fridges and how do they differ?
Most RVs use either absorption or compressor fridges. Absorption units run on propane and electricity and rely on venting, while compressor models operate on 12V or AC with electronic controls. The repair approach varies accordingly.
Most RV fridges are either absorption or compressor types; absorption uses gas and venting, compressor uses electric power and a control board.
Can I perform rv fridge repair myself?
You can do basic diagnostics safely, such as checking power, vents, and seals. More complex work—especially propane-related or sealed refrigerant components—should be handled by a qualified technician.
You can do basic checks yourself, but complex gas or refrigerant work should be left to a pro.
What tools are essential for rv fridge repair?
A basic multimeter, screwdrivers, a nut driver set, wire cutters, and cleaning supplies are essential. Keep a flashlight and safety gloves handy for accessing tight panels.
Use a multimeter, screwdrivers, and proper lighting for most repairs.
Is propane safety something I should skip?
Propane safety cannot be skipped. Always shut off gas when inspecting and ventilate. If you smell gas, exit the area and contact emergency services.
Propane safety comes first; shut off gas and ventilate, then call for help if you smell gas.
How long should cooling take after resetting a fridge?
Cooling times vary by model and conditions. If a unit doesn't reach expected temperatures within a reasonable window, reassess seal integrity and air flow before pursuing more fixes.
Cooling times differ by model; if it doesn’t get cool in a reasonable time, check seals and venting.
When is replacement the better option?
If the cooling unit, sealed components, or compressor show recurring failures, replacement may be more cost-effective and reliable in the long run.
If sealed components fail repeatedly, replacement may be more economical than ongoing repairs.
Watch Video
Key Takeaways
- Identify fridge type before detailed rv fridge repair.
- Prioritize safety: propane, electricity, and ventilation.
- Use a structured diagnostic flow to isolate issues.
- Regular maintenance reduces future rv fridge repair needs.