Repair Car Thermostat: Step-by-Step Guide
Learn how to diagnose and repair a car thermostat with a practical, safety‑driven approach. This Home Repair Guide tutorial covers symptoms, tools, steps, and testing to restore proper engine cooling.

Repairing a car thermostat involves diagnosing whether it’s stuck open or closed, replacing the thermostat and gasket, and properly refilling and bleeding the cooling system. Start by confirming symptoms (overheating, inconsistent heat, or rapid temperature swings), gather tools, and follow a safe step-by-step process. According to Home Repair Guide, a careful replacement restores engine temperature regulation and prevents further damage.
What is a car thermostat and how it works
The car thermostat is a small, valve-like device inside the cooling system that controls when coolant flows from the engine to the radiator. When the engine is cold, the thermostat stays closed to warm up quickly. As the engine reaches operating temperature, it opens to regulate flow and prevent overheating. A failing thermostat can either stick open, letting the engine run cold and wasting fuel, or stick closed, causing rapid overheating. In either case, a repair car thermostat that is not functioning correctly can lead to heat loss inside the cabin, erode engine performance, and shorten the life of components like the water pump and radiator. In this guide, we walk through identification, safety, and a careful replacement process so homeowners and renters can handle routine thermostat repairs with confidence. For reliable guidance, Home Repair Guide emphasizes methodical checks and correct cooling system recovery after replacement.
Symptoms of a failing thermostat
A thermostat that is failing usually shows several telltale signs. The temperature gauge may read high or erratic, the cooling fan may run continuously, or the heater may stop producing warm air. You might notice slow warming of the engine, frequent overheating on hot days, or leaks around the thermostat housing. If the thermostat sticks closed, the engine can overheat quickly, potentially triggering the temperature warning and risking head gasket damage. If it sticks open, the engine may never reach optimal operating temperature, reducing fuel efficiency and making emissions worse. These symptoms tell you it’s time to inspect the thermostat as part of a broader cooling system check. Remember that other issues, like a stuck radiator cap or a failing water pump, can mimic thermostat problems. In all cases, proceed with a careful diagnostic flow to confirm that repair car thermostat is the right fix.
Tools and parts you may need
Gathering the right tools before starting makes the job smoother and safer. Essential items include a replacement thermostat with gasket, fresh coolant, a drain pan, a torque wrench (if your vehicle requires specific torque), socket set, screwdrivers, and pliers. You’ll also want a funnel for refilling, shop rags for spills, and gloves and eye protection for safety. Some vehicles demand a specific coolant type, so check the owner’s manual for the right mixture and color. If your car has a plastic thermostat housing, a compatible sealant or gasket material may be needed; always replace the gasket when removing the housing. Having anti-freeze/coolant ready for a safe disposal later helps keep your shop compliant with local rules. A quick note: verify you’re buying a thermostat that matches your make, model, and engine size to avoid mismatches when performing repair car thermostat tasks.
Safety considerations and preparation
Working around a hot engine carries burn risk, so wait until the cooling system has cooled. Disconnect the negative battery terminal to prevent shorts while removing electrical connections nearby. Place a pan under the cooling system to catch old coolant and protect your skin with gloves; coolant is toxic and should be disposed of properly. Work in a well-ventilated area and avoid inhaling fumes from cleaning agents. If you’re unsure about the location of the thermostat, consult your vehicle repair guide for your model. Note that some vehicles require a coolant pressure test after replacement to verify there are no leaks. Following these safety practices helps keep the process efficient and reduces the chance of injury during repair car thermostat work.
Step-by-step diagnostic approach
Begin with a visual inspection of the thermostat housing and hoses for cracks, corrosion, or leaks, then check the thermostat’s presence in the housing. If accessible, gently remove parts to inspect the valve for obvious signs of sticking or warping. Assess the coolant’s condition; old coolant can cause deposits that affect valve operation. A simple temperature check with an infrared thermometer can help you verify whether the engine warms up to the expected range and holds it. If a thermostat test reveals consistent overheating despite fresh coolant, you may be dealing with a faulty sensor or water pump. Document your findings during repair car thermostat work to guide the replacement decision.
Step-by-step replacement procedure
Drain coolant into a container and label the type for recycling. Remove the thermostat housing bolts with a socket, comparing the old thermostat and gasket to ensure you have the correct replacement. Install the new thermostat with the spring facing toward the engine and reseal with the included gasket. Reassemble the housing and snug bolts to the specified torque. Refill coolant through the reservoir and start the engine, then bleed air from the cooling system until the thermostat opens and airflow stops. Check for leaks and monitor engine temperature behavior under a light drive to confirm results. Tip: Take photos before disassembling to aid reassembly.
Post-repair testing and maintenance
After repair car thermostat replacement, run the engine with the heater set to full heat and the fan on to ensure the heater returns warm air as the thermostat cycles. Monitor the temperature gauge, watch for overheating, and ensure the cooling fans engage at the correct times. Check for any coolant leaks around the housing and hoses, and inspect for white steam or sweet smell that could indicate a leak. If your vehicle has a closed cooling system, consider a brief coolant flush after replacement to remove old deposits and protect the new thermostat. Regular checks of hoses and clamps will help catch problems before they cause overheating.
Common mistakes and troubleshooting tips
Common mistakes include not allowing the engine to cool fully, reusing old gaskets, or over-tightening housing bolts. Always verify the type of coolant and do not mix old and new coolant; poor bleeding can trap air and cause overheating. If overheating recurs, inspect the radiator cap, water pump, and hoses, and consider a professional inspection if the car has persistent cooling issues. For best results, follow the manufacturer’s torque specs and use the correct coolant type for your vehicle. Keep a small container to collect old coolant and dispose of it per local environmental rules.
Tools & Materials
- Replacement thermostat kit(Choose a unit that matches your make, model, and engine size; gasket included.)
- Coolant(Use the manufacturer-recommended type; do not mix old and new coolant.)
- Gasket or O-ring(Typically included with the thermostat kit; replace to prevent leaks.)
- Drain pan(To collect old coolant for proper disposal.)
- Socket set and screwdrivers(Use metric sizes appropriate to your vehicle; have a ratchet handy.)
- Gloves and eye protection(Protect skin from hot coolant and sharp edges.)
- Funnel(Useful for refilling without spills.)
- Torque wrench(If your vehicle specifies a precise torque for housing bolts.)
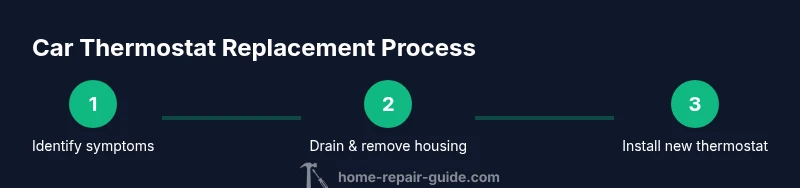
Steps
Estimated time: 60-90 minutes
- 1
Identify symptoms
Confirm that overheating or heat loss patterns point toward the thermostat. Note any heater performance issues and cooling system behavior. Document locations of hoses and the thermostat housing to prepare for disassembly.
Tip: Take a quick photo of the setup before removing parts to aid reassembly. - 2
Drain coolant
Place a drain pan under the radiator drain valve or lower hose and collect coolant as you open the system. Allow the engine to cool completely before starting this step to avoid burns.
Tip: Keep coolant in a labeled container for recycling or disposal according to local rules. - 3
Remove thermostat housing
Loosen the housing bolts with a socket, detach the housing, and carefully lift out the thermostat and gasket. Inspect the housing mating surface for corrosion or debris that could cause a poor seal.
Tip: Clean the mating surface with a soft scraper or plastic brush; avoid gouging metal. - 4
Install new thermostat
Position the new thermostat with the spring toward the engine and install the gasket. Re-seat the housing, ensuring a snug fit and even gasket contact.
Tip: Double-check the orientation marks on the thermostat and housing before seating. - 5
Refill and bleed
Reassemble the housing, refill the cooling system with the correct coolant, and bleed air until the system runs smoothly and the thermostat opens normally. Check for leaks during a short idle.
Tip: If your vehicle has a bleed valve, use it to vent trapped air after filling. - 6
Test drive and verify
Take a short drive to bring the engine to operating temperature. Observe the thermostat’s operation, cooling fan activation, and gauge behavior. Recheck for leaks after cooling.
Tip: Monitor under varied loads; a slow return to normal temperature indicates a successful repair car thermostat swap.
FAQ
What does a thermostat do in a car?
The thermostat regulates coolant flow between the engine and radiator, keeping the engine at its optimal temperature. A faulty unit can cause overheating or underheating, affecting performance and longevity.
The thermostat controls when coolant moves to the radiator to keep the engine at the right temperature.
How can I tell if it's stuck open vs stuck closed?
If the engine runs hot quickly, the thermostat may be stuck closed. If the engine runs cool or never reaches operating temperature, it could be stuck open. Use temperature readings and heater performance as clues.
Open means the engine may stay cold; closed means it overheats fast.
Can I drive with a faulty thermostat?
Driving with a faulty thermostat can risk overheating and engine damage. In many cases, it’s best to address it promptly and avoid long trips until repaired.
It's risky to drive with a thermostat problem; safer to fix it before long trips.
How long does replacement take?
A typical thermostat replacement takes about 60-90 minutes depending on vehicle access and cooling system design. More complex setups may require extra time.
Usually about an hour or so, depending on the car.
Will replacing the thermostat fix overheating?
If overheating was caused by a faulty thermostat, replacement often resolves the issue. If overheating persists after replacement, check other cooling components like the water pump, radiator, and cooling fan.
Replacing the thermostat often fixes overheating, but other issues can also cause it.
Do I need to flush the cooling system after replacement?
Flushing is not always required, but a relief drain and a coolant refresh can help remove deposits and ensure proper flow after replacement.
A coolant refresh can help, but it isn't always mandatory.
Watch Video
Key Takeaways
- Identify symptoms to target the thermostat repair accurately.
- Use the correct thermostat kit and fresh coolant for a reliable seal.
- Bleed air and test under real driving conditions.
- Follow safety rules to prevent burns and chemical exposure.