Car Thermostat Repair: A Practical Step-by-Step Guide for DIYers
A comprehensive, safety-first guide to diagnosing and repairing a car thermostat. Learn symptoms, tools, steps, and post-repair checks for durable cooling system health. Includes DIY tips from Home Repair Guide.

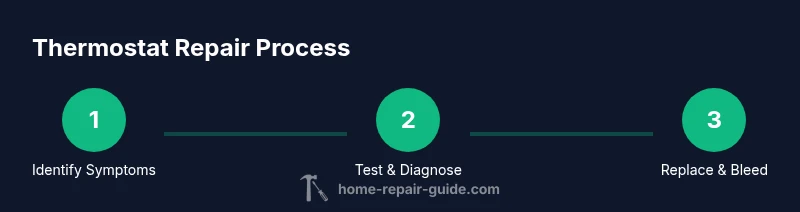
In this guide you will perform thermostat repair car tasks to restore proper cooling and prevent overheating. You’ll diagnose symptoms, drain and refill coolant safely, and replace the thermostat with a new gasket. You’ll need basic hand tools, a replacement thermostat kit, fresh coolant, and a bleed tool or clear tube. Adhere to safety warnings for a durable fix.
Understanding the thermostat's role in car cooling
The car thermostat is a small but critical valve that regulates coolant flow between the engine and the radiator. When the engine is cold, the thermostat stays closed to help the engine reach its optimal operating temperature quickly. Once warm, it opens to allow hot coolant to travel to the radiator for cooling. A thermostat that sticks open or closed disrupts this balance, leading to overheating, longer warm-up times, or poor cabin heat. Regular maintenance and using the correct coolant mix helps prevent thermostat-related issues. According to Home Repair Guide, catching thermostat problems early can prevent more expensive engine damage. In many vehicles, the thermostat is located in the engine block or near the upper radiator hose, behind a mounting plate or housing. Access often requires a few removal steps, careful cooling-system precautions, and correct reassembly to avoid leaks.
Signs your car thermostat may be failing
A failing thermostat can show several telltale symptoms. Overheating engines with a rising temperature gauge or sudden fluctuations suggest the thermostat may be stuck closed or partially open. If the heater barely gets warm, the thermostat could be stuck open, preventing the engine from reaching operating temperature. Other clues include coolant leaks around the thermostat housing, quick drops in temperature after engine shutoff, or a dashboard warning light. If you notice any of these signs, plan a careful inspection using proper safety gear and follow the step-by-step approach in this guide. Home Repair Guide’s analysis emphasizes addressing thermostat issues early to avoid cascading cooling system problems.
Diagnosing safely: quick checks before replacement
Before replacing the thermostat, perform a few safe checks. Ensure the engine is completely cool before touching coolant components. Inspect the thermostat housing for cracks or obvious gasket leaks and verify coolant level and condition. If you can access the thermostat, perform a basic diagnostic test by removing the thermostat and testing its opening behavior in a pot of hot water, watching for a reasonable opening as water temperature rises. This test helps confirm whether a replacement is needed. If your vehicle’s cooling system uses a bleed screw or vacuum-based bleed, be prepared to remove air pockets after reassembly. Always work with clean rags handy and dispose of old coolant properly.
Replacing the thermostat: what to expect
Replacing a thermostat typically involves draining some coolant, removing the thermostat housing, extracting the old thermostat, cleaning the mounting surfaces, installing a new thermostat with a fresh gasket, and reassembling the housing. Take care to orient the thermostat correctly so the hot and cool flow paths align as designed. Reuse or replace the gasket depending on its condition. Ensure all hose clamps and connections are secure, and torque bolts to the vehicle manufacturer’s specifications. A new thermostat helps ensure accurate temperature control and reliable heating performance.
Post-repair testing and maintenance
After installing a new thermostat, refill the cooling system with the correct coolant type and bleed any air pockets according to your vehicle’s manual. Start the engine and monitor the temperature needle for a steady climb to the normal operating range, then hold at that range until the thermostat cycles between open and closed when needed. Check for leaks around the thermostat housing and hose connections once the engine reaches operating temperature. If possible, drive a short test route to ensure the cooling system maintains consistent temperature and the heater functions properly. Regular inspections can catch issues before they become major repairs.
Common mistakes and how to avoid them
Common mistakes include opening the radiator cap while the engine is hot, failing to fully drain coolant before servicing, reusing an old gasket, and not properly bleeding air from the cooling system. To avoid these, wait for the engine to cool, use a drain pan and funnel, install a new gasket, and follow the manufacturer’s bleeding procedure. Take photos during disassembly to ensure correct reassembly order and orientation. Double-check all clamps and hoses for leaks after the repair.
Tools & Materials
- Replacement thermostat kit (with gasket)(OEM-style or compatible aftermarket; confirm vehicle-specific temperature rating)
- Coolant (fresh, correct type for your vehicle)(Use the vehicle’s recommended coolant type and mix)
- Drain pan(Capable of catching hot coolant)
- Funnel(For refilling without spills)
- Socket set (metric/SAE) and screwdrivers(For removing housing bolts)
- Pliers, hose clamps, and a gasket scraper(To remove old gasket and secure hoses)
- Safety gear (gloves, eye protection)(Protect hands and eyes from coolant and sharp objects)
- Rags or towels(Clean spills and wipe mounting surfaces)
- Torque wrench (optional but recommended)(Use if your vehicle specifies a torque value)
- Coolant-safe disposal container(For old coolant disposal per local regulations)
- Thermal-safe flashlight or work light(Better visibility in tight engine bays)
Steps
Estimated time: 45-90 minutes
- 1
Prepare and safety check
Ensure the engine is completely cool. Put on safety gear, place a drain pan beneath the thermostat housing, and gather all replacement parts before starting.
Tip: Label hoses if you disconnect multiple lines to avoid misrouting. - 2
Drain coolant and access thermostat
Loosen the thermostat housing bolts and drain the coolant through the lower hose or drain plug. Remove the housing cover to expose the thermostat assembly.
Tip: Have a rag ready; coolant is toxic and can burn skin if hot. - 3
Remove old thermostat and gasket
Carefully lift out the old thermostat and gasket, noting orientation. Clean the mounting surface to remove old gasket material and inspect for warping or corrosion.
Tip: Use a gasket scraper gently to avoid scratching the mating surface. - 4
Install new thermostat and gasket
Place the new thermostat in the correct orientation with the spring or jig aligned as per the engine design. Install the gasket and reseal the housing.
Tip: Avoid over-tightening bolts; use manufacturer torque specs if available. - 5
Refill coolant and bleed air
Reconnect the housing, refill with coolant using a funnel, and bleed air pockets per the vehicle manual. Start the engine and allow it to reach operating temperature to verify proper flow.
Tip: Watch for leaks around the housing; tighten if necessary without overdoing it.
FAQ
What are common signs of a failing car thermostat?
Common signs include overheating, fluctuating temperature gauge, heater not warming, and occasional coolant leaks around the thermostat housing. If you notice any of these, inspect the thermostat and consider replacement.
Common signs include overheating and an erratic temperature gauge. If you notice those, inspect the thermostat and replace if needed.
Can I drive my car if the thermostat is failing?
Driving with a suspected thermostat problem can damage the engine. It’s best to park and diagnose or call for assistance to avoid overheating.
No, driving with a suspected thermostat problem can overheat the engine; have it inspected first.
OEM vs aftermarket thermostat – which is better?
OEM-compatible thermostats are generally preferred for fit and performance, but many reputable aftermarket options also work well if correctly rated for your engine.
OEM-compatible parts usually fit best, but a quality aftermarket option can work if correctly matched to your engine.
Do I need to flush the coolant when replacing the thermostat?
A full coolant flush isn’t always required, but flush if the coolant is old, contaminated, or if you’re experiencing rust or debris in the system. Follow the manual for guidance.
A full flush isn’t always necessary, but do it if the coolant looks dirty or contaminated.
How long does a thermostat replacement take for a DIYer?
For many cars, a DIY thermostat replacement takes about 45 to 90 minutes, depending on the model and access to the thermostat housing.
Most DIY thermostat replacements take about 45 to 90 minutes.
Watch Video
Key Takeaways
- Work on a cooled engine to avoid burns and scalding.
- Install a new gasket and correct thermostat orientation.
- Bleed the cooling system thoroughly after replacement.
- Check for leaks and confirm stable temperature during a test drive.