Whirlpool Dryer Repair: Complete Step-by-Step Guide
Learn how to diagnose and fix common Whirlpool dryer problems with a practical, step-by-step guide by Home Repair Guide. Safe DIY tips, required tools, and guidance on when to call a professional.

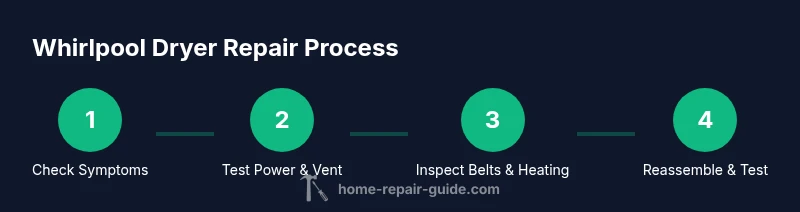
By following this guide, you can diagnose and fix common Whirlpool dryer problems safely without professional help. Start by unplugging, then inspect the vent, door switch, and heating element. This step-by-step approach covers testing with a multimeter and when to replace parts.
Common Whirlpool dryer problems and likely causes. Whirlpool dryers present recurring issues: no start, no heat, drum not turning, and noisy operation. No start can be electrical or control board related; check breakers, fuses and the door switch. No heat often points to a blown thermal fuse or failed heating element, or a blocked exhaust vent. Drum not turning usually comes from a worn belt or motor issue, while long drying times often result from vent restrictions or overloaded loads. Error codes on Whirlpool models guide diagnosis, but verify model numbers before searching for manuals. This section maps symptoms to likely causes and highlights safety considerations from Home Repair Guide.
Safety first: essential precautions before you start. Before any inspection, unplug the dryer and disconnect power. If you use a gas Whirlpool model, shut off the gas at the valve and ensure adequate ventilation. Work in a dry, nonflammable area and wear safety gloves to protect hands from sharp edges. Never run the dryer with panels removed for more than a moment, and keep kids and pets away. If you smell gas or hear hissing, stop and call a professional. These precautions minimize risk while you test and diagnose. Home Repair Guide emphasizes safety as the top priority.
Tools and replacement parts you may need. A solid toolkit makes the job safer and quicker: multimeter for tests, screwdriver set for panels, a nut driver for fasteners, and a lint brush or vacuum to clean vents and blowers. You may need a thermal fuse, high limit thermostat, drum belt, or an idler pulley depending on diagnosis. A flashlight helps inspect dark interiors, and safety gloves protect your hands. Always confirm part compatibility with your Whirlpool model before ordering replacements.
Diagnosing without disassembly: quick checks you can trust. Start by confirming outlet power and circuit status. Test the door switch for continuity with a multimeter; a faulty switch stops the dryer from starting. Inspect the lint trap and vent for blockages and clean out lint from the blower housing. For heat issues, test the heating element and thermal fuse; if a fuse is blown, replacement will restore heat. Electric models should show 240V across the two hot legs. If tests indicate a part failure, prepare to replace it.
Inspecting critical components during disassembly. If basic checks fail, remove access panels to inspect belts, pulleys, and the blower. Check the drum belt for cracks and fraying, and confirm the idler pulley spins freely. Inspect the blower wheel for damage and ensure it is seated correctly. For heating problems, examine the high limit thermostat and the heating element coil for breaks. Note wiring routes to avoid pinches on reassembly.
Safe replacement steps and reassembly. After identifying a faulty component, replace with compatible parts and reassemble in the correct order. Reinstall the drum, belt, pulleys, and wiring, then recombine panels. Clear lint from the vent and run a short cycle with no load to verify airflow and heating. If heat or airflow seems off, stop and recheck connections and part fit.
Preventive maintenance to extend your dryer's life. Maintain performance by cleaning the lint screen after each load and inspecting the vent annually to remove lint and fix kinks. Avoid overloads and use appropriate cycles to prevent overheating. Consider a yearly professional check if you rely heavily on your dryer, and schedule routine maintenance to prolong life and efficiency.
Tools & Materials
- Multimeter(to test fuses and heating elements)
- Screwdriver set (Phillips & flat-head)(to remove panels and access components)
- Nut driver or socket set(for belt and fasteners)
- Vacuum or lint brush attachment(clean vent/blower housing)
- Replacement parts kit (thermal fuse, high-limit thermostat, drum belt, idler pulley)(only if diagnosis indicates a failed part)
- Replacement door switch(if door switch is faulty)
- Flashlight(to inspect dark interior)
- Safety gloves(protect hands from sharp edges)
- Work towels and small containers(organize screws and parts)
Steps
Estimated time: Estimated total time: 1.5-2 hours
- 1
Power down and unplug
Unplug the dryer from the wall and disconnect any power source before touching internal components. If it's a gas model, shut off the gas supply per local code. This prevents shock and gas leaks while you work.
Tip: Always double-check outlet power with a tester before touching any wires. - 2
Access the interior panels
Carefully remove the top or back panel to access the belts, motor, and blower. Keep track of screws and note how parts are oriented to simplify reassembly.
Tip: Use a parts tray or magnetic mat to prevent losing fasteners. - 3
Test door switch and basic circuits
With power disconnected, test the door switch for continuity and inspect the control harness for loose connections. Worn switches or faulty wiring can prevent startup or heat generation.
Tip: If the switch tests open, replace it before proceeding. - 4
Check the thermal fuse and heating path
Locate the thermal fuse and high-limit thermostat; test for continuity. If either is open or failed, replace it and re-test heating.
Tip: Thermal fuses are single-use; replace only when confirmed faulty. - 5
Inspect belt, rollers, and blower
Examine the drum belt for cracks or fraying, and verify the idler pulley and rollers spin freely. A worn belt or seized roller will stop drum rotation.
Tip: Rotate the drum by hand to feel for rough spots. - 6
Reassemble and run a test cycle
Reinstall panels, belt, and wiring. Clear lint from the vent and run a short cycle with no load to verify airflow and heating before a full test.
Tip: Always supervise the first test cycle for unusual noises or smells.
FAQ
Can I repair a Whirlpool dryer myself?
Yes, many common issues can be fixed at home with proper safety measures and the right tools. Complex electrical problems or gas servicing should be handled by a professional. Always consult your model's manual and local codes.
Yes, many common issues can be fixed at home with proper safety and the right tools, but complex electrical or gas servicing should be left to a professional.
What are the most common Whirlpool dryer problems?
No heat, no start, drum not turning, and loud noises are frequent. Each symptom points to different causes such as fuses, belts, switches, or bearings, which helps target the fix.
The most common problems are no heat, no start, drum not turning, and noisy operation.
Is it safe to clean the vent while the dryer is installed?
Yes, but ensure the dryer is unplugged. Use a vent brush or vacuum to remove lint from the vent path, and never work with a plugged vent under pressure.
Yes, with the dryer unplugged, you can safely clean the vent using a brush or vacuum.
How long does a typical Whirlpool dryer repair take?
Basic checks and minor part replacements can take 1–2 hours. More complex repairs or ordering parts may extend the timeline.
Basic checks and small fixes usually take 1–2 hours; more involved repairs may take longer.
Do I need a professional for electrical repairs?
If you’re not comfortable with electrical systems, hire a licensed technician. Working with 120/240V circuits can be dangerous.
If you’re not comfortable with electrical work, hire a professional; it can be dangerous.
When should I replace the dryer belt?
If the drum won’t rotate or slips during operation, inspect and replace the belt. Look for cracks or fraying and use a new belt matching your model.
Replace the belt if the drum won’t rotate or slips, and check for wear.
Watch Video
Key Takeaways
- Unplug before any inspection.
- Diagnose using symptom mapping and safe tests.
- Vent cleanliness is critical for performance.
- Only replace parts after proper testing.
- Test the dryer thoroughly after reassembly.