Whirlpool Top-Load Washer Repair: A Practical Guide
Learn safe, step-by-step methods to diagnose and fix common issues in Whirlpool top-load washing machines, with practical tips for homeowners seeking durable repairs.

This guide helps you diagnose and repair common issues in Whirlpool top-load washers, including lid switch problems, draining or spinning faults, belt wear, and noisy drums. You'll find a diagnostic checklist, safe disassembly steps, and replacement tips to restore performance without guesswork. According to Home Repair Guide, many fixes are doable with common hand tools.
Common Whirlpool top-load washer issues
Whirlpool top-load washers are reliable, but they can develop common faults over time. Understanding typical symptoms helps you decide whether a DIY repair is practical. If the washer won’t drain, the issue is often the drain pump, a clogged filter, or a kinked hose. If it won’t spin, the belt or motor coupling may be worn, or the lid switch may be misreading the lid as closed. Leaks from the tub or hoses are frequently caused by loose connections, worn seals, or overfilled loads. A drum that slaps or makes grinding noises can indicate worn bearings, a failing pulley, or foreign objects in the drum. If the washer won’t fill, check water inlet valves and pressure hoses. For any noise, inspect drum rollers and belt for wear. The Home Repair Guide analysis emphasizes starting with the simplest fix and testing after each step.
Safety first when repairing a washer
Before touching any electrical or water components, disconnect power by unplugging the machine and switching off the household circuit or removing fuses. Shut off the cold and hot water supply to avoid pressure surges and flooding. Drain any remaining water from hoses into a bucket, and place towels to catch spills. Wear protective eyewear and gloves as needed. Work in a well-lit, ventilated area with the model unplugged. If you’re unsure about wiring or high-voltage components, consult a professional. Following basic safety steps reduces the risk of shock, leaks, or property damage. Home Repair Guide stresses that safety is non-negotiable and should frame every repair around risk awareness.
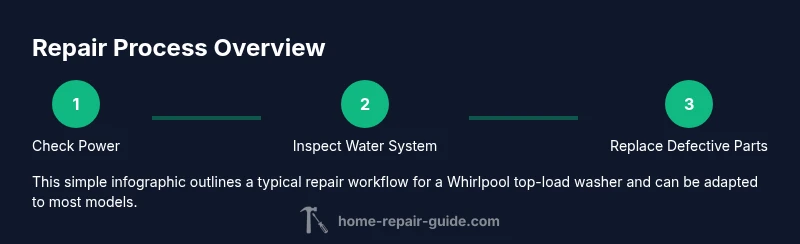
Diagnostic flow for a Whirlpool top-load washer
Start with the simplest check: confirm the unit is getting power and the lid switch engages when you press the lid. Use a multimeter to test the lid switch for continuity when the lid is closed. If the switch is faulty, replace it. Next, inspect the drive belt for cracks or looseness; a worn belt can stop the drum from turning. For draining issues, verify the drain hose is not kinked and clean the pump filter if serviceable. If the machine fills but doesn’t agitate, check the motor coupling or the transmission if applicable. During diagnosis, test one component at a time and re-test the machine after each replacement before moving to the next. Document findings with photos to aid reassembly.
Tools and parts you may need for diagnostic and repair
A basic repair won’t require exotic tools, but having a standard set saves trips to the hardware store. You’ll want a combination of screwdrivers (Phillips #2 and flat-head), a nut driver set, pliers, and a multimeter for electrical checks. Replacement parts such as a lid switch, drive belt, or drain pump should be on hand if you identify them as faulty. Also gather towels, a bucket, and rags to manage spills, along with spare hoses that fit Whirlpool models. Keeping a simple wiring diagram or manual on hand can reduce the risk of misconnecting wires during reassembly. The goal is to test conservatively and replace only what’s proven faulty.
Step-by-step repair guide (an example workflow)
This section provides a practical workflow you can adapt to many Whirlpool top-load models. Each step is a single action, with a clear rationale and a pro tip to prevent mistakes. Start with power safety, then inspect mechanical wear, test electrical components, and finally reassemble and verify operation. If you encounter a model-specific feature, refer to the user manual or service bulletin. The subsequent steps assume you’ve confirmed a fault that can be addressed with common replacement parts.
Maintenance to prevent future problems
After completing repairs, adopt a routine to minimize future failures. Level the washer to prevent vibration and wear on the belt and drum; clean the inlet filters to avoid gradual flow restrictions; use appropriate detergent and avoid overloading; run a monthly empty cycle with a cleaning agent to prevent residue buildup. Regular inspection of hoses, clamps, and connections helps catch leaks before they escalate. Home Repair Guide emphasizes that proactive maintenance is cheaper and less stressful than repeated emergencies.
Troubleshooting by model features
Whirlpool top-load models vary in features such as direct drive vs belt drive, lid switch placement, and sensor logic. When diagnosing, note any model-specific indicators, error codes, or indicator lights. If a code appears, consult the user manual for code definitions and recommended resets. If errors persist after basic fixes, verify that critical cables aren’t damaged and that the control board isn’t showing signs of failure. In many cases, a targeted part replacement based on the symptoms resolves the issue without a full control board replacement.
Realistic expectations and when to call a pro
DIY repairs can save money, but some problems—especially those involving high voltage, main control boards, or complex mechanical assemblies—are safer and more reliable to hand to a trained technician. If you notice persistent leaks, electrical shocks, burning smells, or if tests indicate a failing motor, belt, or pump beyond simple replacement, a pro should handle the repair. The Home Repair Guide team recommends weighing risk against cost: if the repair requires specialized equipment you don’t own, consider professional service to avoid further damage.
Tools & Materials
- Multimeter(Set to continuity and resistance; test at appropriate ranges for switches and coils)
- Screwdriver set (Phillips and flat-head)(Phillips #2 and standard flat-blade for panel screws)
- Nut driver set(Assorted sizes for mounting nuts and hose clamps)
- Pliers (needle-nose)(For hose clamps and small connectors)
- Towel and bucket(Catch water spills during hose removal)
- Replacement lid switch(Stock spare for common failures)
- Replacement drive belt(Check width and cracks; replace if worn)
- Drain pump (optional alternate)(Useful if pump is failing or clogged)
- Replacement hoses (inlet/drain)(Whirlpool-specific hoses may differ by model)
Steps
Estimated time: 60-90 minutes
- 1
Power down and unplug
Ensure the washer is completely disconnected from power. Pull the plug from the outlet, and if feasible, switch off the dedicated circuit breaker. This prevents electric shock during any disassembly. Keep a clear workspace and remove any nearby metal objects that could cause grounding issues.
Tip: Label screws and remove panels one at a time to avoid losing fasteners. - 2
Shut water supply and access panels
Turn off the cold and hot water valves behind the machine. Disconnect hoses from the back or sides to prevent water spills. Remove the back or top panel as needed to access internal components like the lid switch and belt path.
Tip: Place towels to catch residual water and photograph each connection before detaching wires. - 3
Test lid switch and basic power
With power disconnected, access the lid switch and test continuity with the lid closed. If the switch shows no continuity, replace it. Reconnect power only after confirming safe wiring routes.
Tip: Never bypass the lid switch; it is a critical safety interlock. - 4
Inspect drive belt and drum condition
Inspect the drive belt for cracks, glazing, or looseness. If worn, replace with the correct belt size for your model. Spin the drum by hand to feel for roughness or binding that indicates bearing wear.
Tip: Take a photo of belt routing before removing it, to ensure correct reinstallation. - 5
Check drain system and hoses
Ensure the drain hose is free of kinks and the drain pump is free of debris. If the pump is noisy or seized, replace it. Clean or replace inlet hoses if they show swelling or weakness.
Tip: Test the pump by briefly powering the unit (with safety precautions) to confirm flow. - 6
Reassemble and test run
Reassemble the cabinet following your photos and notes. Reconnect water lines and power, then run a short test cycle with no load to confirm proper filling, draining, and spinning. Check for leaks and listen for abnormal noises.
Tip: If leaks appear, power down and tighten clamps, then recheck for leaks after a brief test.
FAQ
Can I repair Whirlpool top-load washing machines myself?
Yes for many common issues like lid switch or belt wear. More complex electrical or motor problems should be done by a professional to avoid safety risks and further damage.
Yes, you can fix many common issues yourself, but save risky electrical work for a pro.
What tools do I need for a basic repair?
A basic set of screwdrivers, a multimeter, pliers, and replacement parts such as a lid switch or belt. Keep towels handy for spills and a bucket for removing water.
A simple toolset plus spare parts will cover most DIY fixes.
How do I test the lid switch safely?
Unplug the unit, access the switch, disconnect wires one at a time, and test continuity with a multimeter when the lid is closed. Replace if you get no continuity.
Unplug first, then check continuity with a meter while the lid is closed.
Why won’t my Whirlpool washer drain?
Drain failures are usually caused by a clogged pump, a kinked drain hose, or a defective pump. Replace faulty parts and clear clogs as needed.
Drain problems often come from clogs or a worn pump.
When should I replace the drive belt?
Replace the belt if it’s cracked, stretched, or makes slipping noises during operation. Use the model’s specified belt size to ensure a proper fit.
Replace a worn belt to restore drum rotation and prevent further damage.
Is it safe to bypass the lid switch during diagnostics?
No. The lid switch is a safety interlock; bypassing it can expose you to shocks and leaks and may void warranty.
Don’t bypass safety features; use proper diagnostics.
Watch Video
Key Takeaways
- Identify the fault with a controlled, stepwise approach
- Safety always comes first; unplug and shut water off
- Common fixes include lid switch, belt, and drain pump replacements
- Test after each repair to avoid unnecessary parts changes
- Maintain the washer to prevent future breakdowns