LG Front-Load Washer Repair: A Practical Step-by-Step Guide
Learn safe, practical LG front-load washer repair with a clear, step-by-step approach from Home Repair Guide. Diagnose leaks, drains, and motor issues effectively and test after each fix.

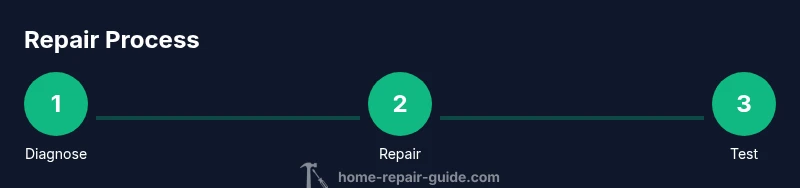
Want to tackle lg front load washer repair at home? This quick guide outlines safe, common-sense steps to diagnose leaks, drainage issues, spinning problems, and motor faults, plus the essential tools and a plan for testing after each repair. Follow the step-by-step process to build confidence, avoid shocks, and restore reliable performance.
Common Problems with LG Front-Load Washers
LG front-load washers are generally reliable, but like any appliance they develop symptoms over time. According to Home Repair Guide, many lg front load washer repair issues fall into a few common categories: leaks around the door boot, drainage problems, pump or motor faults, and control-panel glitches. For lg front load washer repair, recognizing these patterns early can save time and prevent water damage.
Typical symptoms include:
- Leaks around the door boot or gasket, especially after long use or heavy loads.
- Water not draining or spins that are weak or incomplete.
- Error codes on the display or unresponsive control panel.
- Unusual noises, banging, or excessive vibration during cycles.
If you notice any of these, start with a visual inspection for obvious wear and follow a cautious diagnostic path rather than jumping to part replacement. By understanding these common problems, you’ll be better prepared to choose the right repair route and avoid unnecessary costs.
Safety First: Power, Water, and Electrical Safety
Before starting any repair, power down the washer and unplug it from the outlet. If your unit is hardwired, disconnect the circuit at the breaker panel. Shut off the water supply valves to prevent further leaks and drain any remaining water in hoses. Use a dry, non-slip work area and keep a bucket or towels on hand to manage spills. Wear safety gloves and eye protection when handling sharp components or electrical connections. Never work on live electric components with wet hands or while standing in water. If you are unsure about the electrical safety of your setup, consult a qualified electrician before proceeding. These precautions significantly reduce the risk of electric shock or water damage during lg front load washer repair.
Tools and Materials You’ll Need
Gather the essential tools and replacement parts before you begin. A well-prepared workspace helps you move quickly and safely through lg front load washer repair tasks. See Tools & Materials block for the full list of items and notes on each item’s role. Typical kits include basic hand tools, a replacement pump or door boot if needed, towels or rags for spills, and a drain pan to capture water. Planning ahead minimizes downtime and helps you stay organized during disassembly and reassembly.
Diagnostic Plan: Read Codes, Check Hoses, and Listen for the Pump
A systematic approach helps you pinpoint the issue without unnecessary part swaps. Start by observing any error codes on the display and consulting the user manual or online guides to interpret them. Inspect the inlet hoses for kinks, leaks, or blockages, and check the drain hose for proper routing. Open the access panel to listen for pump operation—a humming sound usually means the pump is running; a grinding noise or no sound at all often signals a faulty pump or motor. If the door boot shows signs of wear or cracking, plan to replace it to prevent further leaks. A careful diagnostic routine saves time and money in lg front load washer repair.
Replacing the Drain Pump: Steps and Considerations
Drain pump failures are among the most common repair needs for front-load models. Begin by disconnecting power and water supply, then access the pump area (usually behind the bottom front panel). Detach the hoses, unplug the electrical connector, and remove the pump assembly. Compare the replacement pump to the original to ensure compatibility, then reinstall in reverse order, making sure all clamps and hoses are secure. After reassembly, run a short test cycle with no clothes to verify proper drainage and absence of leaks. If the pump was clogged, clean the filter or screen in the pump housing to prevent future blockages.
Replacing the Door Boot (Gasket) and Seals
A worn or cracked door boot is a frequent source of leaks in lg front load washer repair. To replace it, disconnect power and water, remove the front panel and any fasteners securing the boot, then detach the old boot from the tub and door frame. Clean the mating surfaces, install the new boot with the correct gasket orientation, and reattach all clamps securely. Reassemble the front panel and run a leak test with water only. Replacing a cracked boot not only stops leaks but also improves washing efficiency and reduces mold growth inside the boot.
Electrical and Control System Troubleshooting
Control boards and sensors can fail and manifest as unresponsive displays or erratic cycles. If the problem appears electrical, use a multimeter to test for proper voltages and continuity on sensor wires and connectors. Check the main control board for obvious signs of damage, such as burnt components or swollen capacitors, and reseat connectors if necessary. If you suspect a faulty control board, consider a professional diagnosis or a factory-compatible replacement part. Updating firmware where available can also resolve software glitches that mimic hardware failures in lg front load washer repair.
Maintenance and Prevention to Extend Life
Ongoing maintenance reduces the frequency of lg front load washer repair needs. Regularly clean the door boot and gasket to prevent mold and odors, inspect hoses for signs of wear, and run a hot water cleaning cycle monthly to dissolve detergent residues. Use the recommended amount of high-efficiency detergent to avoid excess suds that strain the pump. Leave the door slightly ajar after cycles to air out the drum and prevent moisture buildup. Periodic checks of the pump filter and hose clamps can catch issues before they become leaks or clogs.
When to Call a Professional
If you encounter persistent leaks after replacing the boot, recurring error codes despite resets, or suspected electrical faults beyond basic testing, it’s time to contact a licensed technician. Complex control-board faults or difficult disassembly tasks carry a higher risk of further damage. A pro can provide a definitive diagnosis, ensure safe electrical connections, and source model-specific parts. Home Repair Guide recommends evaluating the task’s safety and your comfort level before proceeding with lg front load washer repair.
Authority Sources
For safety and best practices, consult authoritative resources from governmental and reputable organizations:
- OSHA: Electrical safety guidelines for handling appliances and wet environments: https://www.osha.gov
- CPSC: Consumer product safety information and guidance on household appliances: https://www.cpsc.gov
- Consumer Reports and other major publications for appliance reliability and repair considerations: https://www.consumerreports.org
Tools & Materials
- Multimeter(To check electrical continuity and voltage in sensor circuits)
- Screwdriver set (Phillips and flat-head)(Assorted sizes; 6-8 inch handles preferred)
- Torx bit set(For common LG fasteners)
- Nut driver(Useful for hose clamps and panel nuts)
- Pliers (needle-nose and groove-jroint)(Grips for hoses and clamps; avoid damage)
- Bucket or drain pan(To catch residual water during pump work)
- Towels or rags(Keep area dry and clean while working)
- Replacement parts kit (door boot, drain pump, seals)(Only if you identify parts needing replacement)
- Safety gear (gloves, safety glasses)(Protect hands and eyes during repair)
Steps
Estimated time: 60-120 minutes
- 1
Power down and unplug
Unplug the washer and switch off the circuit breaker if needed. This eliminates the risk of shock while you work. If water remains in the drum, use towels to soak it up and prevent spills.
Tip: Verify outlet is working by testing another device before starting. - 2
Shut off water supply and access panel
Close both hot and cold water valves. Remove the bottom front panel or access panel to reach the pump, hoses, and filter. Have a bucket ready to catch any draining water.
Tip: Take a photo of hose routes before disconnecting to aid reassembly. - 3
Inspect visible components
Check door boot for cracks, ensure clamps are tight, and look for obvious leaks. Inspect inlet and drain hoses for cracks, kinks, or disconnections. If you hear a pump hum but no water movement, the issue may be the pump or its impeller.
Tip: Do not tug hoses aggressively; use securing clamps to loosen if needed. - 4
Disconnect and test the drain pump
Carefully detach the pump from the housing, disconnect electrical connector, and remove hoses. Inspect the impeller for debris or damage. Test continuity with the multimeter to confirm motor coil integrity.
Tip: Keep fasteners in a labeled container to avoid misplacement. - 5
Replace drain pump (if needed)
Install the replacement pump, ensuring all seals are seated properly and hoses are clamped. Reconnect electrical connector and reattach to the pump housing.
Tip: Use the original orientation to ensure correct flow path. - 6
Replace the door boot if worn
Remove the front panel, release clamps, and take out the old boot. Clean mating surfaces, position the new boot, and re-secure clamps. Reinstall the front panel and run a leak test.
Tip: Inspect for any residual mold and clean the area before reinstalling. - 7
Check control connections and sensors
Reseat connectors on the control board and sensors. If you detect corrosion or damaged wires, consider replacing the affected harness or board with model-compatible parts.
Tip: Avoid pinching wires when reassembling covers. - 8
Reassemble and perform a test run
Reconnect power, reattach hoses securely, and run a short cycle without laundry to verify drainage and leak-free operation. Observe during the cycle for any anomalies.
Tip: If you see new leaks, pause and re-check seals and clamps immediately. - 9
Evaluate results and plan next steps
If the problem persists after the steps above, review error codes and consider professional service or model-specific parts. Document what you did to assist any technician.
Tip: Maintain a service log for future reference.
FAQ
Why won't the LG washer drain after a cycle?
A clogged drain pump or filter is a common cause. Check hoses for kinks and debris, then inspect and clean the pump housing if accessible.
If the washer won’t drain, start by inspecting the drain pump and filter for clogs and ensure hoses aren’t kinked.
How can I tell if the door boot is leaking?
Look for visible cracks or moisture along the boot and around the drum opening after a cycle. A persistent wet area around the door likely indicates a boot issue.
If you notice water around the door area after a cycle, check the boot for cracks or loose clamps.
Can I reset the control board myself?
Some LG models respond to a simple reset procedure. If your model supports it, unplug for several minutes and reconnect, then run a test cycle.
You can try a basic reset by disconnecting power for a few minutes, then reconnecting and testing.
What tools do I need for basic LG front-load repair?
A basic tool kit with screwdrivers, pliers, a multimeter, a drain pan, and towels is typically enough for common repairs. Replacement parts depend on the issue.
A screwdriver set, pliers, a multimeter, a drain pan, and towels cover most basic repairs.
Is it safe to repair the washer with power on?
No. Always unplug and disconnect power before starting any repair to avoid electric shock.
Never work on the washer while plugged in; unplug first.
When should I call a professional?
If you encounter persistent electrical issues, recurring error codes after resets, or if disassembly seems risky, seek a licensed technician.
If in doubt about safety or persistent issues persist, call a pro.
Watch Video
Key Takeaways
- Diagnose before replacing to avoid unnecessary parts.
- Prioritize safety: unplug power and shut water supply first.
- Test after every repair to verify success.
- Replace door boots to prevent future leaks.