Repair Car Window Regulator: A Practical Step-by-Step Guide
Learn to diagnose, replace, and test a faulty window regulator with a clear, safe step-by-step process. Includes tools, safety tips, troubleshooting, and maintenance for durable window operation.

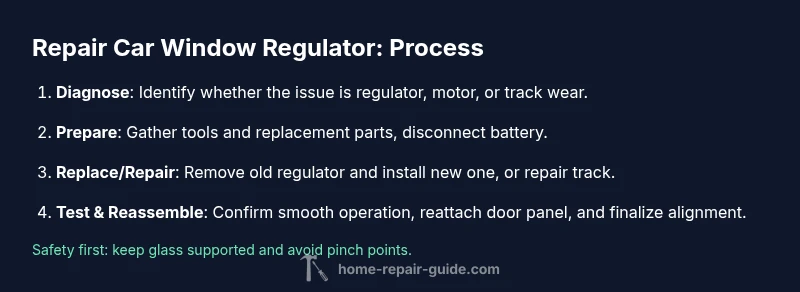
With the right diagnosis and the proper parts, you can restore window operation by replacing or repairing the regulator assembly. This guide covers the signs of failure, the tools you’ll need, and a safe, step-by-step process to fix a typical power or manual window regulator in most cars. Always disconnect the battery and wear eye protection.
How a car window regulator works
A car window regulator is the mechanism that moves the glass up and down inside the door. In manual windows, the regulator converts the crank motion into linear movement; in power windows, a small electric motor drives the regulator via gears and cables. Inside most doors you’ll find a metal frame called the window track, a regulator assembly with a cable or scissor mechanism, pulleys, and mounting points. When you press the switch or crank the handle, the regulator pulls or releases the cable, guiding the sash along the track. The regulator and motor (or manual hand crank) must coordinate precisely with the glass to keep it aligned and prevent binding or slipping.
According to Home Repair Guide, common causes of regulator failure include worn cables, bent tracks, and motor burnout. Regular use can wear parts at the track’s contact points, leading to slower movement or jerky operation. If you notice the glass stalling, a grinding noise, or the window dropping inside the door, the regulator is often involved. Diagnosing may require checking the switch, testing for power at the regulator, and inspecting the door’s inner area with the panel removed. This knowledge helps you choose whether to repair the regulator or replace the assembly.
Signs of a failing regulator and quick diagnosis
Several telltale symptoms point to a failing car window regulator. If the window moves slowly, stops midway, or makes grinding, creaking, or popping noises as it travels, the regulator could be worn or jammed. If the window falls down into the door or refuses to rise when you press the switch, the regulator or its cables may have failed. If the glass rattles, tilts, or goes off track when moving, you should inspect the regulator track and mounting points. In older vehicles or after a collision, the regulator's mounting brackets may crack, causing misalignment.
To diagnose, test the window using the switch and, if safe, apply light manual pressure to see if the glass sticks. Remove the interior door panel to inspect the regulator mechanism for obvious damage to cables, pulleys, or gears. Check the electrical side by testing for voltage at the regulator motor connector with the switch on. If there’s no voltage, the problem may be a blown fuse, bad wiring, or a faulty switch, not the regulator itself. With the information gathered, you can decide whether to repair the regulator or replace the entire regulator assembly.
Tools, parts, and safety considerations
Preparing the right tools and stocking the correct parts makes a regulator repair smoother and safer. Essential tools include a trim removal tool or plastic pry bars, a Phillips and a flat-head screwdriver, a socket wrench with extensions, and a Torx driver set. Needle-nose pliers, a multimeter (or test light), and a flashlight help with diagnostics. For parts, have a replacement regulator assembly on hand, plus any window clips or mounting hardware your model requires. Safety gear is non-negotiable: wear safety glasses and gloves, and keep hands clear of pinch points. When working inside the door, support the glass so it doesn’t fall if the regulator shifts. A silicone spray or white lithium grease helps maintain smooth operation once the job is done.
Relaxed safety protocols reduce risk: disconnect the battery before starting, set the car in park, and work in a well-lit area. Keep a clean workspace and organize screws so nothing falls into the door cavity. If you’re unsure about the part compatibility, verify against your vehicle’s make, model, and year.
Planning your repair: sourcing parts and costs
Parts for a window regulator repair fall into three general categories: OEM/regulator assemblies, aftermarket regulators, or remanufactured units. OEM parts typically guarantee fit, but may cost more; aftermarket options can offer good value, but verify compatibility with your vehicle. Remanufactured regulators can balance price and reliability. In all cases, choose a regulator that matches your window configuration (manual vs power) and the side of the car (driver vs passenger). The Home Repair Guide analysis suggests that correct fit and proper installation are the biggest predictors of long-term reliability, more so than brand alone. In addition to the regulator, you may need window clips or small mounting hardware. If your window ramp or channel shows wear, consider replacing the entire track assembly to avoid a reoccurring failure.
Budget considerations vary by vehicle age and part quality. If your car has a rare model or integrated locking mechanism, you may need to source a specialized kit. When budgeting, also factor in potential labor time if you’ll hire a professional, and set aside a contingency for rework if the glass is damaged during removal.
Step-by-step overview: manual vs power window approaches
There are two main kinds of regulators: manual crank regulators and power regulators driven by an electric motor. The manual type uses a hand crank and often a simple linkage; the power type uses a motor, gears, and a cable or scissor mechanism. The repair approach is similar in principle: access the regulator, detach it from the window glass and door frame, install the replacement, and reassemble. For manual regulators, ensure the window crank mechanism aligns with the regulator’s track and engages the crank gear. For power regulators, disconnect the motor connector before removing the regulator, and ensure the new regulator’s wiring matches the vehicle harness. Regardless of type, the goal is to restore smooth, balanced movement with proper glass alignment.
Carefully support the glass during removal to avoid cracks. When installing the new regulator, thread fasteners to the manufacturer’s torque guidance (if available) and confirm all connections are secure before testing. After installation, operate the window through its full range to check for binding, misalignment, or squeaks, and correct as needed.
Testing, adjustments, and reassembly tips
With the regulator installed, reconnect the battery and test the window using the switch. If the glass moves smoothly and remains aligned, proceed to reattach the door panel. If you notice binding or uneven movement, pause and double-check the regulator alignment, track mounting, and the glass position in the channel. Lubricate the tracks lightly to reduce friction, then run the window again to confirm improvement. When reinstalling the door panel, reinstall all fasteners in the same pattern and clip the harnesses back into their connectors. Finally, test the switch from multiple positions to ensure consistent operation.
Safety remains a priority: never force a window that feels stuck and avoid pinching fingers during panel reassembly. If the regulator exhibits persistent issues after installation, recheck electrical connections and verify the regulator is the correct part for your model.
Maintenance and long-term care
To prolong a repaired window regulator’s life, regularly inspect the window tracks and clear debris from the channels. Keep the window clean and lightly lubricated with silicone spray to minimize wear on cables and pulleys. If you operate windows frequently in harsh climates, consider checking the regulator and motor assembly after seasonal changes. Address misalignment or binding promptly to prevent damage to the glass or frame. Finally, store replacement parts in a dry, organized space so you can complete future repairs quickly if needed.
Tools & Materials
- Replacement window regulator assembly (left or right side as required)(Ensure compatibility with make/model/year)
- Electrical multimeter or test light(To verify power at the regulator connector)
- Trim removal tool or plastic pry bars(Careful panel removal without cracking plastic)
- Screwdrivers (Phillips and flat-head)(For screws securing door panel and regulator)
- Torx driver set (e.g., T15, T20)(Common for regulator mounting screws)
- Socket wrench with extensions (8mm-12mm)(To release regulator bolts)
- Needle-nose pliers(Grip cables and connectors safely)
- Silicone spray or white lithium grease(Lubricate tracks after installation)
- Safety gear (gloves, safety glasses)(Protect hands and eyes during disassembly)
- Suction cups or helper (optional)(Support glass during removal)
Steps
Estimated time: Estimated total time: 1-2 hours
- 1
Prepare workspace and safety checks
Park on a level surface, disconnect the negative battery terminal, and gather tools. Inspect the door area for obvious damage and plan your sequence. This reduces the risk of dropping the glass or losing small fasteners.
Tip: Take photos of wiring and panel clips before removal. - 2
Remove the door panel
Carefully pry the door panel away from the door frame using a trim tool. Remove screws and disconnect any wiring harnesses from the panel. Keep all fasteners organized for reassembly.
Tip: Work gradually from edges to avoid cracking the panel. - 3
Disconnect regulator linkage and motor (power windows)
Detach the regulator’s linkage from the window glass and motor (or manual crank). Label connectors if needed. This step frees the regulator for removal.
Tip: Support the glass with a suction cup or helper to prevent damage. - 4
Remove the old regulator
Unbolt the regulator from the door frame and carefully slide it out with the window glass still supported. Inspect the track, cables, and mounting points for wear or damage.
Tip: Count and label mounting bolts to ensure correct reinstallation. - 5
Install the replacement regulator
Position the new regulator and align it with mounting points. Start bolts by hand to avoid cross-threading, then tighten to spec. Reconnect the window glass to the regulator assembly.
Tip: Lubricate tracks lightly before final assembly. - 6
Test before full reassembly
With the panel still loose, reconnect the battery and test the window operation. Check for smooth travel, alignment in the track, and no unusual noises.
Tip: If movement is stiff, re-check the regulator alignment and track clearance. - 7
Reassemble and perform final test
Reinstall the door panel, clips, and screws in reverse order. Test the window from multiple switches and positions to confirm reliable operation.
Tip: Apply a light coating of lubricant on the track after final test.
FAQ
Do I need to remove the door panel to fix a window regulator?
In most vehicles, yes. Accessing the regulator typically requires removing the interior door panel to reach the assembly. Some models may have alternative access points, but panel removal is the common approach.
Yes, most cars require removing the door panel to access the regulator.
Can I fix a window regulator myself, or should I replace the whole window?
If the regulator and track show clear wear and you have the right tools, a DIY replacement is feasible. For complex assemblies or difficult access, professional replacement may be safer.
DIY is possible for many cars, but assess complexity before starting.
What are common signs of a faulty regulator?
Common signs include slow or uneven window movement, grinding noises, the window slipping off track, or the glass dropping inside the door.
Watch for slow movement, grinding sounds, or misalignment.
What tools do I need for regulator replacement?
You’ll typically need screwdrivers, a trim tool, a socket set, Torx bits, pliers, and the replacement regulator. Having a multimeter helps with diagnostics.
A basic toolkit plus the replacement regulator is usually enough.
Is it safe to operate a window during repair?
Operate the window only if you know the regulator is securely installed and all connections are safe. If in doubt, stop and recheck the installation.
Only test when you’re confident the regulator is properly installed.
Watch Video
Key Takeaways
- Identify the root cause before replacement.
- Ensure part compatibility with the vehicle.
- Test thoroughly before reassembly.
- Lubricate tracks to extend life.