Mobile Car Repair: Safe DIY Fixes on the Go
Learn practical, safe mobile car repair techniques you can perform with a portable toolkit, diagnostic apps, and roadside-ready gear. This step-by-step guide covers jump-starts, tire changes, fluid checks, and basic electrical checks for homeowners and travelers.

This guide helps you perform essential mobile car repairs on the roadside or at home using a portable toolkit, a diagnostic app, and safe procedures. It covers jump-starts, changing a flat, topping fluids, and basic electrical checks with clear steps and safety reminders for homeowners and travelers. According to Home Repair Guide, plan ahead, know when to call for help, and use vehicle-specific manuals for best results.
Why Mobile Car Repair Matters
The mobile repair car approach empowers drivers to address common breakdowns without immediately calling for towing or waiting for a shop. With a portable toolkit, a smartphone diagnostic app, and an understanding of safety, you can often regain mobility quickly. The Home Repair Guide team highlights that preparedness reduces downtime and risk on busy highways and long rural drives. In this section we'll explore practical scenarios where roadside DIY fixes are viable, clarify the limits of DIY work, and outline the decision process for when to escalate to professional service. Examples include jump-starting a dead battery, replacing a flat tire with a spare, topping off essential fluids, and performing basic electrical checks with an OBD-II scanner. Always wear safety gear, use reflective devices, and avoid attempting risky tasks in heavy traffic or poor lighting.
Essential Tools & Safety Gear
A reliable mobile repair kit starts with quality, weather-ready tools. Core items include a portable jump starter with clamps, a lug wrench, a car jack, wheel chocks, and a compact air compressor with a pressure gauge. Add a reflective triangle, safety vest, gloves, and safety glasses to stay visible and protected on the shoulder. An OBD-II scanner paired with a smartphone, a multimeter for voltage checks, duct tape, zip ties, and a flashlight round out the basics. Keep spare fuses and a battery terminal brush. Regular maintenance of the kit matters: check batteries, replace worn cables, and verify the inflator works. The Home Repair Guide team reminds readers to tailor the kit to their vehicle’s weight and fuel type, and to store items in a durable, organized container.
How Mobile Diagnostics Work with a Smartphone App
Smartphone-enabled diagnostics have transformed roadside troubleshooting. An OBD-II adapter connects to the car’s data port and broadcasts codes to a preferred app. A trained reader interprets P-codes and live sensor data to identify issues like battery faults, charging problems, misfires, or cooling system faults. Note that codes guide you, they do not replace hands-on inspection. The app can display freeze-frame data, fuel trim, RPM, and temperature readings, which helps you decide if you can safely operate the vehicle or if you should seek a tow. Remember to work only after the engine is off and the car is in park with the parking brake engaged. The Home Repair Guide team notes that diagnostics complement, not replace, mechanical checks and symptom-based testing.
Jump-Starts: Safe Methods and What to Avoid
If the battery is the root cause, a controlled jump-start can save you a tow. Begin by parking on level ground, applying hazard lights, and placing triangles. Connect the red positive clamp to the donor battery, then to the dead battery, then connect the black negative clamp to the donor and the engine block or chassis away from the battery. Start the donor vehicle and allow a minute or two for charge before attempting to start the disabled car. If the engine doesn’t crank after 20-30 seconds, stop to avoid damaging the alternator; check connections and try again after a few minutes. Remove cables in reverse order. Battery safety hazards include sparks, acid exposure, and hot surfaces. If you smell rotten eggs or notice swelling, abort and seek professional help.
Tire Changes on the Road: Steps and Safety
A spare tire is a lifeline, but changing a tire on a busy road is hazardous. Ensure you’re visible, place triangles, and keep passengers away from traffic. Loosen lug nuts slightly before lifting the car; then use a jack to raise the vehicle until the tire clears the ground. Remove lug nuts and the wheel, mount the spare, replace nuts finger-tight, lower the car, and then torque the lug nuts in a star pattern to the manufacturer’s spec. If the spare is a short-term unit, drive slowly to a repair shop. Always check tire pressure after the change with a gauge and store the removed wheel properly. If you don’t have a spare or the tire cannot be safely changed, call roadside assistance immediately. The key is to stay calm, work in daylight if possible, and never place yourself under a raised vehicle without jack stands.
Fluid Checks and Top-Offs You Can Do
Low fluids are common roadside culprits. With engine off and on level ground, check engine oil using the dipstick; wipe, reinsert, and read the level, then add the correct type if low. For coolant, look for visible levels in the reservoir when the engine is cold. Use the correct mix if topping; never open hot systems. Check brake fluid and windshield washer fluid; top as needed, using approved containers. Do not mix fluids or use unknown brands, which can damage seals. If you notice leaks, overheating, or unusual smells, stop and contact a professional. In all cases, avoid overfilling, and keep the engine bay clean to reduce dust and debris.
Basic Electrical Checks and Small Repairs
Electrical issues can be tricky roadside. Start with a quick visual inspection of battery terminals for corrosion; clean if needed with a terminal brush. Check fuses in the cabin and underhood fuse box for any blown units. If the OBD-II scan indicates electrical faults, use the multimeter to test voltage at the battery and alternator. Do not replace components based solely on codes; confirm with tests. When in doubt, consult the vehicle’s manual or a professional. This section focuses on safe, low-risk checks you can perform without specialized tools.
When Roadside Repairs Should End and Professional Help Is Needed
Not every problem is a DIY fix on the roadside. If fluids appear contaminated, there is a petrol smell, smoke, steam, or the vehicle won’t start after reasonable attempts, stop and call a tow. If the parking brake cannot hold the car, or if you are unsure about the repair, contact a qualified technician. Roadside help is also recommended for complex issues like transmission faults, major electrical problems, or suspected fuel leaks. Remember, your safety comes first; avoid working under a car without proper stands. The Home Repair Guide team emphasizes that knowing your limits reduces risk and saves money in the long term.
Planning a Mobile Repair Kit for Your Vehicle
Turn preparedness into a habit with a dedicated space in your trunk or storage. Create a checklist for periodic kit audits: test jump-starter charge, confirm tire pressure tools, inspect cables, and replace worn parts. Label compartments, keep a spare battery, and include a small manual for quick reference. Store the OBD-II adapter in a zip pouch with its cables, and refresh any protective cases. Build your kit around your vehicle’s needs: a compact SUV may require larger jacks and more fluids, while a compact car needs lighter tools. Practicing a mock roadside repair once every few months builds familiarity, reduces stress, and keeps you confident. The Home Repair Guide team notes that a well-planned kit improves response times and safety when a breakdown occurs.
Tools & Materials
- Portable jump starter with clamps(Built-in safety features; test before travel; avoid wet conditions.)
- Tire iron / lug wrench(Use to loosen lug nuts before lifting; ensure proper size for your wheels.)
- Car jack(Choose a jack rated for your vehicle’s weight; use jack stands for extra safety.)
- Wheel chocks(Place on both sides of wheels away from traffic when parked.)
- Spare tire (or run-flat) and lug wrench(Ensure spare inflated and compatible with your vehicle.)
- Portable air compressor & tire pressure gauge(Checks and maintains proper tire pressure for safety.)
- Reflective triangles or flares(Increase visibility in low light or on the shoulder.)
- Safety vest(High visibility clothing improves safety around traffic.)
- Gloves (mechanic or nitrile)(Protect hands from sharp edges and hot components.)
- Safety glasses(Eye protection during wrenching and splash risk.)
- OBD-II scanner (Bluetooth)(Read codes and monitor live data with a smartphone app.)
- Multimeter(Useful for basic voltage and continuity checks.)
- Electrical tape and duct tape(Temporary fixes and securing loose connections.)
- Flashlight or headlamp(Hands-free lighting for nighttime work.)
Steps
Estimated time: 60-90 minutes
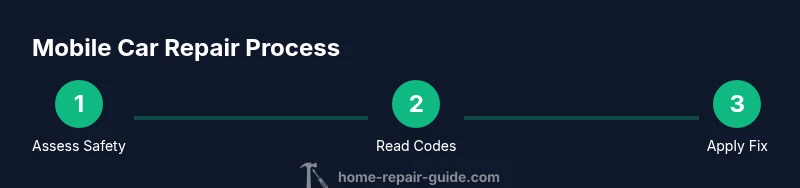
- 1
Assess safety and secure scene
Turn on hazard lights, place triangles, and pull over to a safe, level area away from traffic. Check for any fluid spills or hazards before approaching the vehicle. If you don’t feel safe, don’t attempt repairs.
Tip: Always prioritize personal safety; if traffic is heavy, seek a safer location or call for roadside assistance. - 2
Gather tools and put on PPE
Collect your toolkit, wear gloves and safety glasses, and organize in a way that keeps cables from tangling. Confirm the vehicle’s ignition is off and the parking brake is set.
Tip: Keep a dedicated bag for tools to speed up access during emergencies. - 3
Connect diagnostic tool and read codes
Plug in the OBD-II scanner, pair with your phone, and read any error codes. Note live data such as temperature and RPM to help interpretation.
Tip: If codes indicate a known, non-critical issue, proceed cautiously; if unclear, seek professional advice. - 4
Perform a safe jump-start if battery is the issue
Follow the safe jump-start sequence: donor positive to both positives, donor negative to chassis away from battery, start donor car, then start the disabled car. Remove cables in reverse order after the engine starts and run for a few minutes.
Tip: Never lean over the battery during connections; avoid smoking or sparks near the battery. - 5
Change a flat tire if you have a spare
Loosen lug nuts before lifting, raise the car with a jack, remove the wheel, mount the spare, tighten nuts by hand, lower the car, and then torque in a star pattern to spec.
Tip: Only perform tire changes on level ground; never beneath a vehicle without jack stands. - 6
Check and top off fluids as needed
Check engine oil with the dipstick, coolant reservoir when cold, and brake fluid level. Top up with the correct fluids, avoiding overfill.
Tip: Dispose of any used fluids properly and never mix unknown substances. - 7
Inspect electrical connections
Inspect battery terminals for corrosion and check exterior fuses. Use a multimeter to verify voltage if available.
Tip: Do not force connectors or wires; faulty connections can cause further damage. - 8
Verify repair and plan next steps
Test drive cautiously to confirm the issue is resolved and re-scan with the OBD-II tool. If problems recur, arrange a tow or professional service.
Tip: Document what you did and any codes observed for your technician.
FAQ
What should I do first if my car won't start on the roadside?
Ensure safety, turn on hazard lights, and inspect for obvious causes. Use a diagnostic app to check battery and alternator issues, then decide whether to jump-start or call for help.
First, make yourself safe, turn on hazards, and run a quick check with a diagnostic app to decide the next step.
Is it safe to attempt tire changes alone on a busy highway?
Tire changes on a highway shoulder are risky. If you’re uncomfortable, move to a safer area or call roadside assistance. Use proper lights and wear reflective gear.
It can be dangerous; if you’re unsure, wait for a safer moment or call for help.
Can I rely solely on a diagnostic app for repairs?
Codes help identify faults but don’t fix the problem. Use diagnostics as a guide and verify with manual checks or a professional assessment.
Codes guide you, but they don’t replace hands-on checks.
What should I do if a jump-start fails?
If the car doesn’t start after multiple attempts, stop and seek professional help. A failed jump-start can indicate a dead battery beyond recovery or other electrical issues.
If it won’t start after a couple tries, stop and get help.
How should I maintain my mobile repair kit?
Regularly inspect tools, test the jump starter, replace worn cables, and refresh fluids and fuses. Keep a simple log of checks.
Keep your kit up-to-date and test it before trips.
What if I’m unsure about the repair after diagnostics?
If you’re unsure or the issue involves high risk, it’s safer to tow or call a professional rather than risk injury or further damage.
When in doubt, tow or consult a pro.
Watch Video
Key Takeaways
- Prepare a complete mobile repair kit and check it regularly.
- Use diagnostics as a guide, not a guaranteed fix.
- Prioritize safety and visibility during roadside work.
- Know when to call for professional help to avoid risk.
- Practice routine roadside drills to stay calm and effective.