Service Street Tire & Auto Repair: A Practical DIY Guide
Learn reliable, step-by-step, safety-focused guidance to service street tires and perform basic auto maintenance at home with Home Repair Guide.

This guide shows you how to safely perform essential street-tire and auto maintenance tasks at home, including tire inspection, a basic tire change, fluid checks, and evaluating when to DIY or call a professional. You’ll learn practical tool usage, safety precautions, and decision points for common repairs. Expect clear steps, warnings, and time estimates to keep your vehicle reliable on the road.
What service street tire & auto repair covers
Service street tire & auto repair refers to practical, on-road maintenance and quick fixes you can perform outside of a full dealership visit. Core tasks include tire inspection and pressure checks, patching minor punctures where appropriate, basic fluid checks (engine oil, coolant, windshield washer), battery health checks, light diagnostics, and simple suspension or braking checks. The aim is to prevent roadside breakdowns, extend tire life, and keep daily driving safe. According to Home Repair Guide, adopting a safety-first mindset and using the right gear makes most of these tasks approachable for homeowners and renters with basic mechanical aptitude. The core idea is to build confidence by mastering a small set of reliable procedures, while recognizing when a problem exceeds your comfort zone and warrants professional service. Proper planning, accurate torque, and careful vehicle stabilization are the hallmarks of a trustworthy DIY tire and auto maintenance routine.
According to Home Repair Guide, reliable tire and auto service starts with a basic, safety-first approach that homeowners can perform themselves when conditions allow. Always prioritize personal safety, use proper lifting and stabilization methods, and consult the owner’s manual for vehicle-specific guidance.
Tools & Materials
- Floor jack(Solid lift capable of supporting the vehicle’s weight)
- Jack stands(Stabilize the vehicle after lifting; never rely on the jack alone)
- Lug wrench(Appropriate size for your lug nuts)
- Torque wrench(To torque lug nuts to the manufacturer’s specification)
- Wheel chocks(Place on the opposite side to prevent movement)
- Tire pressure gauge(Accurate reading; compare to door placard or manual)
- Spare tire or flat repair kit(Have a usable spare or puncture repair kit available)
- Personal protective equipment(Gloves and eye protection for safety)
- Flashlight(Good lighting for undercarriage checks)
- Owner’s manual(Reference for torque specs and recommendations)
- Air compressor or portable inflator(Top off tires and maintain proper pressure on-site)
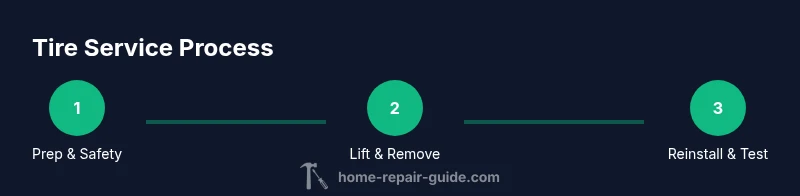
Steps
Estimated time: 30-45 minutes
- 1
Prepare the vehicle and work area
Park on a flat surface, engage the parking brake, and place wheel chocks on the diagonally opposite wheel. Gather tools and wear protective gloves and eyewear. Review the owner’s manual for wheel lug torque specs before starting.
Tip: Always set the parking brake and chock the wheels before positioning the jack. - 2
Loosen lug nuts while the car is still on the ground
Use the lug wrench to loosen each lug nut about a half-turn. This prevents the wheel from turning when you lift the car. Do not remove them completely yet.
Tip: Loosen in a star pattern to avoid warping the rotor and ensure even starting torque. - 3
Lift the vehicle safely
Position the floor jack under the manufacturer-recommended lift point and raise the vehicle until the wheel is off the ground. Secure with jack stands before you work on the wheel.
Tip: Never place any part of your body under the vehicle when it is supported only by the jack. - 4
Remove the wheel and inspect
Finish removing lug nuts and take the wheel off. Inspect the tread, sidewalls, and rotor/drum for damage or wear. Check for embedded objects like nails and evaluate the severity of any puncture.
Tip: If you encounter a cut or bulge in the sidewall, replace the tire rather than attempting a patch. - 5
Repair, rotate, or replace as needed
For punctures within the tread, consider a temporary patch or plug if you have a repair kit and the tread is intact. For worn tires or structural damage, plan for replacement. If you’re rotating tires, follow the correct pattern for your vehicle.
Tip: Follow local regulations and tire manufacturer guidance when deciding between patching and replacement. - 6
Reinstall and torque
Place the wheel on the hub, hand-tighten lug nuts, then lower the car and tighten in a star pattern to the manufacturer’s torque specification with a torque wrench. Re-check lug nuts after a short drive.
Tip: Always torque nuts to spec and recheck after 50-100 miles to confirm proper seating.
FAQ
Can I repair a punctured tire at home?
Punctures in the tread can sometimes be patched or plugged if damage is limited and the tire is otherwise safe. If the sidewall is damaged, the puncture is large, or there are multiple punctures, professional replacement is advised.
Punctures in the tread can sometimes be patched if damage is limited and safe. If the sidewall is damaged, or there are multiple punctures, replace the tire and seek a professional.
Do I need specialized tools for basic tire service?
A basic set includes a lug wrench, floor jack, jack stands, torque wrench, wheel chocks, and a tire pressure gauge. Some tasks may require a torque wrench and a wheel alignment check for best results.
A basic set includes a lug wrench, jack, stands, torque wrench, wheel chocks, and a tire gauge. For best results, use a torque wrench and consider an alignment check if needed.
How often should I check tire pressure?
Check tire pressure monthly and before long trips. Use the vehicle’s recommended psi from the door placard or owner’s manual and adjust when tires are hot after driving.
Check tire pressure monthly and before long trips, using the recommended psi from your door placard or manual.
What is the typical cost range for simple tire service?
Costs vary by region and service level. Basic checks and rotations at a shop are generally affordable, while more involved repairs or replacements depend on tire type and labor. DIY steps typically save on labor but require time and tools.
Costs vary by region and the service level; basic checks and rotations are usually affordable, with higher costs for complex repairs or new tires.
When should tires be replaced rather than repaired?
Tires should be replaced when there is significant tread wear, sidewall damage, bulges, or structural issues that compromise safety. If a puncture is near the sidewall or within the wear bar area, replacement is generally recommended.
Replace tires when there’s significant tread wear or damage that compromises safety. Punctures near the sidewall usually require replacement.
Watch Video
Key Takeaways
- Master a safe, basic tire service workflow
- Use the right tools and torque specs
- Know when a repair is appropriate versus a replacement
- Prioritize safety and call a pro for complex issues