Car Water Pump Replacement: A Complete DIY Guide
Learn how to diagnose a failing car water pump, prepare your workspace, and safely replace the pump with a practical, step-by-step approach from Home Repair Guide. Ideal for DIYers and homeowners seeking reliable auto-repair guidance.

By the end of this guide, you will diagnose a failing car water pump, gather the right tools, and safely replace it or decide when to call a pro. You’ll learn common failure signs, essential safety steps, and how to refill coolant without air locks. This step-by-step approach helps even DIYers handle typical car repair water pump tasks with confidence.
Understanding the car water pump and why it fails
The water pump is a small but critical component in your car's cooling system. It keeps coolant circulating between the engine and radiator, preventing overheating. A pump can wear out due to bearing failure, leaking seals, or worn-out impellers. When a pump fails, you may encounter overheating, coolant leaks, or a misinterpreted temperature gauge. According to Home Repair Guide, most pump failures stem from long service life, contaminated coolant, or leaks in the gasket. Replacing a failing water pump is a common DIY project for homeowners with basic mechanical skills, but it requires attention to safety and correct torque specs. The pump's location varies by manufacturer; in most engines, it sits at the front of the engine and is driven by the serpentine belt or timing belt. Access can be easier on some vehicles than others, and some cars require removing components such as the serpentine belt, thermostat housing, or even the timing cover.
Signs of a failing water pump and when to act
Early signs are subtle: a coolant puddle under the vehicle, visible coolant spray, or steam from the engine bay. A failing water pump can also emit a grinding or whining noise from the pump pulley, fluctuating temperature readings, or a sweet smell from leaking coolant. If you notice coolant loss, overheating, or foggy coolant in the reservoir, stop driving and inspect further. Timely diagnosis prevents more costly damage to the radiator, head gasket, or engine. Regular maintenance, including coolant flushes and belt inspections, can extend pump life. Home Repair Guide emphasizes that catching symptoms early helps you plan a safe repair window and reduces the risk of roadside failure.
Safety and coolant-handling basics
Working on an automotive cooling system requires caution. Coolant is toxic and will be hot if the engine recently ran. Always allow the engine to cool completely and wear eye protection. Use a drain pan to capture coolant leaks and dispose of used coolant at a proper recycling facility. Label hoses and clamps before disassembly, and keep track of the routing of the serpentine belt and any pulleys involved. If your vehicle uses a timing belt with the water pump, you may need to verify timing marks after reassembly. Refer to your vehicle-specific service manual for torque specs and gasket requirements to avoid leaks or warping the housing.
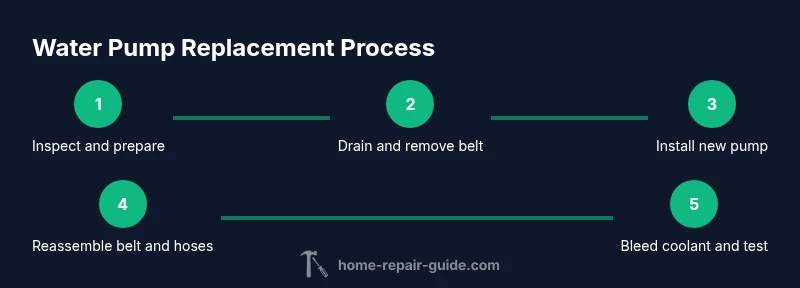
Step-by-step replacement overview
This section provides an overview of the replacement process so you know what to expect before you start. You will disconnect the battery, relieve system pressure, drain coolant, remove the belt, detach hoses, unbolt the old pump, install the new unit with the correct gasket, reattach belts, refill coolant, and bleed air from the system. Some engines require additional components to be removed, such as the thermostat housing or accessory pulleys. Always confirm your car’s exact routing and torque specs in the service manual before proceeding. The goal is a clean, leak-free install with proper coolant circulation.
Post-repair checks and maintenance tips
After completing the installation, start the engine and watch the temperature gauge closely for several minutes. Check for leaks around the pump housing and along hoses; if you see seepage, re-tighten carefully within spec. Ensure the coolant level is correct and that air is purged from the system to prevent hot spots. Recheck the drive belt alignment and tension. Schedule a follow-up coolant flush or system check as part of routine maintenance to extend the life of the pump and prevent future overheating.
Tools & Materials
- Drain pan(Place under radiator drain valve or petcock)
- Socket set(Metric sizes typical for most cars)
- Wrenches (open/box-end)(Used for tight spaces around pulleys)
- Screwdrivers(Flat and Phillips for hose clamps and covers)
- Pliers(Hose clamps and hose removal)
- Torque wrench(Required for exact head bolts on some models)
- Serpentine/timing belt tool (if needed)(Only for models with belt-driven pumps)
- New water pump(Ensure correct model for your vehicle)
- New gasket or sealant (as required)(Check gasket requirement per manual)
- Coolant (make/model specified)(Top up after bleed )
- Funnel and catching container for coolant(To prevent spills)
- Safety goggles(Eye protection at all times)
- Gloves(Protect hands from hot parts and coolant)
Steps
Estimated time: 2-4 hours
- 1
Prepare the vehicle and safety
Park on a level surface, engage the parking brake, and chock the wheels. Disconnect the negative battery cable and allow the engine to cool completely. Gather all tools and materials, and review your vehicle's service manual for pump location and torque specs.
Tip: Take a quick photo of belt routing before removal to avoid misrouting during reassembly. - 2
Relieve pressure and drain coolant
Open the radiator cap only after the engine is cool. Place a drain pan under the radiator drain valve or petcock and slowly open it to drain coolant. Collect used coolant for proper disposal and keep the area clean to prevent contamination of other components.
Tip: If your car uses a refillable overflow bottle, tilt it to drain, then transfer coolant back to the bottle after cooling. - 3
Loosen and remove the drive belt
Use the belt tensioner tool or a wrench to relieve tension and slide the belt off the water pump pulley. If needed, remove additional accessories to access the pump. Keep track of belt routing for reinstallation.
Tip: Label the belt with tape showing its path so you don’t forget the routing when reassembling. - 4
Detach hoses and wiring from the pump
Carefully loosen hose clamps and detach the water pump inlet and outlet hoses. Disconnect any electrical connectors or sensors attached to the pump housing. Keep track of clamps and hoses to ensure correct reassembly.
Tip: Use penetrating oil on stubborn hose clamps and twist gently, avoiding hose damage. - 5
Remove the old pump and gasket
Remove the mounting bolts uniformly to prevent warping the pump or the mounting surface. Detach the pump from the engine block and inspect the mounting surface for gasket residue. Clean the surface with a cigarette-napkin or a soft scraper to avoid scraping into the coolant passages.
Tip: Apply a clean gasket or sealant as required by your vehicle’s manual before installing the new pump. - 6
Install the new water pump
Place the new pump and gasket, then thread bolts by hand to ensure proper alignment. Tighten bolts in a crisscross pattern to the specified torque. Reconnect hoses and any electrical connectors, ensuring clamps are tight but not overtight.
Tip: Check the gasket for alignment before final tightening to avoid leaks. - 7
Reinstall belt, refill coolant, and bleed air
Reinstall the drive belt in the correct path and restore tension. Refill the cooling system with the appropriate coolant, then start the engine and let it reach operating temperature. Use the radiator cap to bleed air until the system stabilizes and the level remains consistent.
Tip: Run the engine with the heater on high to help bleed air from the system. - 8
Check for leaks and test drive
Inspect the pump area for any signs of leakage after the initial test run. Monitor the temperature gauge and ensure the engine cools normally. After a short test drive, recheck coolant level and top up if needed.
Tip: Keep a watchful eye for the first 100 miles; address leaks immediately if they appear.
FAQ
Can I replace a car water pump myself, or should I hire a mechanic?
Whether to DIY depends on your mechanical skill, tool access, and the engine layout. Complex engines or timing-belt interference may require professional service. Use our guide to assess your comfort level and the vehicle-specific complexity.
DIY is possible for many engines if you follow safety steps and have the right tools; otherwise, consult a professional.
What are the most common signs of a failing water pump?
Overheating, coolant leaks, steam from the engine bay, or a grinding noise from the pump pulley are typical indicators. If you notice any, stop driving and inspect further to avoid engine damage.
Overheating and leaks usually point to a failing water pump; stop driving and check it out.
Do I need to replace the timing belt when I replace the water pump?
Some vehicles require timing-belt removal to access the water pump. If the belt is old or due for replacement, consider replacing it along with the pump to prevent future work.
In many engines, the timing belt must be removed to access the pump; assess belt condition if you’re performing the repair.
How should I bleed air from the cooling system after installation?
Run the engine with the heater on high and the radiator cap off (when safe) to bleed air. Watch for bubbles and top up coolant as needed until the level stabilizes.
Bleed by running the engine with heat on high and topping coolant until there are no more air bubbles.
Is it safe to drive immediately after replacing a water pump?
Avoid aggressive driving right after the repair. Monitor temperature and coolant levels for the first few miles and address leaks or overheating promptly.
Don’t push the car hard after replacement; watch for leaks and temperature changes closely.
What coolant type should I use for my engine?
Use the coolant type specified in your vehicle’s manual or on the radiator cap. Using the wrong coolant can cause corrosion or poor cooling performance.
Refer to your manual for the exact coolant spec to avoid damage.
Watch Video
Key Takeaways
- Identify signs early to prevent engine damage
- Follow torque specs and gasket requirements precisely
- Bleed the cooling system to avoid air pockets
- Test for leaks before concluding the job