Fuel Pump Repair: A Step-by-Step Guide
Diagnose, access, replace, and test a faulty fuel pump safely with a practical, step-by-step approach from Home Repair Guide for homeowners and renters.

Goal: Diagnose a failing fuel pump, plan a safe repair or replacement, and verify proper fuel delivery after work. You’ll learn common symptoms, required tools, a clear step-by-step approach, safety checks, and post-repair testing to ensure reliable engine performance. This guide emphasizes practical, DIY-friendly methods while outlining when to seek professional help.
Why fuel pump repair matters
The fuel pump is a critical part of your vehicle's fuel delivery system. When it struggles or fails, engine performance deteriorates, stalling can occur, and you may experience long cranks or hesitation during acceleration. A reliable fuel pump maintains consistent fuel pressure, ensuring your engine receives a steady stream of gasoline or diesel. For homeowners and DIY enthusiasts, understanding the basics of fuel pump repair helps you decide between a simple service, a full replacement, or seeking professional support. This guide uses practical, non-technical language to describe why fuel pump health matters and how to approach repairs safely. Home Repair Guide’s analysis emphasizes cautious, methodical work and proper testing to prevent misdiagnosis. Remember, a failing fuel pump can also be a symptom of other fuel-delivery issues, so confirm the root cause before replacing parts.
In most modern vehicles, the fuel pump is located inside the fuel tank, which means accessing it requires tank work. This design minimizes vapor exposure but increases the complexity of the repair. If you own an older or simpler vehicle, components may be easier to access. Regardless of the make, the core principles of diagnosis, safety, and testing stay the same. Treat fuel system work as potentially hazardous due to flammable liquids and energized electrical connections. Take your time and follow best practices.
Symptoms you may notice
A faulty fuel pump often presents in predictable ways, but symptoms can overlap with other issues in the fuel system. Common indicators include a vehicle that cranks but won’t start, hesitation or stalling under load, and reduced engine performance at higher speeds. You might also notice a drop in fuel pressure, a whining noise from the rear of the vehicle, or a fuel pump relay that hums when the ignition is turned on. Before you dive into replacement, confirm the diagnosis with a fuel pressure gauge or professional diagnostic tools. Home Repair Guide emphasizes verifying symptoms with tests rather than relying solely on intuition. If you’re unsure, consult a repair manual for your vehicle’s specific fuel system layout and safety precautions.
Persistent problems such as frequent stalling, misfires at high rpm, or poor acceleration are strong signals that the fuel pump or related components require attention. Keep in mind that fuel pump failures can be intermittent, especially in older vehicles or those driven in extreme temperatures. Document when symptoms occur and how long they last to help with troubleshooting and to provide a clear history for any shop you may visit.
Safety first: planning and precautions
Fuel system work involves flammable liquids and energized electrical circuits. Begin by parking on a flat surface away from ignition sources and turning off the engine. Disconnect the negative battery terminal to minimize the risk of sparks while working near electrical connections. Relieve fuel system pressure according to your vehicle’s service manual before opening any fuel lines. Wearing safety gear—gloves, eye protection, and clothing that covers exposed skin—helps protect you from spills. If you smell strong fuel or see fuel pooling, stop and ventilate the area. Home Repair Guide recommends working in a well-ventilated space and having a fire extinguisher rated for fuel fires nearby. These safeguards reduce risk while you diagnose and repair the fuel pump.
Document the steps you take, including any hitches or unusual findings. A careful approach is especially important if you’re planning to reuse old gaskets or seals or if you’re dealing with a high-mileage fuel system that may have accumulated debris. If you’re uncomfortable with any step, consider professional assistance; fuel system work is complex and errors can be costly.
Tools and materials you’ll typically need
Having the right tools ready before starting saves time and reduces mistakes. A basic set includes a socket wrench and assortment, screwdrivers (flat and Phillips), pliers, and a multimeter. You’ll likely need a fuel pressure gauge to verify pressure before and after repairs. An appropriate replacement fuel pump or kit is essential if you’re performing a full swap. A rubber mallet, gasket sealant compatible with fuel, and replacement o-rings are often required. Don’t forget safety gear: gloves, eye protection, and a fire extinguisher within reach. For some vehicles, you may also need a tank strap removal tool or a fuel line disconnect tool. Always refer to your vehicle’s service manual for exact part numbers and torque specifications.
Accessing the fuel pump: locating and opening the access panel
In many cars, the fuel pump is housed inside the fuel tank, protected by an access panel or rear seat panel. Begin by locating the access cover, usually in the cargo area or under the rear seat. Remove the cover with appropriate tools, taking care not to damage any wiring harnesses or the tank itself. Once the access panel is removed, you’ll see the top of the fuel pump assembly along with its electrical connections and fuel lines. Document the orientation of components before disconnects so reassembly is straightforward. If your vehicle lacks an obvious access panel, you may need to access the pump by lowering the tank, which is more involved and should be undertaken with caution.
Step-by-step overview: what to expect during the removal and replacement
A fuel pump replacement typically involves draining or safely supporting the tank, disconnecting electrical connectors, and carefully detaching fuel lines. The old pump is removed, a new pump is installed, and seals or gaskets are replaced to prevent leaks. Reassembly requires reconnecting lines and wiring, securing the tank, and reconnecting the battery. After installation, you’ll test the system for leaks and pressure, then clear any diagnostic trouble codes if present. This section provides a high-level progression to guide your planning, but you should always follow your vehicle’s service manual for precise steps and torque specs. Home Repair Guide emphasizes patient, careful work and double-checking your connections to ensure a safe, durable repair.
Testing the repaired system: verifying fuel pressure and leaks
Testing is essential to confirm the repair’s success. After reinstalling the pump and securing all connections, reconnect the battery and turn the ignition to the on position (without starting the engine) to power the fuel pump briefly. Use a fuel pressure gauge to compare readings against your vehicle’s specifications. Look for steady pressure, no sudden drops, and no leaks at the connections or seals. If the test reveals weak pressure or leaks, recheck hose clamps, fittings, and seals. A successful test means you can proceed to a short road test, paying attention to start-up behavior, idle quality, and throttle response. Document any abnormal readings and address them before long trips.
Cost considerations and choosing the right parts
Costs for fuel pump repair can vary with vehicle make, model, and the specific pump type. OEM parts tend to be more expensive but can offer a perfect fit and longer life, while aftermarket options may provide a cost savings with acceptable reliability. Your decision should consider labor time, access difficulty, and whether the pump module includes integrated sensors or filters. Home Repair Guide recommends obtaining multiple quotes and verifying warranty terms for any replacement part. If your vehicle is under warranty or you’re unsure about compatibility, consult a qualified technician to avoid misfit parts that could cause recurring failures.
Post-repair maintenance: extending fuel pump life
After a successful repair, maintenance helps extend the life of your fuel delivery system. Keep the fuel tank at least a quarter full to prevent pump overheating and cavitation. Use clean, high-quality fuel to reduce sediment and debris that can clog filters. Replace fuel filters on schedule and inspect fuel lines for signs of wear, cracking, or leaks. Regularly check electrical connections for corrosion and secure mounting to minimize vibration. A small, proactive maintenance routine can prevent premature failures and keep your fuel system operating reliably for longer.
When to seek professional help
Some fuel pump issues are straightforward, but others are complex enough to require specialized tools and knowledge. If you encounter fuel leaks, persistent hard starts after repair, or fuel pressure readings that fall outside the manufacturer’s specifications, it’s wise to consult a professional. Complex tank work, safety concerns, or vehicles with advanced fuel delivery systems may necessitate equipment and expertise beyond a typical home workshop. Home Repair Guide recommends weighing the risks, your experience, and the vehicle’s value before attempting repairs beyond basic maintenance.
Final notes: DIY potential vs. risk assessment
Fuel pump repair can be within reach for the mechanically inclined, especially with proper manuals and the right tools. The key is to plan, stay organized, and prioritize safety. If you’re unsure about steps or feel uncomfortable at any stage, stop and seek professional assistance. The Home Repair Guide team emphasizes practical, safe repairs aligned with your skill level, vehicle design, and local regulations. A careful assessment is the best predictor of a durable, trustworthy fix.
Tools & Materials
- Socket set (metric and SAE)(Include deep sockets for tank strap bolts; prefer a standard ratchet and extension.)
- Screwdrivers (flat and Phillips)(Varied sizes to remove access panels and clamps)
- Pliers (needle-nose and hose clamp pliers)(Essential for hose clamps and electrical connectors)
- Fuel pressure gauge(Check system pressure per vehicle spec; may require adapter)
- Replacement fuel pump module or pump kit(Choose OEM or high-quality aftermarket compatible with your vehicle)
- O-ring kit and gaskets(Replace all seals to prevent leaks)
- Safety gear (gloves, eye protection)(Chemical-resistant gloves recommended)
- Fire extinguisher (class B/C)(Keep within reach during any fuel work)
- Torque wrench(Useful for re-tightening bolts to spec)
- Container or towels for spills(Have absorbent materials ready for any drips)
Steps
Estimated time: 3-6 hours
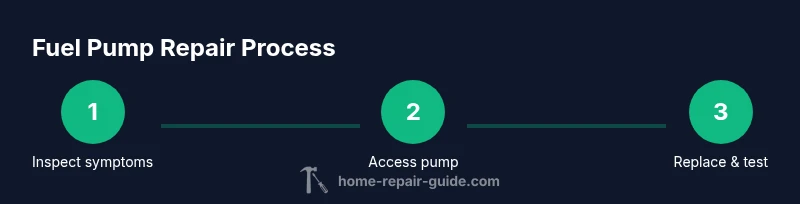
- 1
Prepare and safety check
Park on a flat surface, turn off the engine, and disconnect the negative battery. Relieve fuel system pressure according to the manual, then gather tools and safety gear. This step minimizes fuel spray and electrical hazards before touching the fuel pump.
Tip: Always have a fire extinguisher within reach and work in a well-ventilated area. - 2
Access the pump
Locate the fuel pump access panel (usually in the rear seating area or trunk). Remove the cover and inspect the area for loose wiring or damaged hoses before proceeding.
Tip: Take a photo of connector orientations before disconnecting any wiring. - 3
Disconnect electrical and lines
Carefully unplug the pump electrical connector and detach fuel lines using appropriate tools. Cap lines to prevent spills and avoid bending fittings.
Tip: Label each line if you’re working with multiple connections. - 4
Remove the old pump
Loosen fasteners, lift the pump assembly from the tank, and inspect the mounting hardware and seals. Keep track of any shims or brackets that must be reused.
Tip: Do not force parts; if resistance occurs, recheck connections and alignment. - 5
Install the new pump
Install the replacement pump, align seals, and reconnect the lines and electrical. Ensure the assembly sits firmly and seals evenly against the tank opening.
Tip: Lubricate O-rings with a compatible, clean fluid or lubricant recommended by the manufacturer. - 6
Reassemble and secure
Reattach the access panel, secure mounting hardware, and reconnect the battery. Verify all fasteners are tight to the specified torque.
Tip: Double-check hose clamps for proper tightness; a loose clamp is a common source of leaks. - 7
Initial pressure check
Power the pump briefly to pressurize the system, then connect the fuel pressure gauge. Compare readings to the vehicle’s specification and look for stability.
Tip: If readings are inconsistent, recheck fittings and seals before test drive. - 8
Leak test and engine start
With the system pressurized, inspect all connections for leaks. Start the engine and observe idle behavior, then verify smooth acceleration.
Tip: If a leak is detected, stop immediately and reseat seals before continuing. - 9
Road test and final checks
Take a short drive to confirm performance, then re-check for leaks after cooling. Document readings and any anomalies for future reference.
Tip: Keep a log of symptoms and test results for future maintenance.
FAQ
What are common signs of a failing fuel pump?
Common signs include hard starting, engine misfires, loss of power under load, and a whining noise from the rear. Fuel pressure testing confirms the diagnosis, while inspecting for leaks helps ensure safety.
Common signs include hard starting, loss of power, and a whining noise from the rear; fuel pressure testing helps confirm the issue.
Can I replace the fuel pump myself?
Yes, with the right tools, access to your vehicle’s fuel tank, and careful attention to safety. Some vehicles have straightforward access panels; others require tank removal. Always consult the service manual for procedures and torque specs.
You can replace it yourself if you’re comfortable with tank access and safety steps; follow the manual for exact steps.
How do I test fuel pressure after replacement?
Connect a fuel pressure gauge according to the manufacturer’s spec, power the pump, and observe the reading. Compare to the vehicle’s specified range and check for a steady value without drops.
Attach a pressure gauge, run the pump, and compare the reading to the spec to confirm a successful repair.
Is it safe to drive with a suspected fuel pump problem?
Driving with a suspected pump issue risks stalling and fuel starvation, which can be dangerous. If symptoms appear, limit driving and arrange a diagnostic check soon.
Drive cautiously and get a diagnostic check soon if you suspect a fuel pump issue.
What tools do I need for a fuel pump replacement?
A basic tool set, fuel pressure gauge, replacement pump kit, O-rings, and safety gear cover most DIY replacements. Some vehicles may require special connectors or removal tools.
You’ll need a basic tool set, a fuel pressure gauge, and a pump kit plus safety gear.
When should I replace the whole pump vs just seals?
If the pump fails to build pressure or is noisy after testing, replacement is often necessary. Seals alone are insufficient if the pump has wear or damage.
If pressure is low or the pump is noisy, replace the pump rather than just seals.
Watch Video
Key Takeaways
- Identify fuel pump symptoms early and test before replacing parts.
- Safety first: disconnect battery, relieve pressure, and ventilate work area.
- Use proper seals and verify fuel pressure post-repair.
- Consider OEM parts for perfect fit and reliability.
- When in doubt, seek professional help to avoid costly mistakes.