Water Pump Repair: A Step-by-Step Home Fix Guide
Learn how to diagnose and repair common water pump issues at home. This guide covers safety, tools, parts, a clear step-by-step workflow, and maintenance tips to extend pump life.

By the end of this guide you will be able to diagnose and repair a common home water pump issue. You’ll learn to safely shut off power and water, inspect valves and seals, replace worn gaskets or impellers, and test for leaks. This step-by-step approach fits typical residential setups.
How a water pump fits in your home plumbing system
In most homes, a circulating pump is integrated into the hot water system or cold water supply to boost pressure or circulate water in a boiler loop. Understanding where your pump sits helps you diagnose problems quickly and perform safe repairs. This section explains the typical configurations (centrifugal vs. inline pumps) and what pump components you should know: housing, motor, impeller, seals, and discharge valve. By identifying the pump's location, you can isolate problems to the pump itself rather than the broader piping network. Common places to find a pump include the well pressure system, sump pump basins, or inline pumps under sinks or near water heaters. Knowing the model and voltage helps ensure you purchase compatible parts if replacement is needed.
Note: Home Repair Guide emphasizes careful identification of the pump type before attempting any repair, to prevent accidental damage to the system.
Common failure modes and signs
Pumps fail for several reasons: worn seals or gaskets, corroded impellers, blocked intake screens, overheating due to electrical issues, and air locks in the discharge line. Signs include unusual grinding or humming noises, intermittent pressure drops, visible leaks around the pump flange, and slower water flow. In sump pumps, check for rapid cycling or frequent cycling due to overload. If the pump runs but no water moves, inspect the intake and check for air leaks. Regular inspection helps catch issues before a leak becomes flooding.
Pro tip: keeping a simple log of sound changes or pressure fluctuations helps you detect gradual wear over time.
Diagnosing issues safely and efficiently
Start by turning off electrical power to the pump at the breaker and turning off the water supply. Release residual pressure by draining a faucet in the affected zone. Inspect the pump housing for cracks, leaks, or corrosion. Remove the access panel to inspect the impeller and seals; replace O-rings if they look worn. Check the electrical connections for loose wires and test the motor with a multimeter if you have one. If you identify a damaged winding, defective capacitor, or a seized impeller, plan for replacement. Follow the manufacturer’s manual for torque specs and part numbering to avoid over-tightening.
Safety note: Always de-energize before touching electrical components and wear protective gear. Home Repair Guide recommends a tested voltage meter and insulated tools for every pump job.
Inspection, parts, and replacement options
Keep a ready stock of lubricants, replacement seals, and gaskets that match your model. Decide between repairing the core components or replacing the entire pump unit. Replacements may require a new impeller, shaft seal, or a complete cartridge seal kit. For well pumps, verify cut-in and cut-out pressures; for sump or circulating pumps, verify voltage and motor compatibility. Always keep spare O-rings and a few feet of spare pipe tape. When ordering parts, note the pump's model number and size to ensure a proper fit.
Tip: If you’re unsure of the exact seal kit, bring the old parts to a plumbing supply store to compare replacements.
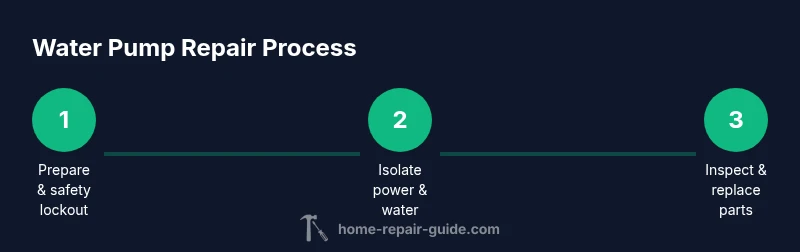
Step-by-step repair workflow overview
Most repairs follow a predictable sequence: safely power down and depressurize, access the pump, inspect components, replace worn parts, reassemble with proper torque, bleed air, test in a low-pressure dry run, and re-energize the system. This overview helps you plan your work and avoids missing critical steps. The exact actions depend on your pump type (centrifugal, submersible, or well pump). If you feel unsure at any point, stop and consult a professional.
This section sets the stage for the detailed step-by-step instructions that follow in the dedicated STEP-BY-STEP section.
Maintenance tips to extend pump life
- Schedule regular inspections every 6–12 months to catch wear early.
- Keep suction screens and strainers clear of debris to prevent flow restrictions.
- Replace seals, gaskets, and O-rings at manufacturer-recommended intervals.
- Check electrical connections for corrosion and secure mounting to reduce vibration.
- Avoid running the pump dry; ensure water is present before startup.
- Consider a quality pump controller or pressure switch to protect the system.
Following these practices can dramatically extend the life of a water pump and reduce emergency repairs.
Tools & Materials
- Safety glasses(Impact-resistant; wear at all times)
- Work gloves(Digest for grip and hand protection)
- Adjustable wrench(16–24 mm range covers most fittings)
- Socket set(Metric or SAE based on model)
- Flathead screwdriver(For pry or clamp adjustments)
- Phillips screwdriver(Screw removal and mounting)
- Pipe wrench(Access hard-to-reach fittings)
- Teflon tape(Seal threaded connections)
- Replacement seals/O-rings(Match model and size)
- Gasket seal kit(Optional if kit exists for your pump)
- Bucket and towels(Contain water and catch drips)
- Penetrating oil(Loosen stubborn fittings)
- Multimeter or voltage tester(Only if you’re comfortable testing electricals)
Steps
Estimated time: 60-120 minutes
- 1
Prepare and safety lockout
Identify the pump type and read the manufacturer’s manual for safety procedures. Gather tools, wear PPE, and plan the steps before touching any components. Create a dedicated workspace with good lighting and a clear path for parts.
Tip: Label all removed fasteners and keep them grouped by step to avoid mix-ups. - 2
Shut off power and water supply
Switch off the circuit at the main breaker and shut off the relevant water valve. Confirm no power is reaching the pump by testing with a voltage tester if available. Relieve pressure by opening a faucet downstream and allowing trapped water to escape.
Tip: Double-check the breaker and the valve; never assume another circuit isn't feeding the pump. - 3
Access the pump and inspect exterior
Remove the pump cover or access panel according to the model. Visually inspect for leaks, corrosion, or damaged housing. Take photos of wiring and connections before disassembly to aid reassembly.
Tip: Keep track of which bolts go where; mismatched bolts can affect seal integrity. - 4
Disassemble and inspect internal parts
Carefully detach the pump head to access the impeller, seals, and O-rings. Check the impeller for wear, cracks, or clipping; examine seals for cracks or cracking. If wires or windings show damage, mark and replace the affected components.
Tip: Do not force parts loose; apply light tapping with a plastic mallet if needed. - 5
Replace worn parts and reassemble
Install new seals/O-rings and, if required, a new impeller or seal kit. Reassemble in reverse order, ensuring fittings are snug but not over-tightened. Apply fresh Teflon tape to threaded connections and align components correctly.
Tip: Use a torque wrench if the manufacturer specifies torque values. - 6
Bleed air, test, and restore service
After assembly, slowly re-pressurize the system and bleed air by opening a downstream faucet. Run the pump briefly and listen for abnormal noises. Check for leaks at every joint and verify proper flow before returning to full operation.
Tip: Monitor for several minutes; a small drip initially may indicate a settling joint rather than a leak.
FAQ
What are the most common causes of water pump failure?
Common failures include worn seals, damaged impellers, clogged intake, and electrical faults. Regular inspection helps catch wear before a leak or total failure occurs.
Common failures are worn seals, damaged impellers, clogs, and electrical faults. Regular checks prevent surprises.
Can I repair a water pump myself, or should I hire a pro?
You can handle basic seal and gasket replacements if the pump is accessible and you have the right tools. Complex electrical work, well pumps, or sealed units may require a licensed technician.
You can do simple seal and gasket work, but complex electrical or well pumps may need a pro.
How long does a typical water pump repair take?
For most residential pumps, a straightforward seal or impeller replacement can take about an hour or two. More complicated issues or inaccessible pumps may require additional time.
Most repairs take one to two hours, depending on access and parts.
Do I need special tools to repair a water pump?
Basic hand tools plus replacement seals are usually sufficient. A torque wrench and voltage tester add safety and accuracy for more complex jobs.
Basic tools usually work, but a torque wrench and tester improve safety.
Is there a safety risk when working on a water pump?
Yes. Always disconnect power, depressurize the system, and wear PPE. If you smell burning or see damaged wiring, stop and seek help.
There is a risk of shocks and floods—disconnect power and depressurize first.
When should I replace the entire pump instead of repairing it?
If multiple internal components fail or the unit is old and inefficient, replacement is often more reliable and cost-effective than repairing multiple parts.
If many parts fail or it’s old, replacing the pump is usually best.
Watch Video
Key Takeaways
- Identify pump type and location before work.
- Shut off power and water to prevent flooding or shocks.
- Inspect seals and impellers for wear and replace as needed.
- Test thoroughly and monitor for leaks after reassembly.