Brake Line Repair: A Step-by-Step DIY Guide for Safer Brakes
Learn to inspect, plan, and safely repair or replace a brake line with our homeowner-friendly guide. Includes tools, steps, safety tips, and when to call a pro.

Brake line repair is a critical safety task to stop leaks and restore proper braking. This guide outlines how to assess damage, choose an approach, gather the right tools, and perform a safe, effective repair or replacement, with cautions about air in the system and when to seek professional help.
What brake line repair is and why it matters
Brake line repair refers to fixing or replacing the metal tubes that carry brake fluid from the master cylinder to the calipers or wheel cylinders. These lines are subject to rust, corrosion, road damage, and flexing from steering articulation. A compromised brake line can leak fluid and lead to a loss of hydraulic pressure, resulting in reduced braking ability or a complete loss of braking. In our experience at Home Repair Guide, addressing brake line issues early reduces risk and helps maintain reliable stopping power. Whether you opt for a repair sleeve, a newly cut and flared section, or a full-line replacement, the goal is a leak-free path with clean, secure connections and proper bleed to remove air from the system.
Note: Always verify compatibility with your specific vehicle year, make, and model and follow the service manual. If you’re unsure about the correct routing or fittings, consider professional help to avoid compromising safety.
Safety and legal considerations for brake line repair
The braking system operates under high hydraulic pressure and contains brake fluid that is corrosive to skin, eyes, and paint. Wear protective gloves and splash goggles, and work in a ventilated area away from open flames or sparks. Never smoke near brake fluid and promptly clean spills with absorbent materials. Use jack stands, wheel chocks, and secure the vehicle before starting any work. If your vehicle is under warranty or if you’re unsure about local inspection requirements, check with a licensed mechanic or inspector to avoid voiding coverage or failing a safety inspection. According to Home Repair Guide analysis, following official guidelines reduces risk and helps ensure a compliant repair.
Prepare your workspace: lay down clean rags, cover nearby components to prevent fluid contamination, and have a dedicated container for used brake fluid.
Symptoms that indicate a brake line needs attention
Common warning signs include visible leaks along the lines or fittings, rust on the steel tubing, damp or discolored patches under the car, a spongy or sinking brake pedal, increased stopping distance, or a brake warning light illuminating on the dashboard. If you notice any of these, treat it as urgent and perform a thorough inspection to locate the exact leak point. Ignoring symptoms can lead to failure of the hydraulic system and compromise vehicle safety.
In many cars, leaks originate near flexible hoses or at corroded clamps where the rigid line meets the wheel cylinder or caliper. Documenting the location with photos helps guide repair decisions and ensures you replace the correct length of line.
Approaches to repair: patching, replacement, or full line overhaul
There are several strategies, depending on damage, budget, and your confidence level. A patch or repair sleeve may be a temporary fix for minor leaks on limited segments but is not generally a permanent solution for a compromised line. Replacing a damaged section requires cutting, flaring, and proper fittings to maintain a sealed, leak-free system. In cases of extensive rust or multiple weak points, replacing the entire brake line or the entire line network in that zone might be the safer long-term choice. Always bleed the system after any repair to remove air and restore pedal feel. If you’re uncertain, consult a professional before proceeding, since improper repair can lead to dangerous brake failure.
Planning your repair: costs, time, and choosing DIY versus professional help
Brake line work can vary in complexity based on vehicle type and line routing. DIY repairs are feasible for some straightforward rusted sections or sleeve repairs with the correct tools, but traditional steel lines often require precise flaring and bending. Budget for replacement parts, brake fluid, new fittings, clamps, and consumables, plus labor if you hire a shop. Consider the time commitment—fuel and temperature can affect fluid viscosity and ease of work—and always prioritize safety. Home Repair Guide recommends evaluating your own skill, tool availability, and warranty implications before starting.
Tools & Materials
- Brake line repair kit (new line sections, sleeves, fittings)(Choose steel or copper-nickel alloy; verify compatibility with your vehicle)
- Tubing cutter (brake line cutter)(Use a cutter rated for brake line thickness; score and cut squarely)
- Flare-nut wrenches set(Common sizes: 3/8", 7/16"; keep fittings square)
- Brake fluid (DOT 3 or DOT 4 as specified by vehicle)(Keep container sealed; flush and refill after repair)
- Brake line bending tool(Helps avoid kinks and ensures proper line routing)
- Line clamp or vise(To hold the line steady during work)
- Catch pan, rags, and absorbents(Contain old fluid and protect the work area)
- Jack stands and wheel chocks(Never rely on a jack alone; ensure stable support)
- Bleed kit or vacuum/pressure brake bleeder(Essential to remove air after installation)
- Protective gloves and safety glasses(Brake fluid is caustic; PPE is mandatory)
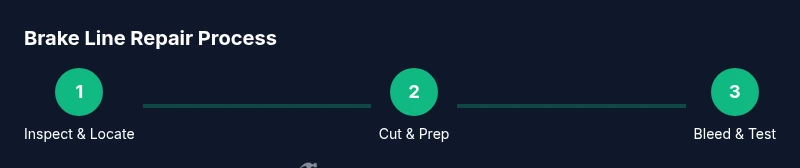
Steps
Estimated time: Total time: 3-5 hours
- 1
Identify leak and secure vehicle
Park on a level surface and apply the parking brake. Chock the wheels and wear PPE before inspecting. Locate the exact leak area using light and a flashlight, then document with photos for reference.
Tip: Label the damaged section with tape and note the alignment for reassembly. - 2
Relieve pressure and gather tools
With the engine cool, remove the master cylinder cap to relieve residual pressure. Gather all tools and fresh fluids to minimize trips to the toolbox. Ensure the vehicle is safely elevated and supported before working under it.
Tip: Work in a well-lit area and keep a dedicated container for old brake fluid. - 3
Remove damaged section and prepare ends
Loosen and remove fittings at the damaged section, taking care not to twist adjacent lines. Cut the line squarely using the tubing cutter and remove any burrs. Deburr the flare ends and deburr both ends to ensure a clean seal.
Tip: Use wobble-free cutters and keep fittings clean to prevent contamination. - 4
Fabricate and fit replacement line
Measure the distance and cut a replacement length to fit between fittings. Bend the line to match the original routing, avoiding sharp kinks. Slide on new fittings and check alignment before torquing.
Tip: Test-fit the line without fluid first; ensure it won’t contact moving parts. - 5
Bleed and verify system integrity
Reconnect the brake line, tighten fittings to manufacturer specs, and bleed the system to remove air. Refit the reservoir cap and wipe any spilled fluid. Check for leaks with the engine off and the pedal pressed gently.
Tip: Multiple bleeding passes may be needed; never reuse contaminated fluid. - 6
Road-test and finalize
Lower the vehicle and perform a cautious road test in a safe area. Recheck for leaks after a short drive and monitor brake pedal feel. If any sponginess or leaks persist, stop and reassess or seek professional help.
Tip: Document test results and return to a shop if anything feels off.
FAQ
Is brake line repair safe for DIY?
DIY brake line repair can be safe for simple repairs if you have the right tools, skills, and a leak-free setup. However, it’s a critical system, and errors can lead to brake failure. If you’re unsure, consult a professional.
DIY brake line repair is possible for simple fixes if you have the right tools, but this is a critical system. When in doubt, contact a pro.
Can I fix a brake line without specialized tools?
Some repairs can be done with basic tools, but flaring, bending, and proper sealing typically require specialized brake line tools. Using incorrect tools increases risk of leaks and failure.
You can attempt simple fixes with basic tools, but proper flaring and sealing usually need specialized gear.
What are common signs of a failing brake line?
Look for visible fluid leaks, rust along the line, damp spots, a spongy pedal, or a warning brake light. If you notice any of these, inspect promptly.
Common signs include leaks, a spongy pedal, and warning lights. Inspect promptly.
Do I need to flush the brake fluid after repair?
Flushing or bleeding the brakes after any line repair is recommended to remove air. This helps restore brake feel and stopping power.
Yes, bleed the brakes after repair to remove air and restore pedal feel.
How long does brake line repair typically take?
DIY repair can take several hours depending on access and vehicle layout. A professional job may be faster but can cost more.
It can take a few hours for a DIY fix; a pro may complete it faster but at a cost.
Can I drive with a suspected brake line issue?
Driving with a suspected brake line leak is dangerous and not recommended. If you notice leaks, avoid driving and have it inspected immediately.
If you see a leak, don’t drive; get the brake system checked now.
Watch Video
Key Takeaways
- Identify leaks early to prevent total brake failure.
- Use the correct materials and safe techniques when repairing brake lines.
- Bleed the system thoroughly to remove air after any repair.
- If uncertain, consult a professional to ensure safety.