Leak Roof Repair Near Me: Your Step-by-Step Guide
Learn how to identify, assess, and fix roof leaks near you with practical, safe steps. This Home Repair Guide tutorial covers tools, materials, and when to call a pro.

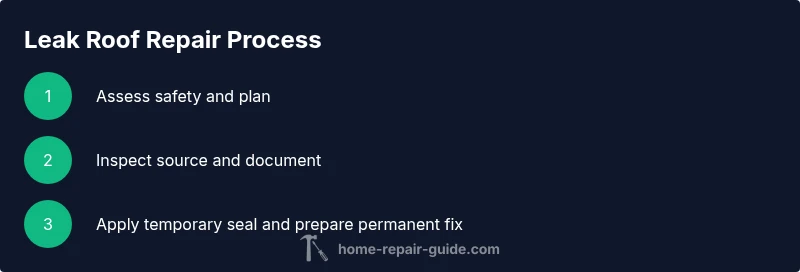
To address a leak roof repair near me, start by safely locating the source, clearing debris, and drying the area. Inspect shingles, flashing, and gutters for damage, then apply a quick temporary seal if you must. For persistent leaks, or if you’re unsure about safety or roof structure, hire a local roofer promptly. This guide from Home Repair Guide helps you decide DIY vs. pro.
Understanding when you need professional help vs DIY
The decision to DIY or hire a pro for leak roof repair near me hinges on safety, extent of the damage, and your comfort level with heights and roofing materials. According to Home Repair Guide, most small leaks from damaged flashing or clogged gutters can be managed by a careful DIY approach on a dry day, using basic tools and sealants. However, larger leaks, active water intrusion, signs of widespread water damage, or structural concerns require professional assessment. In such cases, a licensed roofer can assess roof integrity, flashing condition, ventilation, and attic insulation. When evaluating options, balance cost, time, and risk: DIY can save money for minor issues, but mistakes can lead to costly water damage. Home Repair Guide analysis shows that timely, informed decisions prevent escalation.
Safety considerations before you begin
Working on a roof carries fall risks and exposure to sharp edges. Always verify weather conditions, wear non-slip boots, use a harness where required, and never work alone when climbing or inspecting a roof. If you feel uncertain, pause and consult a professional. The Home Repair Guide team emphasizes safety first; poor footing or distracted work can lead to serious injuries.
Step-by-step inspection process
Begin with a thorough inspection on a dry day. From the attic, look for dark stains, damp insulation, and any light infiltration around flashing or joints. Use a flashlight to trace water trails back to their source. Then inspect the exterior roof up close: look for cracked, curled, or missing shingles, damaged flashing around vents, chimneys, and valleys. Document findings with photos, as this helps you plan repairs and compare quotes later. If you find structural damage or extensive rot, stop and call a pro.
Common roof leak sources and how to address them
Leaks typically originate from damaged flashing around chimneys and vents, curled or missing shingles, or failed seals where two planes meet (valleys and transitions). Clogged gutters and downspouts can overload roof edges, causing water to seep under shingles. Inattentive attic ventilation can trap moisture, promoting rot. Address the simpler sources first, such as clearing gutters, resealing flashing, or replacing a handful of damaged shingles. For flashing replacement or extensive shingle work, plan a more thorough repair or a professional visit.
Temporary fixes to stop water ingress
When a leak is active, you can apply a temporary seal to slow water intrusion while you plan a permanent repair. Clean and dry the area, apply roofing cement or sealant along the flashing and joints, and cover the area with a tarp if feasible. Remember, temporary fixes are not permanent; they buy time but don’t replace missing flashing or rotted decking. Replace temporary measures with a proper repair as soon as practical.
Permanent repair options and materials
Permanent repair choices depend on the source and extent of damage. Replacing damaged shingles or flashing, installing new underlayment, and resealing along joints are common approaches. If there is compromised decking, you may need to replace sections of plywood or sheathing. Choose materials compatible with your roof type and climate. A well-executed repair should restore water shedding pathways and protect interior spaces for years to come.
Weather considerations and timing
Dry, calm days are ideal for roof work. Avoid repairing during rain, high winds, or freezing temperatures, which can cause shingles to crack or sealants to fail. Waiting for the right window reduces risk and improves adhesion of sealants and flashing. If a heavy storm is forecast, plan temporary measures to protect interior space and schedule the main repair after conditions improve.
How to document leaks for a pro visit
Create a concise packet for your roofer: a map of affected areas, photos before and after, measurements of damaged sections, and a timeline of when leaks occur. Note any prior repairs or roof work. This information helps the professional assess the scope and prepare an accurate estimate. Clear documentation can reduce back-and-forth and speed up the repair process.
Cost considerations and budgeting
Costs for roof leak repairs vary with roof type, extent of damage, and local labor rates. While DIY fixes reduce upfront costs, larger problems may require professional service to ensure long-term effectiveness. Budget for materials, potential deck repairs, and follow-up inspections. The Home Repair Guide analysis shows that planning ahead and comparing quotes helps homeowners avoid sticker shock.
When to hire a pro near me
If the leak is widespread, if there is active water intrusion, if you see sagging decking, or if safety concerns arise, contact a licensed roofer near you promptly. Obtain multiple written quotes, confirm licensing and insurance, and ask for warranty terms on repairs. The Home Repair Guide team recommends erring on the side of safety and professional assessment when structural elements are suspected.
Maintenance to prevent future leaks
After repairing, perform regular maintenance: clean gutters, inspect flashing and seals after storms, and check attic insulation and ventilation. Schedule seasonal inspections and address issues promptly to extend the life of your roof. Practicing preventative maintenance reduces the likelihood of future leaks and protects interior spaces.
Tools & Materials
- Extension ladder(Reach eaves safely; stabilize on firm ground)
- Safety harness(Attach to a secure anchor point)
- Roofing cement(For temporary seal on active leaks)
- Roofing sealant(Silicone or polyurethane for flashing joints)
- Roofing nails(Galvanized or stainless; hold flashing in place)
- Hammer(For nails and fasteners)
- Utility knife(Trim shingles and underlayment)
- Pry bar/flat bar(Lift shingles and remove damaged pieces)
- Tin snips(Optional for metal flashing work)
- Roofing tape/patch(Temporary patch for minor gaps)
- Ground tarp/plastic sheeting(Protect interiors during repair)
- Work gloves(Grip and protect hands)
- Headlamp or flashlight(Work in low light areas)
- Caulk/sealant(Flexible sealant for joints and edges)
Steps
Estimated time: 2-6 hours
- 1
Assess safety and prepare
Check the weather, clear the area, and don PPE. Ensure the ladder is set on stable ground and use a harness if needed. This first step minimizes risk before any roof work begins.
Tip: Make sure someone is available to spot the ladder and assist if needed. - 2
Set up ladder and access roof safely
Place the ladder at a stable angle and secure the top. Climb slowly, maintaining three points of contact. If your roof is steep, consider professional assistance.
Tip: Never reach too far off-center; reposition the ladder instead of leaning. - 3
Identify the likely leak source from interior
From the attic, locate damp insulation, water trails, and any light entering through gaps. Trace the path to the exterior. Document findings with photos for reference.
Tip: Mark areas with tape to avoid losing track of the source. - 4
Clear debris around leak area
Remove leaves, dirt, and broken shingles from the vicinity of the leak. Debris can trap moisture and hide further damage. Keep the area dry for accurate inspection.
Tip: Use a stiff brush for stubborn residues; avoid scratching shingles. - 5
Dry the area thoroughly
Use a towel or a blower to dry the surface around the leak. A dry surface ensures sealants adhere properly and that you can assess true damage.
Tip: Do not seal wet surfaces; moisture will trap under sealant and fail later. - 6
Apply a temporary seal
Apply roofing cement or sealant along the flashing and around the affected shingles as an interim stopgap. Place a patch of roofing tape over gaps as needed.
Tip: A temporary seal should not mask structural damage; plan for a permanent fix. - 7
Inspect flashing and shingles around leak
Look for loose flashing, cracked shingles, or rusted nail heads. Replace or reseal as needed. Faulty flashing is a common cause of recurrent leaks.
Tip: If flashing is corroded, replace rather than patch to ensure longevity. - 8
Plan permanent repair method
Decide whether to replace shingles, reseal flashing, or install new underlayment. Gather required materials before starting the permanent fix.
Tip: For complex work, create a clear list of steps to minimize on-site mistakes. - 9
Execute the permanent repair
Install replacement shingles or flashing, reseal joints, and reattach any underlayment. Ensure seams shed water and seals are smooth.
Tip: Take your time to ensure a weather-tight seal; rushing leads to future leaks. - 10
Re-test for leaks
After repairs, re-check the area during a controlled water test or after rainfall. Look for any new signs of water intrusion.
Tip: If you see residual drips, inspect nearby flashing and joints again. - 11
Clean up and document
Gather tools, dispose of waste properly, and photograph the finished work for records. This helps with future maintenance and potential warranty claims.
Tip: Keep a repair log including date, parts replaced, and notes for future reference. - 12
Schedule follow-up maintenance
Set reminders for seasonal inspections and gutter cleaning. Regular checks reduce the chance of future leaks and extend roof life.
Tip: Pair inspections with seasonal maintenance to build a simple routine.
FAQ
Should I DIY or hire a professional for a roof leak?
DIY can work for small, clearly accessible leaks with proper safety, but severe damage, complex flashing, or structural concerns warrant a professional assessment. Always evaluate risk, skill, and potential costs of mistakes.
DIY can help with small leaks, but for complex damage, hire a pro after assessing safety and scope.
Can a roof leak be stopped with a tarp?
Tarping can stop active water intrusion temporarily when done correctly, but it does not fix underlying issues. Plan a permanent repair as soon as practical.
Tarping may stop the immediate water flow, but it isn’t a fix for the root cause.
What basic tools do I need for a DIY roof leak repair?
A ladder, pry bar, utility knife, roofing cement, sealant, nails, hammer, and a flashlight are typically sufficient for minor DIY repairs.
You’ll need a ladder, pry bar, knife, sealant, nails, hammer, and a flashlight.
How long does a roof leak repair last?
Durability depends on materials, climate, and installation quality. Properly executed repairs in suitable conditions can provide several years of protection.
A well-done repair can last for several years, depending on conditions and materials.
What are common signs of roof leaks inside the home?
Look for water stains, musty odors, damp insulation, or ceiling sagging. Early signs often appear in the attic or upper floors after rain.
Watch for stains, smells, and damp insulation near the ceiling.
Is it safe to climb onto a roof during rain?
No. Wet roofs are extremely slippery and dangerous. Wait for dry conditions or hire a professional for inspections during wet weather.
Don’t climb a wet roof; wait for dry weather or call a pro.
Watch Video
Key Takeaways
- Identify the leak source early and document it.
- Use temporary sealants only as a stopgap.
- Know when to escalate to a professional for safety and quality.
- Maintain a repair log to guide future maintenance.
- Regular maintenance reduces future leaks.