Roof Repair Miami FL: A Practical Step-by-Step Guide
Explore reliable roof repair steps for Miami, FL, covering leaks, flashing, shingle fixes, and safety tips, with maintenance guidance from Home Repair Guide.

In this guide you will learn how to assess and perform basic roof repairs in Miami, FL, including identifying leaks, inspecting flashing and shingles, selecting the right materials for humid climates, and executing safe, step-by-step fixes. It emphasizes safety, local weather considerations, and when to call a professional. It also covers a practical tools checklist and a maintenance routine to prevent future leaks.
Why Roof Repair in Miami FL Matters
Miami's climate punishes roofs with heat, humidity, heavy rain, and tropical storms. Regular maintenance helps prevent leaks, mold growth, and structural damage that can escalate quickly after a storm. According to Home Repair Guide, proactive roof care saves homeowners time and money by catching issues early, especially before hurricane season. This guide outlines local considerations, common problems, and practical repair steps you can perform to extend your roof’s life in humid climates.
Climate Considerations for Miami Roofing
In Miami, salt air, high humidity, and intense sun cause shingles to deteriorate faster than in drier regions. Heat cycles can warp flashing and underlayment, accelerating leaks. Local codes often emphasize proper ventilation, attic insulation, and weatherproofing. The Home Repair Guide team notes that choosing materials rated for tropical climates and ensuring proper drainage are essential for durability.
Common Roofing Problems in Miami Homes
Leaks around flashing at valleys and chimneys are very common after heavy rains. Shingles may crack or cup due to heat exposure, and the underlayment can degrade under constant moisture. Algae and moss growth can loosen shingles and affect water shedding. Flat or low-slope roofs in our region may experience ponding water that leads to accelerated wear and leaks. Home Repair Guide analysis shows that routine inspections significantly reduce costly repairs.
Materials and Tools for Miami Roof Repairs
Select weather-resistant shingles that match your roof color and a flashing kit designed for coastal environments. For patch work, use roofing cement, self-adhesive patches, and compatible underlayment. Essential tools include an extension ladder, safety gear, hammer, nails, caulk gun, utility knife, and a chalk line. Keep a metal ruler and square handy for accurate cuts and alignment.
Safety First: Working on a Roof
Always use fall protection and a stable ladder on level ground. Wear non-slip footwear and gloves, and work with a partner when feasible. Avoid working in high winds or during rain. Cut away from edges and keep the work area clean to prevent trips. For detailed safety rules, refer to OSHA guidelines on rooftop work.
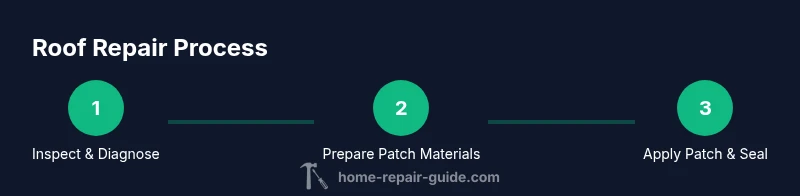
Inspection and Diagnosis Techniques
Start with a visual roof inspection from the ground using binoculars; look for damaged shingles, curling edges, and loose or missing nails. Carefully remove dirt and debris from gutters to reveal hidden leaks. Inspect flashing at joints, valleys, and vent pipes. If underlayment shows wear or moisture intrusion is detected, plan a patch or roof cement treatment.
Quick Patch Options for Small Leaks
Apply roofing cement to sealed, dry patches over small holes or cracks. Replace a handful of damaged shingles and reseal with matching sealant. For flashing gaps, re-seal with appropriate caulk and secure flashing with nails. These fixes are temporary and should be followed by a full inspection and longer-term repair.
Long-Term Fixes and Maintenance
Improve attic ventilation and keep insulation dry to reduce temperature-related wear. Clean gutters regularly to prevent water backing up and ice dam formation. Schedule seasonal roof checks, especially after storms, and address damaged areas promptly. Consider upgrading to impact-resistant shingles if your budget allows to extend lifespan.
Hiring a Pro in Miami: When and How
Major leaks, widespread shingle damage, or structural concerns require a licensed roofer. Get multiple quotes, verify licenses, and ask for local warranty details. If you’re uncertain about safety, permit requirements, or flashing installation, hire a pro to ensure a durable, code-compliant repair.
Tools & Materials
- Extension ladder (sturdy, non-slip)(Reach the roof safely; inspect feet for stability)
- Fall protection gear (harness, lanyard)(Required for elevated work)
- Safety footwear with good traction(Prevents slips on shingles)
- Gloves(Hand protection during cuts and nail work)
- Hammer with a magnetic nail holder(Nail heads stay in place when reusing shingles)
- Copper or galvanized roofing nails(Corrosion-resistant for longevity)
- Roofing cement or sealant(Seals patches and flashing joints)
- Caulking gun and sealant (silicone/polyurethane)(Flexible sealant for leaks)
- Self-adhesive roofing patches(Temporary patch over small damage)
- Underlayment felt or synthetic membrane(Provides moisture barrier behind patches)
- Flashing kit (aluminum/galvanized)(Repair or replace base flashing)
- New shingles to match existing roof(Color/brand match helps water shedding and appearance)
- Chalk line and marker(For precise cuts and alignment)
- Utility knife(Trim underlayment and shingles)
- Rope or tarp for weather protection(Quick shelter if weather changes)
Steps
Estimated time: 2-6 hours
- 1
Prepare safety gear and workspace
Set up the ladder on stable ground, attach fall protection, and verify weather. Clear the area of vehicles and clutter. Plan each movement to minimize trips up the ladder.
Tip: Have a partner hold the ladder and keep a rescue plan in mind. - 2
Inspect the roof from the ladder
Gently survey the roof for missing shingles, curling edges, or loose nails. Note flashing gaps around vents and chimneys. Take clear photos for later reference.
Tip: Avoid stepping on weakened sections; distribute weight across the rafter line. - 3
Remove damaged shingles
Carefully lift damaged shingles with a pry bar, working from the outer edge inward. Break only the damaged area to avoid affecting surrounding shingles.
Tip: Use a utility knife to cut sealant and minimize tearing. - 4
Check underlayment and replace if needed
If underlayment shows moisture or tears, carefully remove the damaged section and install a matching patch or new underlayment. Ensure overlaps are at least 2.5 cm (1 inch).
Tip: Keep patches dry before installation to ensure adhesion. - 5
Replace or repair flashing
Remove corroded flashing; clean surfaces and install new flashing, sealing with roof cement. Ensure it seats flush against the deck and sheds water away from the seam.
Tip: Run a bead of sealant along both edges for extra protection. - 6
Seal joints and seams
Apply sealant along joints, seams, and around vents. Smooth with a caulk gun and allow curing as per product instructions.
Tip: Use polyurethane sealant in humid environments for flexibility. - 7
Reinstall or patch shingles
Nail shingles with proper spacing and alignment. Avoid overdriving nails; heads should sit below the shingle tab for water shedding.
Tip: Keep a magnet to collect stray nails. - 8
Final inspection and cleanup
Check for loose nails, re-secure any suspect areas, and remove debris. Observe after rainfall for any signs of leaks and document for future maintenance.
Tip: Record the repair location and date for warranties.
FAQ
Do I need a permit to repair a roof in Miami?
Permit requirements vary by project scope. Minor repairs may not require a permit, but major work, structural changes, or reroofing typically do. Check with your city’s building department and consider the guidance of a licensed professional.
Permit needs depend on the job size; for major work, you’ll likely need one, so verify with local authorities.
Can I patch a roof leak myself?
Temporary patches with roofing cement can stop small leaks, but a lasting repair usually requires replacing damaged shingles and resealing flashing. For large or recurring leaks, hire a professional.
You can do a quick patch for a small leak, but big leaks need a pro.
What signs indicate a major roof problem?
Look for widespread shingle damage, persistent water stains, sagging ceilings, and multiple leaks. These often indicate structural or underlayment failure and require professional assessment.
If you see sagging, many leaks, or structural signs, call a pro.
How long do Miami roof repairs typically last?
Durability depends on material quality and climate exposure. Minor patches may last months to a few years, while properly installed flashing and underlayment can endure longer in humid environments.
Lifespan varies, but good materials and proper installation extend longevity.
Should I replace the roof if it’s older than 20 years?
Age alone isn’t the final determinant; assess current roof condition, prior repairs, and energy efficiency. If structural decking is compromised or repairs are frequent, replacement may be more cost-effective long-term.
If the roof shows extensive wear or frequent leaks, replacement is worth considering.
Watch Video
Key Takeaways
- Schedule repairs after calm weather to ensure safety.
- Use proper flashing and underlayment to prevent leaks.
- Document work for future reference and warranties.
- Know when to call a licensed roofer for major damage.