When to Repair Roof: A Homeowner's Practical Guide
Learn how to judge roof damage, decide between repair and replacement, and plan safe, cost-effective fixes with practical steps and expert tips. A clear framework from Home Repair Guide helps homeowners act confidently.

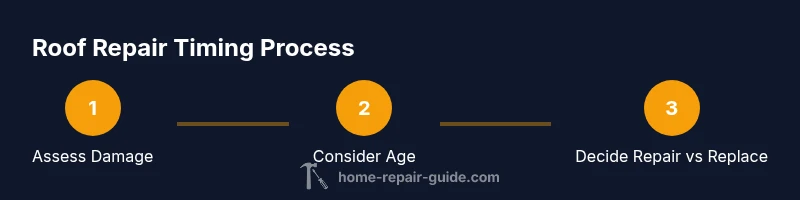
By the end of this guide, you will know when a roof repair is appropriate, what signs indicate urgent action, and how to prioritize safety and cost. We'll cover risk factors, weather timing, and a simple decision framework for homeowners. If in doubt, lean toward professional inspection before heavy weather. This quick answer sets the stage for the deeper steps below.
Understanding Roof Health and Timing
Roof health matters not just for leaks but for energy efficiency, interior comfort, and long-term home value. Knowing when to repair roof requires looking at both age and current condition, as well as expected weather patterns. The Home Repair Guide team emphasizes a practical, nonalarmist approach. According to Home Repair Guide, weather windows caused by mild, dry days are ideal for safe repairs and inspections. Before you decide, assess visible damage, missing granules, curling shingles, cracked flashing, and signs of water intrusion in attics or ceilings. Remember that some issues progress slowly, while others escalate quickly after a heavy storm. A measured, step-by-step assessment helps you separate urgent fixes from routine maintenance. In general, minor issues discovered early are cheaper and easier to fix than waiting for a roof failure. This guide helps you create a practical timeline that keeps your home dry and energy-efficient while protecting your investment.
Signs That a Repair Is Needed
Look for both obvious and subtle indicators that a repair is warranted. Missing or curling shingles, cracked flashing, and granular loss can signal membrane or decking exposure. Interior signs—stains on ceilings, mold growth, or damp insulation—often reveal leaks that aren’t visible from the ground. Ice dams in colder climates indicate compromised drainage, which over time damages shingles and gutters. If you notice sudden leaks after a storm, or if the attic smells musty, treat it as an urgent cue to investigate. While some damage is cosmetic, persistent issues usually mean underlying material failure. The goal is to catch problems early before they compromise framing, insulation, or interior walls. When you see multiple problem signs, prioritize safety and plan a repair rather than postponing until a major failure.
When to Repair vs Replace: A Decision Framework
Deciding between repair and replacement depends on age, damage scope, and long-term cost considerations. If damage is localized to a small area and the roof is relatively young, a targeted repair combined with minor maintenance can be sensible. If damage is widespread or the roof is nearing the end of its expected life, replacement may be a more economical choice in the long run, reducing ongoing leak risks and energy loss. Avoid letting a patch become a substitute for a proper fix if structural components are compromised. Use a practical framework: assess the extent of visible damage, review the roof’s age and warranty terms, consider local weather patterns, and obtain multiple contractor quotes. The Home Repair Guide approach emphasizes safety first, thorough documentation, and a conservative stance when uncertainties remain.
Safe Inspection Practices and Scheduling Repairs
Safety should govern every roof inspection. Start from the ground with binoculars to size up shingles, flashing, and vents. If you must go onto the roof, use proper fall protection, stable steps, and a buddy system. Check the attic for signs of leaks, such as daylight, staining, or warped sheathing. Schedule repairs during dry, mild weather to allow sealants and patches to cure properly. For complex repairs or if you’re unsure about structural integrity, hire a licensed professional. Temporary measures—like tarping damaged areas—can reduce water intrusion while you arrange permanent work. Document all findings with dates and photos for your records and any insurance claims.
Materials, Costs, and Long-Term Planning
Repair decisions should balance immediate needs with long-term durability. Minor fixes (sealant, flashing repair, patching) can extend roof life for a season or two, while more extensive repairs (decking replacement, heavier flashing, or full shingle replacement) provide longer-term protection. Material choice matters: asphalt shingles, metal, clay, or concrete tiles each have distinct repair limits and lifespans. Budget for contingencies; most homeowners underestimate the total cost of a roof repair when considering labor, disposal, and permit requirements. Regular maintenance—clean gutters, remove debris, and address moss or algae growth—extends the life of any roof. Planning ahead reduces the likelihood of emergency calls during storms.
Authority Sources
For deeper guidance, consult trusted sources on roof safety, energy efficiency, and building standards. See Energy.gov for roofing design and energy considerations, OSHA for safe roofing practices, and the National Roofing Contractors Association for best-practice repair guidance. These references help homeowners understand trade-offs and safety requirements when deciding whether to repair or replace a roof.
Practical Checklist
- Inspect weather windows and plan around dry days
- Ground-check for obvious damage and attic signs of leaks
- Gather quotes and verify licenses and warranties
- Use temporary measures only if necessary and safe
- Document damage with photos for your records
- When in doubt, consult a licensed pro to avoid costly mistakes
Tools & Materials
- Ladder sturdy enough for roof height(Non-slip feet; weight rating for safety)
- Fall-arrest system or harness(Required for pitched roofs or elevated work)
- Roofing gloves and safety glasses(Protect hands and eyes from debris)
- Utility knife and roofing nails(For minor shingle cuts and fastenings)
- Hammer or roofing hatchet(Used for nailing and patching)
- Caulking gun and roofing sealant(Seal gaps around flashing and vents)
- Roofing cement or patch material(Temporary fix when delaying full replacement)
- Pry bar or flat bar(Loosen shingles without cracking adjacent tabs)
- Chalk line and marker(Mark straight lines for trim and cuts)
- Tarps or heavy-duty plastic sheeting(Temporary weather protection)
- Ground mat or drop cloth(Protect landscaping below)
- Bin or tarp for debris(Contain shingles and nails)
Steps
Estimated time: 2-6 hours
- 1
Assess roof age and visible damage
Begin with a visual inspection from the ground and attic. Look for curling shingles, missing granules, damaged flashing, and any signs of leaks. Keep a simple map of damaged areas to guide repairs and to discuss with a contractor if needed.
Tip: Take clear photos from multiple angles to document the scope before making repairs. - 2
Check weather windows for safety
Schedule work on dry, calm days. Wet shingles are slippery and patches won’t cure properly. If a storm is forecast, defer work and use temporary protection instead.
Tip: Use a weather app with a 24–48 hour forecast to identify a stable window. - 3
Set up safety gear and perimeter
Place ladders securely, use fall protection when needed, and have a helper spot you. Clear the area below to prevent injuries from falling debris. Do not work alone if you’re newer to roof repairs.
Tip: Test ladder stability on level ground and keep three points of contact when climbing. - 4
Make targeted repairs or secure temporary fixes
For localized damage, replace damaged shingles, reseal flashing, and seal joints. If the decking shows sagging or rot, this may require professional intervention. Apply a temporary repair to prevent water intrusion until a full repair is possible.
Tip: Avoid over-tightening nails to prevent cracking shingles. - 5
Document findings and obtain quotes
Photograph damaged areas and note the extent of the repairs. Get at least two contractor quotes if replacement seems likely. Compare warranties, lead times, and post-repair maintenance needs.
Tip: Ask for written estimates and a proposed timeline before committing. - 6
Plan for safety and long-term maintenance
Set up a regular maintenance plan: yearly inspections, prompt edge repair, and debris removal. This reduces emergency repairs and extends roof life.
Tip: Schedule annual checks in your calendar to build a routine.
FAQ
What are the first signs that a roof needs repair?
Look for water stains on ceilings, damp insulation, missing shingles, and cracked flashing. Early signs often indicate leaks that require attention before they worsen.
Candidates for repair show water stains or missing shingles; addressing them early helps prevent bigger problems.
How do I decide between repairing or replacing a roof?
Consider the roof’s age, the extent of damage, and long-term costs. Local weather, warranty terms, and the roof’s current condition guide the decision toward targeted repairs or full replacement.
Age and damage determine whether to patch or replace; consult a pro for a precise estimate.
Is temporary tarping acceptable as a long-term fix?
Tarps are useful to reduce further water intrusion while arranging a permanent repair, but they are not a substitute for proper roofing work.
Tarps help with leaks temporarily, but you should finish with a proper repair soon.
When should I hire a professional?
If the damage involves decking, structural components, or you’re uncomfortable with heights, hire a licensed roofer. Complex work benefits from safety and warranty protections.
Hire a pro if decking is involved or you’re unsure about the repair scope.
What safety gear is essential for roof work?
Wear a hard hat, non-slip boots, gloves, and a harness if required. Use fall protection and never work alone on a steep roof.
Always strap in and have a helper nearby when you work on a roof.
Can roof repair affect energy efficiency?
Yes. A properly sealed roof reduces heat loss in winter and heat gain in summer, lowering energy bills and improving comfort.
Fixing leaks helps keep your home more energy-efficient.
Watch Video
Key Takeaways
- Inspect regularly for missing shingles and leaks.
- Decide between repair and replacement based on age and damage.
- Weather windows matter for safe, lasting repairs.
- Document damage for insurance and quotes.
- Prioritize safety over speed on the roof.