Water Leak Repair: A Homeowner's Step-by-Step Guide
Learn how to locate, stop, and fix water leaks in your home with practical, safe steps. This Home Repair Guide tutorial covers detection, materials, DIY methods, and when to call a pro to protect against mold and water damage.

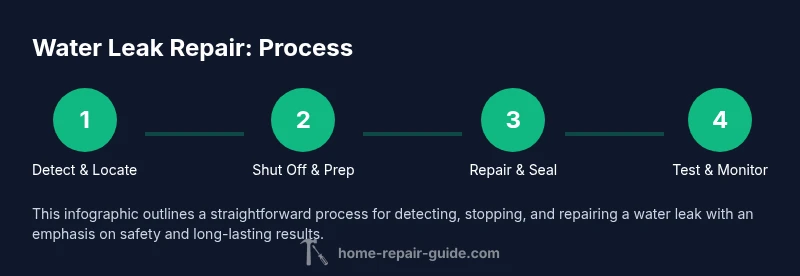
This guide shows you how to locate a water leak, cut off the supply, and perform safe, durable fixes or decide when to hire a plumber. You’ll learn step-by-step actions, essential safety checks, and how to prevent mold and water damage in the future. From quick fixes to long-term repairs, this article helps homeowners guard against costly surprises.
Understanding Water Leaks: Causes, Signs, and Risks
Water leaks can occur in many places, from hidden pipe joints behind drywall to worn faucet seals. For homeowners, recognizing the signs early is essential to minimize damage and mold growth. According to Home Repair Guide, early detection is key to reducing damage from water leaks. Leaks can originate from corrosion, loose fittings, or failed gaskets, and they threaten structural integrity when left unchecked. In this section, you’ll learn how to differentiate between drips, steady leaks, and running water behind walls, plus how moisture affects wood, drywall, and insulation. You’ll also understand how leaks contribute to higher utility bills and hidden damage that’s not immediately visible, which makes prompt action critical for long-term durability.
Assessing the Source: How to Find Leaks
Finding the origin of a leak requires a systematic approach. Start with obvious locations such as under sinks, around toilets, and near appliances. Use a flashlight to inspect dark cavities and check for damp spots, mineral deposits, or warped materials. If the leak is hidden, moisture meters and infrared cameras can reveal elevated moisture levels through walls or ceilings. Based on Home Repair Guide analysis, addressing leaks promptly minimizes mold risk and structural damage, so don’t ignore faint stains or a sudden spike in water usage. Keep a log of where you find moisture and track changes after a repair.
Safety First: Shutoff Valves, PPE, and Electrical Precautions
Safety is the first and most important step when dealing with any water leak. Locate the nearest shutoff valve for the affected area and turn off water flow before touching pipes. If you work near electrical outlets or wiring, switch off the circuit that powers the area or the main breaker to reduce shock risk. Wear protective gear such as gloves and safety goggles, and place towels or a bucket to catch drips. If you smell gas or encounter damaged gas lines, evacuate and call the utility company. Remember, water and electricity are a dangerous combination; never work on energized equipment.
Choosing a Repair Method: DIY vs. Professional
Small, accessible leaks (like a loose faucet tailpiece or a corroded hose connection) are often repairable by confident DIYers with basic tools. More complex leaks—behind walls, inside ceilings, or in main water lines—typically require professional plumbing expertise to ensure a permanent fix and to avoid further damage. Evaluate the leak’s location, the pipe material (copper, PEX, galvanized), and the potential for structural or electrical hazards before deciding. The Home Repair Guide approach encourages weighing risk, cost, and long-term durability when choosing between a DIY patch and a pro repair.
Temporary Fixes and Permanent Solutions
If a leak is active and you cannot reach a permanent fix immediately, use temporary containment to minimize damage. Place a bucket under the drip, apply waterproof tape to slow a small drip, or seal small gaps with silicone caulk as a temporary measure. For permanent solutions, replace damaged fittings, tighten loose connections, or install new gaskets, depending on the leak source. In all cases, dry the area thoroughly after repair to prevent mold growth and check surrounding materials for signs of water damage.
Preventing Recurring Leaks: Sealing, Maintenance, and Mold Prevention
Prevention is your best defense against recurring leaks. Regularly inspect hoses, valves, and appliance connections; replace worn-out washers and supply lines before failure. Re-caulk bathroom fixtures and seal floor joints around showers or tubs to prevent water ingress. Maintain home humidity levels with proper ventilation to reduce mold risk after a leak. If you notice persistent damp spots, consider moisture barriers or insulation improvements to slow future moisture migration. Proactive maintenance saves money and protects your home.
When to Call a Pro and What to Expect
Call a licensed plumber if a leak is behind walls, involves difficult-to-access piping, or if you notice framing damage, extensive mold growth, or electrical hazards. A professional will assess the leak, shut off the correct supply, perform tests to locate the exact source, and provide a warranty-backed repair. Expect a written estimate, a list of recommended fixes, and information about permits or local codes if significant work is required. Early professional intervention minimizes long-term damage and improves outcomes.
Tools & Materials
- Adjustable wrench(Versatile for various fittings)
- Screwdrivers (flathead and Phillips)(For hose clamps and fixtures)
- Teflon tape (plumber's tape)(Seal threads on metal pipes)
- Silicone caulk(Seal joints around fixtures)
- Epoxy putty or patch kit(Temporary repair for small gaps)
- Plumber's putty(Helpful for sinks and drains)
- Moisture meter (optional)(Detect hidden moisture)
- Bucket, towels, rags(Contain and clean up spills)
- Flashlight(Inspect dark areas)
- Safety gear (gloves, goggles)(Protect hands and eyes)
- Drying cloths or a shop vacuum(Dry surfaces thoroughly)
Steps
Estimated time: 60-120 minutes
- 1
Turn Off the Water Supply
Locate the shutoff valve closest to the leak and close it to stop the flow. If you cannot find a local valve, shut off the main water supply to the house. This prevents further damage while you assess the situation.
Tip: If water continues to flow, open a nearby faucet to relieve pressure and confirm the main shutoff works. - 2
Dry the Area and Inspect for Source
Use towels to dry the area around the leak and remove any standing water. Look for damp spots, discoloration, or warped materials that point to the leak source. Use a flashlight to inspect joints and fixtures closely.
Tip: Take photos of the surroundings before starting repairs for reference. - 3
Loosen or Remove Damaged Parts
Loosen fittings or clamps around the leak with the appropriate wrench. If a component is damaged (hose, fitting, or gasket), remove it and set it aside for replacement.
Tip: Keep small parts in a labeled container to avoid misplacing them. - 4
Apply Patch or Replace the Component
Install a new gasket or hose or apply epoxy putty as a temporary fix on minor gaps. Reassemble, tightening fittings snugly but not overtightening, which can cause damage.
Tip: Check for drips after a brief test run of the water supply. - 5
Seal Joints and Test
Seal joints with silicone caulk where needed and run water through the affected fixture to test for leaks. Observe for several minutes to ensure the repair holds.
Tip: Be cautious of returning leaks after pressure changes; re-seal if necessary. - 6
Clean Up and Monitor
Wipe down the area and dry any remaining moisture. Monitor the area over 24-72 hours for signs of moisture reappearance, which may signal a hidden issue.
Tip: Document the repair with notes and photos for future reference.
FAQ
How do I locate a hidden water leak in walls?
Hidden leaks can be found with a combination of inspection, listening for running water, and moisture meters. Start at the suspected area and examine for damp drywall, staining, or warped wood.
Hidden leaks can be found using inspection and moisture tools; start at the damp area and listen for running water.
Can I fix a water leak myself?
Smaller leaks at accessible joints may be repaired DIY with basic tools, but leaks behind walls or in plumbing that carries hot water should be handled by a professional to avoid further damage.
Small leaks can often be DIY, but dangerous or hidden leaks require a pro.
What tools do I need for water leak repair?
Common tools include an adjustable wrench, screwdrivers, Teflon tape, silicone caulk, epoxy putty, a bucket, towels, and a flashlight.
You'll typically need wrenches, tape, and sealants to fix a leak.
What signs indicate moisture damage after a leak?
Look for staining, warped surfaces, peeling paint, musty odor, and with HVAC, mold growth. Early detection reduces mold risk.
Watch for stains and musty odors; mold can develop quickly.
How long does a basic repair take?
A simple sealant or hose clamp fix can take under an hour, while replacing damaged pipes may take several hours to a day.
Simple fixes are quick; major pipe work takes longer.
Watch Video
Key Takeaways
- Identify leak source before repairing
- Shut off water to prevent further damage
- Use appropriate sealants and fittings for the fix
- Test thoroughly and monitor moisture after repair
- Follow safety and sealing best practices—The Home Repair Guide team recommends this approach