Water Damaged Repair: A Practical Step-by-Step Guide
A comprehensive, step-by-step guide to water damaged repair. Learn safety checks, moisture mapping, drying strategies, and restoration steps to protect your home and health. Includes materials, tools, step-by-step actions, tips, and authoritative sources.

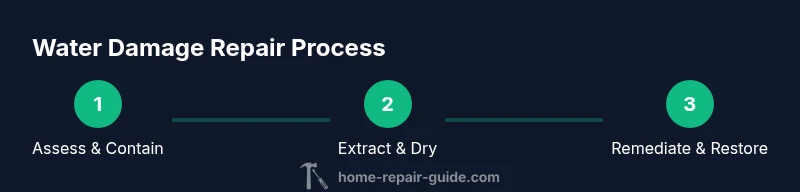
Water damaged repair involves stopping the leak, thoroughly drying the area, and restoring materials while minimizing mold risk. This guide walks you through safety checks, moisture mapping, drying strategies, and when to call a professional. Essential tools include PPE, a moisture meter, dehumidifiers, plastic sheeting, and a wet/dry vacuum. This quick answer is designed for homeowners and renters to act confidently today.
What water damaged repair is and why it matters
Water intrusion can affect structural integrity, indoor air quality, and your family's health. In the simplest case, water from a leaky pipe is less hazardous than black water from a sewer line, but all forms require careful remediation. According to Home Repair Guide, moisture control is the cornerstone of any water damaged repair, because lingering humidity is the primary driver of rot and mold. The first step is to classify the water type: clean water (from a broken supply line), gray water (from appliances or showers), or black water (sewage or contaminated floodwater). Knowing the category helps set safety precautions and remediation sequence.
Next, assess immediate hazards: electrical connections and standing water can pose shock risks; unstable flooring or wet walls may become load-bearing concerns. If you suspect significant damage, or if occupants have medical conditions exacerbated by mold, evacuate and call a licensed professional. For smaller incidents, you can begin containment: shut off the water source, turn off power in affected rooms (at the main breaker if safe), and seal the area with plastic sheeting to prevent cross-contamination.
Document conditions with photos for your records and insurance claims. This early documentation will support timelines and settlement discussions. Home Repair Guide’s team emphasizes keeping a clear log of moisture readings, photography, and dates to streamline remediation and potential insurance processes.
Assessing scope and safety
Before you begin any physical work, map the moisture, assess structural integrity, and review safety protocols. Use a moisture meter to identify damp zones behind walls and under floors; infrared cameras can help locate hidden damp spots. Always wear PPE: impermeable gloves, eye protection, and an N95 mask to guard against mold spores and chemical cleaners. According to Home Repair Guide analysis, accurate moisture mapping reduces unnecessary demolition and speeds recovery. A flooded area may need dehumidification, moisture barrier installation, and targeted drying of affected materials. Document the initial findings with notes and photos to establish a baseline for contractors and insurers. If you see loose baseboards, cracking plaster, or warped plywood, mark them for further evaluation. The goal of this phase is to quantify the problem without triggering unnecessary repairs and to set a safe workflow for the next steps.
Immediate actions to take before professionals arrive
If a water event just happened, perform the following steps: Stop the source if safe to do so; limit spread by sealing off the area with plastic sheeting and using a tack cloth; move valuables to a dry area and document their condition; ventilate the space by opening windows and using fans only after water is absorbed; do not enter flooded spaces if electrical panels are submerged. The aim is to minimize exposure and preserve as much of the structure as possible while awaiting help.
Materials and methods (overview)
Containment is the first practical step in any water damaged repair. Install plastic barriers to isolate the affected zone and minimize dust and mold spread. Use a moisture meter and, if available, an infrared camera to guide targeted drying. Place portable dehumidifiers and air movers to establish air flow across wet surfaces. Keep a written log of readings and equipment runtimes. If porous materials become saturated, consider early removal to prevent long-term damage. Always follow local codes for electrical safety and moisture management, and remember that conservative removal can save cost and time in the long run.
Drying and dehumidification strategy
The drying phase relies on removing standing water and reducing ambient humidity to inhibit mold growth. Position dehumidifiers in the most humid zones and run several air movers to promote air circulation across all affected surfaces. Maintain humidity levels as low as practical for the space while avoiding over-drying adjacent rooms. Monitor progress with your moisture meter every 6–12 hours and adjust equipment placement as moisture migrates. Plan for a drying period of at least 24–48 hours in small rooms and longer in larger or heavily saturated areas. Document humidity trends and operator observations to inform the restoration plan and insurance claim.
Handling porous materials and drywall
Porous materials such as drywall, insulation, carpet pad, and some wood products may need removal if they remain wet after the initial drying phase. Wet drywall often enlarges mold risk and should be removed in sections, with cut edges sealed to prevent cross-contamination. Salvageable materials can be saved if they are clean and dry within 48–72 hours; otherwise, they should be disposed of properly. When removing drywall, wear PPE and follow safe disposal guidelines. After removal, treat exposed studs and sheathing with a mold-inhibiting solution and plan for replacement using moisture-resistant products in high-risk areas.
Mold risk management and when to hire a pro
Mold is a major concern after water damage. Visible growth, a musty odor, or recurrent dampness warrants professional assessment. If mold is detected in HVAC ducts, insulation cavities, or behind walls, call a licensed contractor with mold remediation experience. Home Repair Guide recommends conservative thresholds: consider professional help when you cannot confidently complete safe containment, drying, and restoration within your skills or available time. Early intervention reduces costs and prevents recurring issues.
Insurance, documentation, and cost expectations
Dealing with water damage often involves insurance claims. Take high-quality photos before and during drying, keep receipts for equipment rental, and maintain a detailed log of dates and actions. Read your policy carefully and contact your insurer promptly to start a claim. Budgeting for remediation should account for water mitigation, drying, material replacement, and potential mold remediation. The Home Repair Guide team emphasizes clear communication with insurers and contractors and keeping competing quotes to ensure fair pricing and timelines.
Tools & Materials
- PPE kit (gloves, goggles, N95 mask)(Include disposable coveralls if mold is suspected)
- Plastic sheeting or tarps(1.5–4 mil thickness; large sheets for containment)
- Tape (packing or duct tape)(For sealing containment and plastic seams)
- Moisture meter(Used to track surface and subsurface moisture)
- Dehumidifier(s)(Size based on room volume and saturation level)
- Industrial fans / air movers(Assist air movement; use as needed)
- Wet/dry vacuum(For extracting standing water in initial stage)
- Trash bags for disposal(Heavy-duty bags for contaminated debris)
- Mold-resistant cleaners or disinfectant(Use only as directed; follow safety guidelines)
Steps
Estimated time: 2-5 days
- 1
Stop the water source and secure area
If safe, shut off the water supply at the main valve and engage containment barriers to prevent further spread. Notify others to avoid the affected zone. This first action minimizes damage and buys time for a proper assessment.
Tip: Do not enter rooms with active electrical hazards; call a licensed professional if you’re unsure. - 2
Protect yourself and others
Put on PPE before handling any wet materials or debris. Isolate the space from other areas of the home to limit contamination and mold exposure during the cleanup.
Tip: Inspect PPE fit and discard disposable gear after use to prevent cross-contamination. - 3
Document conditions and start water extraction
Take photos and notes of the damage level, then begin removing standing water with a wet/dry vacuum. Focus on the approximate source of moisture and work outward to prevent cross-contamination.
Tip: Keep water away from electrical outlets; if water reaches outlets, shut power at the breaker. - 4
Begin controlled drying
Set up dehumidifiers and air movers to promote airflow across wet surfaces. Keep doors and windows open if weather permits to improve ventilation, and monitor humidity every 6–12 hours.
Tip: Aim for consistent air movement rather than overheating the space, which can cause warping. - 5
Evaluate materials for removal
Assess porous materials (drywall, insulation, carpet padding) for saturation. Remove and bag any materials that show persistent moisture or mold risk, isolating them from clean areas.
Tip: Label removed materials with room and level of contamination for easier rebuild planning. - 6
Decide on a restoration plan
After initial drying, decide whether to repair in place or replace structural components. For extensive moisture or mold, engage a professional remediation contractor to ensure code-compliant work.
Tip: Obtain written quotes from multiple contractors and verify certifications.
FAQ
What counts as water damage in a home?
Water damage includes any intrusion that affects structure or indoor air quality, from leaks to floods. Classifying water type helps determine safety steps and remediation order. Prompt assessment reduces risk and speeds recovery.
Water damage includes leaks and flooding that affect structures and air quality. Classifying the water helps you choose the right safety steps and recovery order.
When should I call a professional for water damage repair?
Call a professional if structural materials are warped, there is standing water that you cannot remove safely, or mold growth is present. Professionals can perform advanced drying, mold remediation, and code-compliant restoration.
Call a professional if materials are warped, water remains, or mold is present; they handle advanced drying and mold remediation.
How long does it take to dry after a water event?
Drying times vary with space size and moisture levels. In smaller rooms, drying may take hours; in larger or heavily saturated areas, it can take days. Monitoring with a moisture meter guides when to proceed to restoration.
Drying times depend on room size and moisture; monitor with a meter to decide when to proceed.
Can I remove mold by myself?
Small, non-porous surface mold can be managed with proper PPE and containment. Larger or porous mold should be handled by qualified professionals to prevent spread and health risks.
Small surface mold can be cleaned with PPE and containment, but large or porous mold requires a pro.
Will homeowners' insurance cover water damage repairs?
Coverage depends on the policy and cause. Document the event and consult your insurer for a claim; keep receipts and photos to support your case.
Coverage varies by policy; document the event and check with your insurer for a claim.
What are common mistakes to avoid during water damage repair?
Avoid delaying action, skipping thorough drying, and over-drying in a way that traps moisture. Mismanagement of containment and improper material removal can lead to mold regrowth.
Don’t delay drying, skip steps, or mishandle containment and removal; mold risk rises with improper remediation.
Watch Video
Key Takeaways
- Contain damage quickly to minimize loss.
- Drying and dehumidification are critical to mold prevention.
- Decide early when to hire a qualified professional.
- Document conditions and preserve records for claims.