Water Damage Repair Near Me: Practical Step-by-Step Guide
A comprehensive, actionable guide for homeowners and renters on handling water damage quickly, safely, and effectively near your location. Learn immediate steps, drying methods, mold prevention, and how to hire trusted local restoration services.

You will learn how to respond to water damage near you quickly and safely. This guide covers immediate safety steps, how to assess moisture, drying methods, mold considerations, and how to choose a reliable local restoration service. By the end, you’ll know what to do first and how to plan a durable repair.
What 'water damage repair near me' means for homeowners
According to Home Repair Guide, water damage repair near me is about more than stopping a leak. It’s a holistic process aimed at minimizing structural damage, controlling moisture, and preventing mold growth that can affect indoor air quality. When water intrusion happens close to your property, local responders can reach you faster, which improves outcomes and reduces costly repairs later. This section unpacks how proximity to skilled help matters, what your initial priorities should be, and how to recognize when it’s time to call in professionals. You’ll learn why quick action matters for floors, walls, and built-in systems, and how a local restoration team can tailor a plan to your home’s layout and materials.
Immediate actions you should take the moment you notice water
First, prioritize safety: turn off electricity in the affected area if you can do so without stepping through water, then contact your utility provider if there’s a gas line or other hazard. If the water is from a clean source (like a supply line) and you can safely reach it, shut off the water at the main valve to prevent further intrusion. Document what you see with photos before moving belongings, and move undamaged items to dry space to protect them from secondary damage. Do not use electrical appliances in damp areas, and avoid mixing cleaning agents, which can create harmful fumes. These early steps help preserve structure and give professionals a clearer starting point.
How moisture behaves in a home and common damage paths
Water tends to follow gravity and gravity-driven pathways—through baseboards, drywall seams, and subflooring. In basements and crawl spaces, moisture can accumulate behind walls and under flooring, hidden from plain sight. Common sources include leaking roofs, bursting pipes, condensation in humid climates, and appliance failures such as water heaters or dishwashers. Understanding these pathways helps you decide which areas to inspect first and how to stage cleanup without spreading moisture to unaffected rooms. Even seemingly minor leaks can cause rippling effects across framing and insulation if left untreated.
Drying, dehumidification, and preventing secondary damage
Effective drying is more than removing standing water. It requires controlled dehumidification, air movement, and moisture monitoring to bring materials back to their dry standard. Use commercial-grade air movers to increase airflow, heavy-duty dehumidifiers to pull moisture from the air, and moisture meters or infrared cameras to track progress. Remove porous materials like carpeting, padding, and drywall that are saturated beyond repair, then sanitize areas to reduce microbial growth. Keep doors and windows strategically opened (when safe) to promote ventilation, while protecting unaffected spaces with plastic barriers to prevent cross-drying. This approach helps prevent warping, swelling, and mold growth while speeding up the overall cleanup.
Mold risks, testing, and safe remediation boundaries
Mold can establish itself quickly in damp environments, especially where porous materials have absorbed water. If you notice a musty odor, visible discoloration, or staining, treat it as a potential mold issue and engage qualified professionals for testing and remediation. Avoid attempting deep mold remediation yourself if you lack respiratory protection and containment equipment, as disturbance can release spores. Licensed pros will seal off the affected area, use HEPA-filtered equipment, and follow established protocols to prevent cross-contamination. Remember, not all damp spaces harbor active mold, but early assessment reduces long-term health risks.
Hiring the right water damage restoration near you and what to ask
Choosing a local restoration company means evaluating licenses, certifications, and track records. Look for firms that provide a written scope of work, moisture mapping, and a clear timeline from assessment to completion. Ask about their containment methods, air-filtration systems, and whether they handle insurance filings or coordinate with adjusters. A reputable provider should explain equipment needs, drying times, and potential costs in plain language. Reading customer testimonials and requesting references can reveal consistency in communication, professionalism, and outcomes.
DIY vs professional: understanding limits and safety considerations
Small, contained water issues with non-porous materials may be manageable for capable homeowners using proper PPE and drying equipment. However, water that penetrates drywall, wood framing, or insulation often requires specialized tools and containment practices to prevent hidden damage and mold. Electrical hazards, structural weakening, and hidden moisture make professional intervention the safer, more reliable option in many cases. If you’re unsure about the extent of damage, err on the side of caution and contact a local water damage specialist to perform an initial assessment.
Long-term prevention and maintenance to protect your home
Prevention is more effective than frequent repairs. Address leaks promptly, maintain drainage around your foundation, and replace aging plumbing components before they fail. Install water detection devices near high-risk zones, such as under sinks and near appliances, and ensure proper ventilation in bathrooms and laundry areas. Regular inspections after heavy rains can catch small issues before they escalate. A durable plan combines proactive maintenance with a rapid response protocol so you’re prepared to act at the first sign of moisture.
Tools & Materials
- Personal protective equipment (PPE): gloves, goggles, respirator (N95 or P100)(Essential for any damp work to prevent exposure and contamination)
- Wet/dry vacuum or water extractor(For removing standing water and collecting damp debris)
- Commercial-grade dehumidifiers(To reduce humidity and speed drying)
- High-velocity air movers / fans(Promotes air circulation and evaporation)
- Moisture meter or infrared camera(Tracks moisture levels in walls, floors, and insulation)
- Plastic sheeting and painter’s tape(Creates containment barriers to prevent cross-contamination)
- Hose and replacement filters(Optional accessories for dehumidifiers depending on model)
- Disposable bags and trash bins(Safe disposal of damaged materials)
- Mild EPA-registered cleaner and EPA-registered disinfectant(Clean and sanitize surfaces after extraction)
- Bleach or mold-inhibiting solution(Use only if mold presence is confirmed and per label directions)
- Utility knife and pry bar(Remove damaged drywall or flooring safely)
- Protective footwear and clothing(Keep contaminants away from your living spaces)
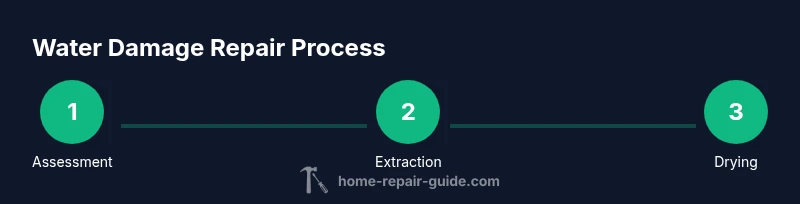
Steps
Estimated time: 8-24 hours
- 1
Assess safety and shut off utilities
Before entering the damaged area, verify your safety. If water is present, don’t step on it if you can avoid it. Turn off the electrical power at the main breaker and shut off the water supply if you can do so safely. This step reduces shock risk and prevents further damage.
Tip: If you smell gas or hear hissing, evacuate and contact the utility company immediately. - 2
Stop the water source and contain the area
If the leak is ongoing and safe to access, shut off the water valve feeding the area. Use plastic sheeting to seal doors and vents to prevent cross-contamination and keep moisture contained to the affected zone.
Tip: Place towels or absorbent materials at the entry to minimize tracking water to other rooms. - 3
Document damage and plan extraction
Take timestamped photos and notes of all affected materials for insurance and restoration planning. Prioritize removing non-structural items that can be dried and saved without risking further damage.
Tip: Create a simple inventory list including room, wall/ceiling type, and material class. - 4
Extract standing water and remove compromised materials
Use a wet/dry vacuum for standing water. Remove any saturated drywall, insulation, carpeting, and furniture that cannot be saved. Bag and dispose of porous materials as contaminated waste.
Tip: Do not disturb mold growth beyond containment; proceed with caution and call a pro if mold is visible. - 5
Drying and dehumidification setup
Position dehumidifiers and air movers to maximize airflow across walls and flooring. Run equipment continuously with doors open to ventilate; monitor moisture using a meter to determine when drying is complete.
Tip: Keep a log of moisture readings to demonstrate progress and justify pacing of repairs. - 6
Clean, disinfect, and prepare for repairs
Clean all remaining surfaces with EPA-approved cleaners, then disinfect to reduce microbial growth. Once dry, seal or replace materials as necessary and plan the reconstruction with a contractor.
Tip: Avoid over-wetting drywall during wet cleanup; damaged sections should be replaced rather than dried in place.
FAQ
How quickly should I respond to water damage?
Prompt action reduces secondary damage and mold risk. Contact a local restoration service as soon as you can while keeping yourself safe.
Act quickly and contact a local water damage restoration service as soon as you can after ensuring you’re safe.
Can I handle water damage myself?
Small incidents with non-porous surfaces may be DIY-friendly, but porous materials and hidden moisture typically require professional equipment and containment.
For most cases, it’s safer to call a local water damage professional for comprehensive assessment and remediation.
Will insurance cover water damage?
Policy coverage varies. Document everything and contact your insurer to understand what’s covered, including restoration and mold remediation.
Check with your insurer and keep receipts and photos to support your claim.
How do I know if there's hidden mold?
Visible mold or musty odors indicate growth. A professional mold assessment can determine extent and recommended remediation.
If you smell mold or see discoloration, get a mold assessment done.
What should I look for in a local water damage company?
Seek licensed, certified professionals with a clear written scope and timeline. Ask for references and a detailed cost estimate before work begins.
Verify licenses, ask for certifications, and insist on a written plan before hiring.
Watch Video
Key Takeaways
- Act quickly to limit damage and mold risk
- Document damage and communicate with your insurer
- Use proper drying equipment and monitor moisture
- Know when to call a local water damage expert