Repair Instant Water Heater: Step-by-Step Guide
Learn to diagnose and repair an instant water heater with clear, step-by-step instructions and safety tips. Home Repair Guide offers practical tips for owners.

By following these steps, you can diagnose and repair an instant water heater efficiently. Begin by powering down the unit and shutting off the cold-water supply, then inspect for obvious leaks or corrosion. This quick guide outlines safe, practical fixes and when to replace a component or hire a pro. Home Repair Guide summarizes a reliable, home-friendly approach.
Understanding Instant Water Heaters
Instant water heaters are compact, on-demand systems that heat water as it flows through a resistor or heat exchanger, rather than storing hot water in a tank. This design saves space and can provide nearly instantaneous hot water for sinks, showers, and appliances. Because these units integrate heating elements, temperature sensors, and water connections in a small footprint, the repair process often involves electrical checks and careful inspection for mineral buildup, corroded fittings, or worn seals. According to Home Repair Guide, understanding the basic components—power supply, inlet/outlet, heating element, thermostat, and sensors—helps homeowners identify root causes quickly and avoid unnecessary replacements.
Safety Considerations Before You Start
Before any diagnostic work, ensure electrical power to the unit is completely shut off and that the water supply is isolated. Water and electricity create a serious shock risk, so use a non-contact voltage tester to verify dead circuits. If you smell gas, hear hissing sounds, or notice a scorched odor, stop and call a professional. Based on Home Repair Guide research, never bypass safety features or operate a heater with exposed wiring or damaged insulation. Wear ANSI-rated gloves and eye protection during all handling tasks to prevent injuries from hot surfaces and sharp edges.
Diagnosing Common Problems
Hot water that runs intermittently or not at all often points to a failed thermostat, a degraded heating element, or mineral buildup on sensors. Leaks at fittings or the pressure relief valve indicate worn seals or loose connections. If the unit cycles on and off rapidly, a faulty thermostat or incorrect temperature setting could be the culprit. Regular mineral buildup can also insulate the element, reducing efficiency. In many cases, cleaning scale, tightening connections, or replacing a faulty sensor restores performance without a full replacement.
Tools, Parts, and Preparation
Having the right tools on hand makes a repair safer and faster. Gather a voltage tester, needle-nose pliers, a set of screwdrivers, an adjustable wrench, plumber’s tape, and replacement parts such as a thermostat or heating element if you have verified a failure. Keep a bucket and towels nearby for minor leaks, and have a replacement gasket or O-ring if you disassemble any joints. This stage is also a good time to review the wiring diagram for your exact model to avoid miswiring.
Step-by-Step Repair Process Overview
This section provides the practical sequence you’ll follow in the dedicated step-by-step block. You’ll verify power and shutoffs, access the internal components, test the thermostat and heating element, replace defective parts, reseal joints, and restore power for a controlled test. The goal is to minimize downtime and avoid repeated disassembly. If any step reveals a dangerous fault or a cracked heater housing, discontinue and call a pro. Regular maintenance afterward can prevent recurrence.
Maintenance Tips to Extend Life
Preventive care is simpler and cheaper than frequent repairs. Flush the unit periodically to reduce mineral buildup, replace worn seals promptly, and keep electrical connections dry and protected. Use a descaler if you have hard water, and schedule annual inspections to catch signs of wear early. Small changes, like keeping the unit in a ventilated, dry area and replacing corroded screws, significantly extend life and improve safety.
When to Call a Pro
If you detect a gas smell, a crack in the case, or persistent leaks after part replacement, contact a licensed technician. For electrical diagnostics beyond simple testing, a professional electrician can confirm proper voltage, grounding, and wiring safety. The Home Repair Guide team emphasizes that safety and code compliance should never be sacrificed for a quick fix.
Tools & Materials
- Non-contact voltage tester(Check for live circuits before touching any wires)
- Screwdrivers (Phillips and flathead)(Flathead for loosening clamps; Phillips for screws)
- Adjustable wrench(Use on inlet/outlet fittings)
- Nut driver set(Helpful for hex nuts on mounting brackets)
- Multimeter(Test continuity and element resistance)
- Teflon tape(Seal threaded connections)
- Replacement thermostat or heating element(Only if diagnosed as faulty)
- Gasket or O-ring kit(Carry extras for resealing joints)
- Bucket and towels(Contain small leaks during service)
Steps
Estimated time: 60-90 minutes
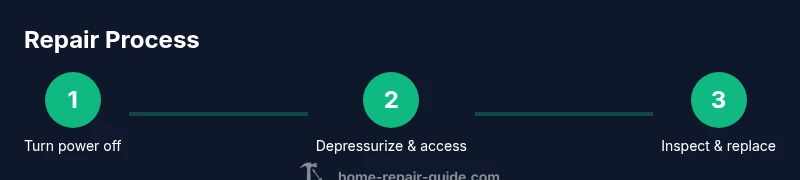
- 1
Turn off power and water
Shut off the electrical supply to the unit at the breaker and close the cold-water inlet valve. This prevents shocks and water inundation while you work.
Tip: Double-check with the voltage tester before touching any components. - 2
Depressurize and access the internals
Open the access panel and carefully release any residual pressure. Keep a bucket handy for incidental drips and inspect wiring for any obvious damage.
Tip: Take photos before disconnecting wires to aid reassembly. - 3
Test the thermostat and heating element
Use a multimeter to check continuity on the heating element and verify the thermostat responds to temperature settings. Replace if readings are out of spec.
Tip: Disconnect power before any component removal. - 4
Replace faulty components if needed
Install a new thermostat or heating element according to the manufacturer’s wiring diagram and ensure connections are tight and dry.
Tip: Apply fresh Teflon tape to threaded connections. - 5
Seal up and restore power
Reassemble the access panel, reconnect power, and slowly open the water inlet to observe for leaks.
Tip: Check around fittings for moisture after a short test run. - 6
Test operation and look for leaks
Run hot water for several minutes to confirm stable temperature and flow. Inspect all joints for drips and confirm safe operation.
Tip: If leak persists, re-tighten fittings or call a pro.
FAQ
Is it safe to repair an instant water heater myself?
DIY repair can be safe for simple fixes if you fully understand the wiring and electrical risks. Do not attempt gas-powered units without professional help. If you’re unsure, consult a licensed technician.
DIY repairs can be safe for small fixes if you know the wiring and safety rules. If in doubt, call a licensed technician.
What should I do if there is no hot water after replacement?
Double-check that the power and water supplies are properly restored. Verify thermostat settings and ensure the heating element is correctly connected. If still no hot water, re-test components or seek professional diagnostics.
If there’s no hot water after fixes, check power and water, confirm thermostat and element are wired correctly, then retest.
Can a leaking heater be repaired or should I replace it?
Small leaks at fittings can often be sealed with proper torque and Teflon tape. A crack in the housing or persistent leaks usually means replacement and professional disposal are needed.
Leaks at fittings can sometimes be fixed, but cracks or persistent leaks usually require replacement.
Should I drain the system before starting a repair?
Draining may be required if you’re replacing components near the bottom or if mineral deposits are thick. Always follow the manufacturer’s instructions and use protective gear during draining.
Draining helps when repairing low parts or mineral buildup; follow the manual and wear protection.
How long does a typical repair last?
Durability depends on usage, water quality, and part quality. Replacing worn components promptly and performing routine maintenance can extend the life of your instant water heater.
The lifespan after repair varies, but maintenance can extend it significantly.
Watch Video
Key Takeaways
- Identify whether the issue is electrical, mechanical, or mineral buildup.
- Shut off power and water before any repair to avoid shocks and floods.
- Test and replace faulty thermostats or heating elements as needed.
- Maintain the unit annually to extend life and prevent failures.