How to Repair a Rinnai Tankless Water Heater: A Step-by-Step Guide
Learn how to diagnose and safely repair common issues with Rinnai tankless water heaters. Step-by-step instructions, safety tips, and when to call a pro.

Understanding Rinnai Tankless Water Heater Basics
Rinnai tankless water heaters heat water on demand rather than storing it in a tank. They rely on gas or electricity to ignite a burner and pass water through a heat exchanger. In most models, venting is required to exhaust combustion byproducts; a condensate drain handles acidic water produced during operation. Key components include the burner, heat exchanger, gas valve, ignition system, sensors, and a control board. When a problem arises, symptoms can be subtle: fluctuating water temperature, error messages, or nuisance shutoffs. Recognize that mineral buildup, restricted venting, or a failing sensor commonly cause these symptoms. To avoid unnecessary repairs, start with simple checks: verify the gas supply is on, ensure the unit has power, and confirm access panels are properly sealed. The Home Repair Guide team notes that many failures originate from issues outside the heater itself, particularly venting obstructions and mineral scale in hard-water areas. By understanding these basics, you’ll be better prepared to communicate with a technician and to perform safe, minor upkeep without compromising safety.
Safety First: When to DIY and When to Call a Pro
Working with a Rinnai tankless system involves gas, electricity, and hot surfaces. Before you touch anything, ensure you can identify hazards and understand your local codes. If you smell gas, hear hissing, or notice any signs of a leak, evacuate the area and contact the gas provider immediately. Carbon monoxide is a silent danger, so never operate a malfunctioning unit in a closed space. Wear protective eyewear and gloves when opening panels, and disconnect power from the unit before inspecting electrical connections. This guidance is especially important for homeowners who try to source parts online and improvise; flammable gas connections or improvised wiring can create serious safety risks. If you’re unsure about gas pressures, vent integrity, or electrical safety, consult a licensed technician. The Home Repair Guide team emphasizes safety as the top priority in any repair workflow and suggests documenting all findings for professionals to review.
Common Error Codes and Quick Diagnostics
Most Rinnai units display error messages that indicate whether the issue is related to ignition, water flow, sensors, or venting. Start by noting the exact code and consulting the model’s manual or the manufacturer’s website for exact meanings. If a code persists after a safe reset, proceed with be cautious checks and avoid forcing components. A successful quick diagnostic often involves verifying the gas supply is steady, confirming the circuit breaker or reset button has been correctly engaged, and inspecting electrical connections to the control board. Do not bypass safety interlocks or bypass gas valves. When faults involve the ignition system, sensors, or gas lines, these areas are more safely handled by a professional. The Home Repair Guide team reminds readers that many error codes are persistent and require a methodical approach rather than a single magic fix.
Diagnostic Tools and Preparation
Gather the essential tools before you begin, including a non-contact voltage tester, a multimeter, basic hand tools, a cleaning brush, and a supply of replacement gaskets if your inspection reveals worn seals. Have a bucket, towels, and a flashlight ready for potential drips or dark compartments. Clear the work area of clutter and ensure adequate ventilation when working with gas appliances. Use a gas leak detector spray to check for any minor leaks around connections after reassembly. Keep the owner’s manual handy for model-specific steps and torque specifications. According to Home Repair Guide analysis, vent blockages and mineral buildup are frequent culprits, so focus checks on the vent path, condensate drain, and water filters during preparation.
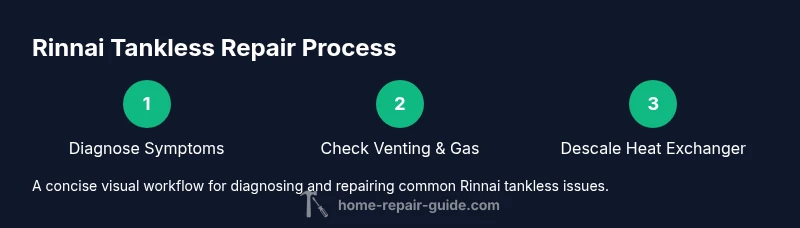
Common Repair Scenarios: Venting, Filters, and Scale
Two frequent scenarios you might encounter are vent obstruction and mineral scale buildup. A blocked vent can lead to improper combustion, error codes, and fluctuating temperatures. Remove accessible sections of the vent and carefully clear debris with a brush, ensuring all joints are re-sealed after reassembly. In mineral-rich water, scale can accumulate on the heat exchanger, reducing efficiency and causing temperature fluctuations. Descale using manufacturer-approved solutions, following the product’s instructions precisely. If your system uses a condensate drain, check for clogs and confirm it drains freely into the proper disposal pathway. For any scenario, avoid over-tightening fittings, and verify all electrical and gas connections are secure after you finish.
Testing, Leaks, and Fine-Tuning
After reinstalling, restore power and, if applicable, gas supply. Run hot water to verify correct temperature rise and consistency. Use a soap solution to check for leaks around fittings and joints; even small leaks can cause gas or water damage and must be corrected immediately. Observe the system for several minutes; if the unit cycles on and off abnormally, recheck sensor placements and wiring harnesses. Keep a log of water temperature, flow rate, and any recurring error codes. The goal is not just to fix the immediate fault but to confirm stable operation under typical household demand.
Seasonal Maintenance: Proactive Care for Longevity
Create a simple maintenance routine to extend the life of your unit: replace or clean water filters, inspect venting, and check the condensate drain for obstruction. Hard-water areas increase mineral buildup, so consider a descaling plan aligned with the manufacturer’s recommendations. Schedule a yearly inspection if you rely on a tankless heater for daily hot water, and adjust maintenance frequency based on usage and water hardness. Regular maintenance improves efficiency, reduces unexpected outages, and supports overall system safety. The Home Repair Guide team notes that routine checks are often the most cost-effective safeguard against expensive repairs down the line.
Maintenance and Troubleshooting Checklist: Quick Reference
Keep a concise checklist handy: note error codes, inspect outdoor vent caps, verify gas supply, test electrical connections, clean filters, inspect seals, and monitor water temperature consistency. If the unit behaves unpredictably after basic troubleshooting, escalate to a professional with the documented observations. This structured approach minimizes guesswork and helps you communicate clearly with technicians when professional intervention is needed. The Home Repair Guide team recommends maintaining a simple, repeatable process to catch minor issues before they escalate.
Conclusion and Next Steps
Repairing a Rinnai tankless water heater requires careful assessment of safety, venting, and heat exchange components. By following a structured approach and keeping safety as the top priority, you can address many common faults and extend the life of your unit. Remember that not every issue is DIY-friendly, especially those involving gas and combustion. If you’re uncertain or the fault persists after basic troubleshooting, contact a licensed technician. The Home Repair Guide team emphasizes that informed homeowners achieve the best outcomes when they combine careful DIY checks with professional support when needed.