Radiator Repair: A Homeowner's Step-by-Step Guide
Practical radiator repair guidance for homeowners: diagnose leaks, bleed air, and replace worn parts with a safe, step-by-step approach and maintenance tips.

Radiator repair skills let you diagnose leaks, release trapped air, and reseat valves in typical home heating systems. In this guide, you’ll learn safe preparation, essential tools, and a clear step-by-step process to handle common radiator problems. The Home Repair Guide team recommends turning off power, allowing the unit to cool, and calling a pro for complex repairs.
What radiator repair covers and why it matters
Radiator repair encompasses diagnosing leaks, stopping drips, reseating connections, bleeding air, and replacing worn parts like valves or air vents in hot-water or steam radiators. For many homeowners, routine maintenance prevents costly failures and keeps rooms warm. The Home Repair Guide team notes that timely fixes save energy and prolong system life. In hydronic and steam systems alike, small issues can cascade into bigger problems, so understanding common symptoms is essential. This guide explains typical symptoms—steadily dripping valves, cold spots on radiators, gurgling sounds, and uneven heating—and how a careful repair can restore comfort. Early action minimizes water damage and reduces overheating risk, especially in older homes where pipework may be corroded. By learning the basics of radiator repair, you gain practical, safe control over your heating system and can decide when DIY is appropriate versus when to call a pro.
Safety first when working on heating systems
Before you touch any part of the heating system, shut off the boiler or circulator, switch the circuit breaker, and allow the radiator to cool completely. Wear gloves and eye protection, use a bucket and towels to catch spills, and work in a well-lit area. Electrical components, hot surfaces, and pressurized segments pose real risks; Home Repair Guide emphasizes conservative steps and avoiding pressure-release behavior unless you know what you’re doing. If you smell gas or hear hissing from a valve, evacuate the area and contact your utility or a licensed technician. Keeping a tidy workspace reduces accidents and helps you track parts as you disassemble.
This safety-aware approach ensures you protect yourself and your home while performing radiator repair.
Diagnosing issues: leaks, airlocks, and valve problems
Common radiator problems include persistent leaks at joints, air trapped in the system causing cold spots, and worn or corroded valves that don’t seal properly. Start with a visual inspection for dampness and rust, then pressurize the system carefully to locate the source of a leak. Bleeding often reveals air pockets that create noises and poor heat distribution; removing air improves efficiency and reduces energy use. Leaks in valve stems or seals may require tightening or replacement. Throughout diagnosis, document observations and test after each fix to ensure the issue is resolved. The Home Repair Guide approach blends practical checks with a safety-first mindset to avoid unnecessary damage to delicate heating components.
Essential tools and materials for radiator repairs
Successful radiator repair relies on a few reliable tools and common supplies. An adjustable wrench and screwdriver set handle most fittings, while a radiator bleed key or a small flat screwdriver can release trapped air. A bucket, towels, and rags keep drips under control, and PTFE tape helps seal threaded connections. You’ll also want a flashlight, a small container for removed parts, and spare valve seals or replacement vents if you expect wear. Keep a notebook for recording leak locations, part numbers, and dates of service. Having these items on hand minimizes trips to the hardware store and keeps the repair process smooth and predictable.
How to plan a simple fix: a practical workflow
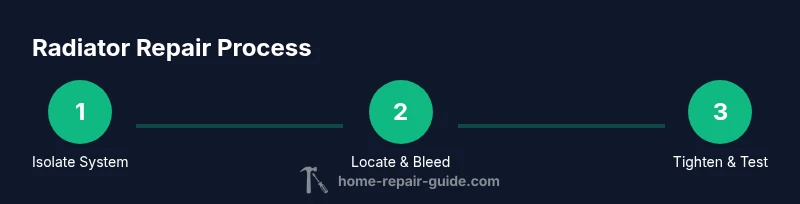
Begin by isolating the radiator and draining a small amount of water into a bucket. Identify the leaking joint or faulty valve, then tighten or replace as needed. Bleed the radiator to remove air pockets, refill the system, and re-pressurize if your boiler requires it. Finally, inspect for any residual drips and run the system to verify proper heat distribution. This workflow supports a controlled, repeatable approach to radiator repair, reducing the risk of accidental spills or missteps.
When to repair vs replace components
Some issues are straightforward fixes, such as tightening a loose valve or replacing a worn air vent. Others require component replacement, which may be more cost-effective in the long run than repeated small repairs. Consider the radiator’s age, the frequency of leaks, and the availability of replacement parts when deciding whether to repair or replace. In many cases, upgrading to a modern, energy-efficient radiator or valve can offer better performance and savings over time. If the system has multiple failing components or shows signs of corrosion, a professional evaluation may be warranted.
Maintenance steps to prevent leaks and air blocks
Regular maintenance reduces the likelihood of future radiator problems. Schedule annual inspections, bleed radiators at the start of the heating season, and check for leaks around joints. Use a corrosion inhibitor or a protective sealant if recommended by your heating system’s manufacturer. Keep pipework tidy and insulated to minimize heat loss and condensation. By integrating these practices into your routine, you can extend the life of your radiator system and maintain efficient operation.
Common mistakes to avoid and quick fixes
Avoid over-tightening joints, which can strip threads and create leaks. Don’t attempt to repair pressurized zones without proper isolation and depressurization. If you’re unsure about a valve type or a vent, consult the manufacturer’s instructions or contact a licensed pro. A few minutes of careful prep can prevent hours of repair work and potential water damage.
Tools & Materials
- Adjustable wrench(For loosening nuts on radiator valves)
- Flat-head and Phillips screwdrivers(For removing covers and valve components)
- Radiator bleed key(To release trapped air from the radiator)
- Bucket(To catch drips and spills)
- Towels or rags(Keep the area clean and prevent moisture damage)
- PTFE tape ( plumber's tape )(Seal threaded connections safely)
- Flashlight(Inspect dimly lit joints and valves)
- Replacement vent or valve seal kit(Only if you anticipate wear on the vent/valve)
- Notebook and pen(Record locations, part numbers, and steps)
Steps
Estimated time: 60-90 minutes
- 1
Isolate and prepare the system
Shut off power to the boiler or circulator and allow the system to cool. Close the radiator shut-off valves to prevent additional water flow. Place a bucket beneath the valve to catch any residual water.
Tip: Never work on a hot system; burns and scalds are common hazards. - 2
Inspect for leaks and identify the source
Visually inspect joints, valve stems, and the bleed valve for signs of water. If the leak is at a joint, you may tighten the fitting or replace the valve. Document location for future reference.
Tip: Use a flashlight to spot slow drips you might miss with the naked eye. - 3
Bleed air from the radiator
Attach the bleed key to the air vent and gently open until air and a small amount of water escape. Close the vent as soon as water appears steadily. Wipe the area to prevent staining.
Tip: Bleed from the highest point of the radiator for best results. - 4
Tighten fittings or replace faulty components
Tighten loose nuts on valves or replace worn seals. If a valve won’t seal, replace the valve or vent. Ensure the connections are snug but not over-tightened.
Tip: Check the valve's alignment; misalignment can cause leaks after reassembly. - 5
Refill the system and purge air
Slowly refill the system to the recommended pressure. Re-bleed if you detect remaining air pockets. Run the boiler briefly to circulate water.
Tip: Keep a close eye on the pressure gauge during refill. - 6
Test for leaks and heat distribution
Inspect all joints for drips after test run. Ensure the radiator heats evenly without cold spots. If issues persist, recheck fittings.
Tip: A minute of observation after heat-up can prevent bigger problems later. - 7
Document and plan future maintenance
Record what you did, which parts were replaced, and when you last bled the radiator. Schedule annual checks and seasonal bleed sessions to maintain performance.
Tip: Set a reminder for next season so you don’t forget.
FAQ
What is radiator repair?
Radiator repair involves diagnosing and fixing issues in home radiators, including leaks, airlocks, valve problems, and worn components. It combines inspection, tightening fittings, replacing seals, and bleeding air to restore proper heating. For safety and efficiency, follow a structured approach and know when to call a professional.
Radiator repair is diagnosing and fixing leaks, air blocks, and worn valves to restore heat. If you’re unsure, consult a professional.
Can I repair a radiator without special tools?
Basic radiator repairs can be done with common tools like wrenches, screwdrivers, a bleed key, and towels. More advanced valve replacements may require specialty fittings. When in doubt, follow manufacturer guidelines and avoid forcing parts.
Most fixes need only basic tools, but some valve replacements may require specialty parts.
How long does radiator repair take?
A typical DIY radiator repair session can take 30 minutes to over an hour depending on the issue and the system. More complex repairs or replacements may take longer and could require a professional.
Most fixes take under an hour, but bigger jobs may take longer.
Is radiator repair safe for DIY?
DIY radiator repair is safe for simple tasks like bleeding air or tightening loose fittings when you follow safety steps. Complex leaks or corroded components should be handled by a licensed technician to avoid injury or damage.
Simple fixes are usually safe to DIY if you follow safety steps; complex problems are best left to a pro.
When should I replace a radiator instead of repairing?
Consider replacing when the radiator is old, leaks recur, or multiple components show wear. Replacement may offer better efficiency and reliability than repeated repairs.
Replace if the radiator is aging or keeps failing; it can be more cost-effective long-term.
Should I call a professional for a leak?
Yes, if you cannot locate the leak quickly, if the system remains under pressure, or if leaks are near gas lines or electrical components. A professional can ensure safe depressurization and proper sealing.
If you’re unsure about the leak's source or safety, call a professional.
Watch Video
Key Takeaways
- Bleeding air improves heat efficiency and reduces noise.
- Tighten or replace faulty valves to stop leaks.
- Test thoroughly after repairs before returning to service.
- Document maintenance to track system health.