Radiators Repair Near Me: A Practical DIY Guide
Learn practical steps to diagnose and repair radiators near you, decide when to DIY or hire a pro, and find trusted local technicians with Home Repair Guide.

Goal: identify common radiator problems, decide when to DIY vs hire a pro, and perform safe, basic repairs. You’ll learn how to bleed air, check for leaks, flush sludge, replace valves, and verify heat output. The guide also covers safety considerations, essential tools, and how to find reputable local technicians for radiators repair near me.
Understanding Radiator Systems and Why They Fail
According to Home Repair Guide, residential radiators are typically either hydronic (hot water) or hot-water steam systems. They rely on a boiler, circulator pump, and a network of radiators to distribute heat. Failures are usually caused by air locks, sludge buildup, valve faults, or leaks. Air trapped in radiators reduces efficiency and heat output; sludge sediments can clog flow paths; faulty valves prevent proper shutoff or heat control. Understanding the basics helps homeowners decide whether a problem is minor maintenance or a job requiring professional service. When you read about radiators repair near me, you are evaluating both DIY viability and the local talent market. Before you begin, confirm your boiler is powered down and cool to avoid burns or scalding. A small routine check now can save a costly breakdown later and keep your heating system efficient through the winter season.
Common Problems and Quick Checks
Radiator problems often show up as cold spots, noisy operation, leaks, or insufficient heat. Quick checks include: 1) Inspect visible valves for corrosion or leaks and ensure they are fully open or closed as intended. 2) Bleed any radiator that feels cold at the top to release trapped air. 3) Check the boiler pressure gauge; if pressure is too low, re-pressurize per your boiler manual. 4) Look for sludge or brown water when you bleed; excessive debris may indicate internal buildup. 5) Listen for banging or clanking, which can reveal air in the system or a dynamic pressure issue. The Home Repair Guide team emphasizes following your boiler manufacturer’s guidelines to avoid accidental damage and unsafe conditions when performing quick checks.
DIY Fixes You Can Try Safely
Safe, basic maintenance can restore heat in many cases. Start with bleeding the radiator to release trapped air, then recheck heat distribution. If cold spots persist, verify that the lockshield valve is open to the correct setting and that the radiator is bled evenly. For sludge buildup, you can perform a controlled flush using a radiator flush kit and a drain hose, following exact kit instructions. Always shut off the boiler and allow components to cool, place a bucket under the drain valve, and wear gloves to protect your hands. After flushing, refill with water and re-pressurize the system as required by your boiler’s design. If you notice persistent leaks or significant pressure drops, stop and seek professional help. Safety and proper adherence to local codes are essential for any DIY project in this area.
When to Hire a Professional and How to Find Them
Not every radiator issue should be DIY’d. If you discover persistent leaks, corroded fittings, a failing pump, boiler pressure instability, or complex valve replacements, contact a licensed technician. To find a local pro, search for installers with recent positive reviews, proper licensing, and clear estimates. Ask about warranties on labor and parts, and verify that the technician is familiar with your boiler type and radiator model. In many communities, reputable local technicians are registered with state licensing boards or heating associations. The Home Repair Guide team recommends collecting multiple quotes and asking for before/after photos of completed work to ensure you’re getting value and quality.
Safety First: Warnings and Best Practices
Safety cannot be overstated when working on heating systems. Always shut off the boiler and allow components to cool before starting any maintenance. Wear gloves and eye protection, and work in a well-ventilated area. Never open a live boiler or force components that are clearly seized. If you detect a strong gas odor, immediately evacuate and call the gas emergency line. For water damage risks, contain leaks with a bucket and towels, and avoid electrical hazards near wet surfaces. If you are unsure about the correct pressure settings or pipe routing, choose professional support to prevent gas, electrical, or flood hazards.
AUTHORITY SOURCES
- U.S. Department of Energy: How Heating Systems Work and Energy Efficiency Tips - https://www.energy.gov/energysaver/home-heating-systems
- Consumer Product Safety Commission: Heating Safety and CO Alarms - https://www.cpsc.gov
- OSHA Safety Essentials: Working With Heating Systems - https://www.osha.gov
What to Expect During a Typical Service Visit
When a technician arrives for radiators repair near me, they will diagnose by listening for noise, inspecting valves, testing boiler pressure, and performing leak checks. They may perform a controlled flush, reseal joints, replace a faulty valve, or recommend a boiler service plan. Expect an itemized estimate with labor, parts, and warranty terms before work begins. If a problem is extensive, you may be advised to replace a radiator or upgrade certain components to improve efficiency.
Tools & Materials
- Radiator bleed key (valve key)(Compatible with standard bleed valves; have a container to catch water)
- Adjustable wrench(For removing and tightening valve nuts)
- Flat-head screwdriver(For some valve adjustments or covers)
- Bucket or shallow tray(Catches water during bleeding or draining)
- Rags or towels(Protect floors and clean up drips)
- Radiator flushing kit (optional)(Includes hose and cleaner for sludge removal)
- Garden hose (optional)(Used for flushing drain valve if applicable)
- Gloves and eye protection(Protect hands and eyes from heat and splashes)
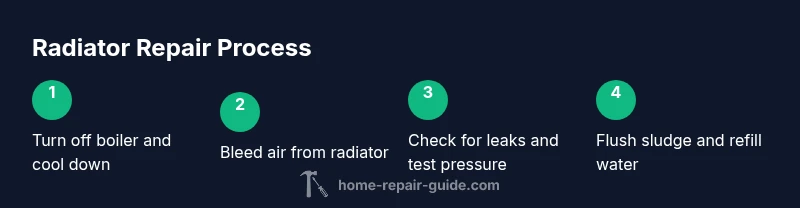
Steps
Estimated time: 60-120 minutes
- 1
Turn off boiler and prepare area
Power down the boiler and allow the system to cool for at least 15-30 minutes. Place towels around the radiator and clear the area for safe access. This reduces the risk of burns and water splashes during maintenance.
Tip: Verify that the boiler pressure gauge is stable before starting any work. - 2
Bleed the radiator to release air
Insert the bleed key into the valve and slowly turn counterclockwise until you hear a hiss of air. When water starts to emerge, close the valve firmly. Catch any drips in the bucket and proceed to other radiators if present.
Tip: Bleed from the radiator at the highest point in the system to improve efficiency. - 3
Check for leaks and valve function
Inspect all visible joints and valves for moisture or corrosion after bleeding. Tighten any loose nuts gently with the wrench and ensure the valve operates smoothly. If leaks persist, isolate the radiator and seek professional help.
Tip: Don’t overtighten valve fittings; this can damage seals. - 4
Flush sludge if necessary
If the radiator produces rusty water or feels sluggish, use a flushing kit or access the drain valve to flush water through the system. Reconnect and refill once clear. This helps restore flow and heat output.
Tip: Follow kit instructions precisely to avoid introducing air back into the system. - 5
Re-pressurize and refill the system
Check boiler pressure and add water as required according to your boiler manual. Ensure the system is within the recommended pressure range. Start the boiler briefly to verify circulation and heat output.
Tip: Run the circulator for a few minutes after re-pressurizing to remove air pockets. - 6
Test heat output and controls
Turn the thermostat up and observe whether all radiators heat evenly. Listen for any unusual noises, and verify that thermostatic valves respond correctly. Note any persistent issues for professional assessment.
Tip: Document any persistent cold spots or leaks to share with a technician.
FAQ
What are the signs that my radiator needs repairs?
Common signs include cold spots, banging noises, leaks, and little or no heat from radiators. If simple bleeding or valve adjustment doesn’t restore heat, there may be sludge buildup or a failing pump requiring professional attention.
Look for cold spots, noise, leaks, or poor heat. If basic fixes don’t help, call a licensed pro.
Can I fix a leak myself?
Minor leaks at valve fittings can sometimes be tightened or resealed with appropriate fittings. Persistent or large leaks, corrosion, or pressure drops should be handled by a licensed technician to prevent water damage or gas-related risks.
Small leaks at fittings may be fixable, but persistent leaks need a professional.
Is bleeding the only fix for cold spots?
Bleeding is often the first step for cold spots caused by air. If cold spots persist, check valve settings, balance across radiators, and consider sludge buildup. A professional may be needed for deeper system flushes.
Bleeding helps, but ongoing cold spots may require further steps or a pro.
How do I choose a local radiator repair service near me?
Look for licensed HVAC technicians with good reviews, transparent estimates, and warranties. Ask for references and ensure they have experience with your radiator type and boiler system.
Find licensed pros with good reviews and clear warranties.
How long does a typical radiator repair take?
Simple bleeding or valve replacement can take about 30-60 minutes. More involved tasks, like flushing or replacing pumps, may take several hours and require a follow-up visit.
Most minor fixes take under an hour; major work may need more time.
Watch Video
Key Takeaways
- Bleeding air from radiators improves heat output.
- Check for leaks and verify system pressure after DIY work.
- Know when to call a professional to avoid safety risks.
- Regular maintenance reduces sludge buildup and extends component life.