Repair Gas Fireplace Near Me: Step-by-Step Guide
Learn to diagnose and repair common gas fireplace issues safely with a clear, step-by-step approach, essential tools, and maintenance tips from Home Repair Guide.

By following these safety-first steps, you can diagnose and fix common gas fireplace issues near me without compromising safety. This guide covers what to inspect (pilot assembly, thermocouple, and control valve), essential tools, and practical precautions in a clear, step-by-step format. According to Home Repair Guide, regular maintenance reduces fire hazards and improves efficiency.
Safety first: assessing risk and legality
Gas fireplaces, when not properly serviced, can pose serious safety hazards, including gas leaks, carbon monoxide buildup, and fire risk. Before you begin any inspection or repair, make sure the area is well ventilated, the space clear of flammable materials, and that you have working CO detectors nearby. If you smell gas or hear hissing sounds, leave the area immediately and call the gas emergency number. According to Home Repair Guide, the safest approach is to treat gas fireplace work as a potential hazard, involving careful shutoffs, tool readiness, and a plan for professional help if you’re unsure. Begin by locating the main shutoff valve and ensuring the gas supply to the unit is fully off, and switch off any nearby electrical power to the unit if accessible. Checking local regulations or permits is wise before any work—some repairs or modifications may require a licensed technician.
Diagnosing common gas fireplace symptoms
Common signs that a gas fireplace needs attention include a pilot that won’t stay lit, a flame that is yellow or uneven, or a weak or no ignition. You may notice soot around the burner, irregular sparking from the igniter, or a faint gas odor. These symptoms point to different root causes such as pilot assembly issues, a failed thermocouple, dirty igniters, or a leaking connection. Based on Home Repair Guide analysis, pilot and thermocouple problems are frequent culprits, along with venting blockages. Conduct basic checks safely: observe the flame color, listen for unusual noises, and verify that the vent terminals are unobstructed. If you identify a gas odor or persistent leaks, evacuate the area and contact your gas supplier or emergency services immediately.
Prep work: tools, PPE, and setup
Before touching any gas appliance, assemble your tools and PPE and create a safe workspace. Lay out a clean cloth or mat to protect surfaces, and establish your work area with good lighting. Put on safety goggles and heat-resistant gloves and keep a fire extinguisher within reach. Gather the essentials: a screwdriver set (Phillips and flat-head), an adjustable wrench, leak detector solution, a vacuum or brush for debris, and optional replacement parts if you identify a worn pilot assembly or thermocouple. Have the owner’s manual handy or download the model’s schematic to confirm part numbers and torque specs. Keep a notebook to document what you inspect for future maintenance. Non-ignition cleaning agents should be used only on non-combustible surfaces; avoid watering down electrical components or gas lines.
Step-by-step overview (what you will do)
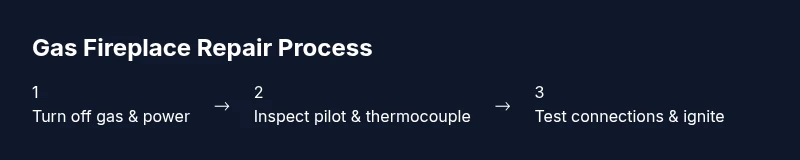
Here is the high-level approach you’ll follow in the formal step-by-step section. Start with safety: turn off gas at the main shutoff and disconnect power if applicable. Inspect the pilot assembly for flame stability and clean or replace the thermocouple if it shows wear. Check gas valves and connections for looseness or leaks using a soapy water test. Clean the ignition system and ensure sparking occurs. Inspect the venting system for blockages and ensure proper atmospheric draft. Finally, reassemble the unit, carefully reintroduce gas, and test the system for stable ignition and proper flame characteristics.
Maintenance and prevention to avoid future problems
Regular maintenance is the best defense against intermittent performance and dangerous failures. Schedule an annual professional inspection and follow a quarterly or biannual cleaning routine. Keep CO detectors active and test them monthly. Wipe down exterior surfaces to remove dust and check glass for cracks. Use the warranty guide to understand what parts are covered and follow manufacturer recommendations for replacement parts. A simple, ongoing maintenance habit can extend life, improve efficiency, and reduce the chance of a dangerous gas incident.
When to call a professional and warranty considerations
DIY can handle straightforward checks, but gas fireplaces involve fuel, combustion, and venting systems. If you detect a gas odor, a hissing sound, rust on venting, or if ignition remains faulty after basic troubleshooting, contact a licensed technician immediately. Modifications to gas lines or venting typically require permits and professional installation to maintain safety and compliance. Review your warranty terms; many manufacturer warranties require professional service for certain repairs to remain valid. Planning preventive service through a licensed pro can protect safety and investment.
Authority sources and safety standards
- NFPA: National Fire Protection Association (https://www.nfpa.org) – Fire safety guidelines for gas appliances and venting.
- U.S. DOE: Department of Energy (https://www.energy.gov) – Energy efficiency and safe operation practices for heating equipment.
- CPSC: Consumer Product Safety Commission (https://www.cpsc.gov) – Safety alerts and consumer guidance for home appliances.
Tools & Materials
- Phillips and flat-head screwdriver set(Include small and medium sizes)
- Adjustable wrench(8-12 inch recommended)
- Leak detector solution (or soapy water)(Test gas line connections for leaks)
- Safety goggles (ANSI Z87.1)(Protect eyes from debris)
- Heat-resistant gloves(Handle hot components safely)
- Vacuum with brush attachment(Clean dust and debris from burner area)
- Non-contact voltage tester(Optional for igniter circuit checks)
- Replacement parts kit (thermocouple/pilot assembly)(Only if you identify a worn part)
- Owner’s manual or model schematic(Model-specific torque and part numbers)
- Fire extinguisher (class ABC)(Keep nearby as a precaution)
Steps
Estimated time: 90-120 minutes
- 1
Turn off gas supply and power
Locate the main gas shutoff valve and rotate to off. If the unit has an electric igniter or control panel, switch off the circuit at the breaker. Confirm there is no gas smell before proceeding.
Tip: Wait 5-10 minutes for residual gas to clear before touching components. - 2
Inspect the pilot assembly
Remove the burner access panel as described in the manual. Visually inspect the pilot flame; a healthy flame is blue and steady. If sooty buildup is present, clean the burner area with a dry brush and recheck.
Tip: If the flame is weak or yellow, the thermocouple or valve may be faulty. - 3
Test and replace the thermocouple or thermopile as needed
Carefully disconnect the thermocouple and inspect for corrosion or damage. If dirty or bent, clean or replace per the manufacturer’s guidance. Reconnect and ensure a snug fit to spec.
Tip: Use only compatible replacement parts for your model. - 4
Check the gas valve and connections
Inspect all gas joints for tightness; apply leak-detection solution and watch for bubbles. If a leak is detected, immediately shut off gas and contact a professional.
Tip: Never operate a joint that shows a gas leak with an open flame nearby. - 5
Clean or replace ignition components
Gently clean the igniter tip with an alcohol wipe and inspect wiring for cracks. Replace damaged parts following the model’s instructions. Re-test sparking after reassembly.
Tip: Avoid touching hot surfaces and ensure the area is cool before handling components. - 6
Reassemble, relight, and test
Reinstall panels, gradually reopen the gas supply, and light the pilot according to the manual. Observe flame stability, ignition response, and heat output. Verify shutoff control works and monitor for any irregularities.
Tip: Keep a fire extinguisher within reach during testing.
FAQ
Is it safe to repair a gas fireplace near me yourself?
DIY can be safe for simple inspections and maintenance if you follow safety protocols and manuals. For complex problems (gas leaks, failed igniters, venting issues) hire a licensed technician.
DIY can be safe for simple checks, but leaks and venting are best left to a pro.
What are the most common signs my gas fireplace needs repair?
Pilot won’t stay lit, flame color is yellow or unstable, weak ignition, or a noticeable gas odor are common signs. These point to issues with the pilot assembly, thermocouple, or venting.
Common signs include a pilot that won’t stay lit, yellow flame, or gas odor.
Do I need a permit to repair a gas fireplace?
Permits depend on local regulations and the scope of work. Minor maintenance may not require one, but gas line work or vent modifications often do. Check with your local building department.
Permits vary by location; check with the local building department before major work.
How often should a gas fireplace be serviced?
Annual professional inspection is generally recommended, along with periodic cleaning and vent inspection as advised by the manufacturer.
Annual professional service is typical; follow the manufacturer’s maintenance schedule.
What parts are most likely to fail in a gas fireplace?
Pilot assembly, thermocouple, ignition system, and gas valve are common failure points.
Pilot assembly and thermocouple are common wear points.
When should I call a licensed technician rather than DIY?
If you detect a gas smell, persistent odor, venting issues, or uncertain about gas line safety, call a licensed technician immediately.
If gas is involved or you’re unsure, call a pro.
Watch Video
Key Takeaways
- Assess safety risks before touching gas lines.
- Gather essential tools and PPE ahead of time.
- Follow model-specific steps; avoid improvising gas components.
- Test each function after reassembly and vent check.
- Know when to call a professional for safety.