Lennox Furnace Repair: A Practical Step-by-Step Guide
Learn safe, practical Lennox furnace repair with a step-by-step approach, common issues, tools, maintenance, and when to call a pro. A practical Home Repair Guide tutorial for homeowners and renters.

By the end you’ll be able to perform safe Lennox furnace repair by diagnosing common symptoms, deciding if a DIY fix is appropriate, and following a practical, step-by-step process to get heat back quickly. This guide covers basic troubleshooting, essential tools, safety precautions, and when to call a licensed pro for gas or complex electrical work.
Overview of Lennox Furnaces and Common Problems
Lennox furnaces are known for energy efficiency and durable performance, but every home heater benefits from routine checks. When you start lennox furnace repair, you’ll notice that many problems originate from airflow limitations, ignition issues, sensor faults, or thermostat misreads. According to Home Repair Guide, addressing the root cause rather than chasing symptoms saves time and money. This section explains typical failure modes, how they show up, and what to check first before diving into deeper diagnostics. Expect to verify the basic conditions: gas supply (if you have a gas furnace), electrical power, clean air filters, and a responsive thermostat. Early signals include unusual startup noises, frequent cycling, yellow flame color, or a system that runs unusually long. By recognizing these patterns, you can decide whether an easy DIY remedy is appropriate or if professional service is required.
Safety First: When to DIY vs When to Hire a Pro
Furnace repair involves live electrical components, gas lines, and moving parts that can pose safety risks. The Home Repair Guide team emphasizes conservative, safety-first decision making. If you smell gas, hear hissing sounds, or see damaged wiring, leave the area immediately and call your gas utility or a licensed technician. For most homeowners, routine maintenance (like changing filters and clearing simple obstructions) is a safe DIY task, but complex diagnostics—especially those involving gas valves, flame sensors, or control boards—are best left to a trained technician. Always shut off power at the furnace and at the service disconnect before touching any internal components. Wear eye protection and keep children and pets away during checks.
Tools and Materials You'll Need (Before You Start)
Having the right tools makes Lennox furnace repair safer and faster. Prepare a basic safety kit and common hand tools, plus some consumables for routine maintenance. The list below covers essentials; optional items can speed up diagnosis but aren’t strictly required for a first attempt. Keep one set of tools nearby with a clear workspace. Using quality, properly sized tools reduces the risk of damage to screws, terminals, and wiring. If you’re unsure about any item, consult the furnace manual or contact a licensed pro. Typical items: digital multimeter, non-contact voltage tester, insulated screwdrivers (Phillips and flat-head), a small flat brush or nylon brush for cleaning, a vacuum or compressed air can, a replacement air filter, safety gloves, and safety goggles.
Diagnosing Common Symptoms (No-Cost Checks)
Most Lennox furnace issues become apparent through simple, non-invasive checks. Start with thermostat settings, power supply, and the air filter. A dirty filter restricts airflow and can trigger cold air delivery or short cycles. Listen for unusual noises such as rattling or squeaks, which often point to loose panels or worn bearings. The blower motor may struggle, causing uneven heating or fan-only operation. Check the error codes on the control board, if present, and refer to the Lennox manual for code meanings. If the system attempts to start but fails to ignite, inspect the ignition sensor or flame sensor and verify wiring integrity. Keep a log of symptoms to help a technician diagnose the issue faster if professional service is required.
Step-by-Step Troubleshooting for Lennox Furnace Repair
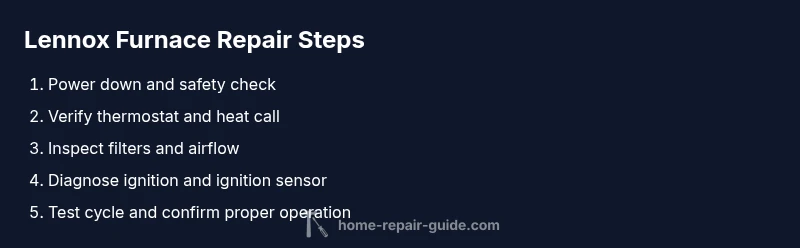
Below is a practical sequence you can follow for many Lennox furnace issues. Do not skip safety steps. If any step feels beyond your comfort level, stop and call a professional. Step 1: Power down the system at the breaker and thermostat and confirm there is no voltage present. Step 2: Check the thermostat wiring and settings; ensure the unit is scheduled to heat and the thermostat is in good contact with the wall. Step 3: Inspect the air filter; replace if dirty and inspect the blower housing for obstructions. Step 4: Look at service indicators or error codes on the control board; consult the Lennox manual for code meanings. Step 5: If you have a gas furnace, do not attempt gas-related work unless you are trained; inspect the ignition module and flame sensor visually from a safe distance. Step 6: Reassemble, restore power, and run a test cycle; monitor for proper ignition, flame stability, and normal cycling. Tip: document any error codes and the exact symptoms observed to guide a professional if needed.
Cleaning and Maintenance to Prevent Future Failures
Preventive care extends the life of a Lennox furnace and maintains efficiency. Regular filter changes every 1-3 months depending on usage reduce strain on the blower and maintain indoor air quality. Keep the blower compartment clean and free of dust to avoid overheating. If your unit has a flame sensor, clean it gently with a soft cloth to prevent ignition delays. Schedule a yearly professional inspection to calibrate the burner and verify control board safety features. A simple maintenance log can help you spot patterns and anticipate required service, saving time and avoiding unexpected outages.
When to Replace vs Repair: Reading the Signs
Repairing a Lennox furnace is often cost-effective for minor issues, but some signals indicate replacement may be wiser. If repairs require more than 50-60% of the cost of a new unit or if the system is more than 12-15 years old, replacement could be a better long-term investment. Other indicators include frequent, recurring failures, declining efficiency, or rising energy bills despite maintenance. In some cases, considering energy-efficient Lennox models with modern zoning and smart thermostats can yield substantial savings over time. The Home Repair Guide team notes that choosing replacement should factor not only upfront cost but ongoing reliability and energy performance.
Energy Efficiency Tips and Cost Considerations
A well-maintained Lennox furnace runs more efficiently, reducing monthly energy costs. Use a programmable thermostat to optimize heating schedules and avoid wasting energy during unoccupied hours. Regularly change air filters to maintain air quality and efficiency. Sealing and insulating ducts improves performance and lowers energy loss. When evaluating repairs versus replacements, compare the long-term energy savings, maintenance costs, and potential tax incentives for energy-efficient equipment. Home Repair Guide analysis suggests that small investments in preventive maintenance can yield meaningful energy savings over time.
Authenticating Your Lennox Parts and Service Options
When you need a part, insist on genuine Lennox components or certified aftermarket equivalents. Check part numbers in your manual and verify compatibility with your model. For service, hire technicians with Lennox certification or factory-trained credentials. Request a written estimate that itemizes parts and labor, and confirm the warranty terms. If you’re exploring DIY, confirm that the parts you buy are compatible with your Lennox model and that you understand the replacement steps. Working with authorized dealers can help ensure the work complies with safety standards and manufacturer guidelines.
Final Check: Ready for Winter
Before the first cold snap, perform a final checklist: verify that the system cycles normally on heat, listen for smooth ignition, ensure comfortable airflow, and confirm there are no gas odors. Recheck filters and seals around access panels, and confirm that carbon monoxide detectors are functioning. Keep a maintenance log, note any new issues, and schedule a professional service if anything seems off. With proper care, your Lennox furnace can provide reliable warmth throughout the season, and a proactive approach reduces surprises and service calls. The Home Repair Guide team recommends maintaining a routine maintenance schedule to maximize longevity and energy efficiency.
Tools & Materials
- Digital multimeter(Essential for testing voltage and continuity in electrical components)
- Non-contact voltage tester(Use to verify live circuits without contact)
- Insulated screwdrivers (Phillips and flat-head)(Different sizes; keep safe from shocks)
- Nut driver set(For panel screws and terminal blocks)
- Flashlight or headlamp(Illuminates tight spaces in the furnace cabinet)
- Vacuum or compressed air can(Clean dust from blower housing and igniter area)
- Replacement air filter(Match your unit’s filter size (MERV rating as advised))
- Safety gloves and goggles(Personal protection when handling electrical or dusty parts)
- Owner’s manual or Lennox service manual (digital)(Model-specific steps and safety notes)
- Optional spare parts (as appropriate for your model)(Belts, sensors, or igniter depending on model)
Steps
Estimated time: 60-90 minutes
- 1
Power down and safety check
Turn off the furnace at the wall switch and the service disconnect. Confirm there is no voltage present at accessible terminals. This prevents accidental shocks and gas-related hazards when you open panels.
Tip: Always double-check that power is fully cut before touching internal components. - 2
Verify thermostat and heat call
Check that the thermostat is set to heat, not cool, and that the setpoint is above room temperature. Ensure wiring is secure and not damaged by pets or dust.
Tip: A simple thermostat wiring issue is a common cause of no-heat conditions. - 3
Inspect air filter and blower area
Remove and inspect the air filter; replace if dirty. Look into the blower housing for dust buildup and clear obstructions carefully with a brush or vacuum.
Tip: A clogged filter reduces airflow and can trigger safety shutdowns. - 4
Check control board indicators
Inspect any LED indicators or status codes on the control board. Refer to the Lennox manual for code meanings and follow prescribed steps.
Tip: Code meanings guide the next diagnostic steps and reduce guesswork. - 5
Evaluate ignition sensors (gas furnaces)
If you have a gas furnace, visually inspect the ignition module and flame sensor from a safe distance. Do not touch hot surfaces; a dirty flame sensor can delay ignition.
Tip: Do not attempt gas-related repairs unless trained; misuse can be dangerous. - 6
Test cycle and observe safety
Reconnect power, set to heat, and run a short cycle. Observe ignition stability, flame color, and airflow. If issues persist, stop and contact a pro.
Tip: Document any error codes or unusual noises for the technician.
FAQ
What is Lennox furnace repair?
Lennox furnace repair involves diagnosing and fixing issues in Lennox-brand heating systems, including filters, igniters, burners, control boards, and thermostats. It ranges from simple DIY maintenance to professional service for complex failures.
Lennox furnace repair means fixing problems in Lennox heating systems, from filters to boards. Some repairs are DIY-friendly, others require a pro.
Can I fix a Lennox furnace myself?
Basic maintenance and minor troubleshooting like changing filters or checking the thermostat can be done by homeowners. More advanced diagnostics, gas-related work, or electrical board repairs should be handled by a licensed technician.
You can handle simple tasks like filter changes, but more complex problems need a professional.
What safety precautions should I take before DIY?
Shut off power at the furnace and breaker, avoid touching gas lines, wear PPE, and never work around a furnace that smells like gas. If you’re unsure, stop and call a pro.
Turn off power, protect yourself with PPE, and if gas is involved, call a professional.
When should I replace instead of repairing my Lennox furnace?
If repairs exceed 50-60% of the cost of a new unit or the system is over 12-15 years old, replacement is often more cost-effective in the long run.
Sometimes it’s cheaper to replace than to repair, especially with older units.
Are Lennox parts easy to get?
Genuine Lennox parts are typically available through authorized dealers or Lennox-certified distributors. Confirm compatibility with your model before purchasing.
Parts are usually available from authorized dealers; always check compatibility.
How long does Lennox furnace repair typically take?
Most repairs on basic issues take a few hours to a day, depending on the complexity and whether parts need ordering.
Most fixes take a few hours to a day, but it depends on the issue and parts.
Watch Video
Key Takeaways
- Identify whether DIY fixes are appropriate before opening the cabinet
- Prioritize safety and power shutoff at every step
- Keep a maintenance log to track symptoms and repairs
- Regular air-filter changes protect efficiency and heat delivery
- Consider replacement if repairs become frequent or the system ages past its useful life