Daikin Mini Split Repair: Step-by-Step Home Guide
Learn safe, practical steps to diagnose and repair common Daikin mini split issues. This Home Repair Guide tutorial covers tools, step-by-step repair methods, and pro tips for durable results.

You will learn how to diagnose and repair common Daikin mini split issues, including airflow problems, refrigerant concerns, and error codes. This quick guide highlights essential safety practices, required tools, and a clear step-by-step approach. When in doubt, know your limits and call a qualified technician. It also outlines scenarios where DIY is risky.
Understanding the Daikin Mini Split System
A Daikin mini split system is a compact, ductless HVAC setup that combines an outdoor condenser with one or more indoor air handlers. Unlike traditional central air, it uses refrigerant loops and inverter technology to modulate cooling and heating without bulky ducts. For homeowners, understanding the basic components helps identify where problems originate: the outdoor unit (compressor and condenser), the indoor air handler (evaporator coil and blower), the remote or wall-mounted thermostat, and the refrigerant lines that connect them. Common failures fall into categories like clogged filters, restricted airflow, ice buildup on the coil, electrical faults, fan issues, and refrigerant-related leaks. According to Home Repair Guide analysis, most Daikin mini split repairs begin with a simple safety check and a thorough inspection of filters, drains, and accessibility points before delving into electronics or refrigerant handling. Keeping a service manual on hand speeds up diagnosis and reduces guesswork.
Common Symptoms Indicating Repair Is Needed
Recognizing the signs early can prevent bigger breakdowns. Typical symptoms of Daikin mini split trouble include: reduced cooling or heating capacity, unusual noises from the fan or compressor, continuous system cycling on and off, frost or ice forming on the evaporator coil, a frozen outdoor condenser coil, high energy bills with no performance gain, error codes displayed on the remote or unit, and water leaks near the indoor or outdoor units. Some issues are intermittent, making diagnosis trickier, so document when symptoms appear, what outdoor conditions were, and any recent maintenance like filter changes. Home Repair Guide notes that recording symptoms can help a technician reproduce the fault quickly if professional service is required. A quick visual check—filters, condensate drain, and outdoor clearance—often reveals obvious culprits you can fix safely.
Safety First: When DIY Is Appropriate and When to Call a Pro
Electrical and refrigerant work carry risks. Before attempting any repair, ensure you turn off power at the main breaker and lock out the circuit to prevent accidental energizing. Use PPE such as safety goggles and insulated gloves, especially when handling electrical connections or touching refrigerant lines. Do not attempt to repair refrigerant leaks or to recharge refrigerant yourself; improper handling can be hazardous and is often illegal without proper licensing. If the diagnostic results indicate compressor issues, major refrigerant loss, or control board faults, the safest option is to contact a licensed HVAC technician. The Home Repair Guide team emphasizes safety as the top priority and recommends using a service manual for wiring diagrams and safety cautions.
Tools, Diagnostics, and Basic Checks
Before you start, assemble a basic toolkit and a clean, well-lit space. Essential checks include confirming power availability to the outdoor and indoor units, inspecting air filters for cleanliness, verifying condensate drain flow, and inspecting for visible damage such as bent fins or damaged insulation. Use a multimeter to verify supply voltage at the control board and to test basic continuity in accessible wiring. Take care not to touch live terminals; never bypass safety switches. If you see signs of refrigerant issues, do not attempt to seal leaks or add refrigerant yourself; those tasks require licensed certification. Document readings and conditions to compare against the unit's service manual requirements.
Diagnosing Typical Problems with Daikin Mini Split Repair
Diagnosis often follows a flow: verify power, inspect airflow, review error codes, and assess refrigerant-related signs. Poor airflow usually stems from a dirty or blocked filter, closed or blocked vents, or a malfunctioning indoor blower. Ice buildup on the evaporator coil points to insufficient airflow, low refrigerant charge, or outdoor unit icing due to poor outdoor airflow. Refrigerant leaks, which may manifest as oil residue around connections or hissing sounds, require professional intervention; refrigerant work is not a DIY task. Electrical issues can appear as tripped breakers or a system that refuses to start. By following a structured diagnostic approach, you can narrow the fault to a specific subsystem and determine whether a repair is within DIY scope or necessitates a pro. This framework aligns with general best practices for Daikin mini split repair and helps homeowners proceed with confidence.
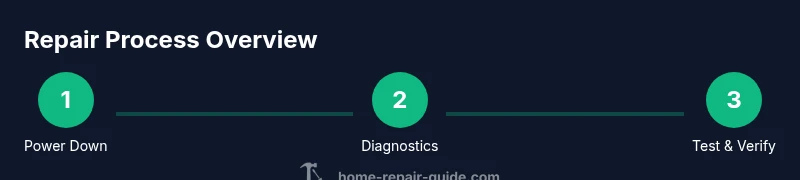
Step-By-Step Repair Overview (High-Level Flow)
Repair is often a multi-step process that begins with safety, followed by diagnosis, and then repair or replacement of faulty components. A practical approach is to isolate power, perform a visual and functional check, reference error codes, test electrical components, and consider mechanical issues such as fan blades and condensate lines. If you identify refrigerant or compressor problems, escalate to a licensed technician. This overview prepares you for the detailed steps below and keeps you focused on what matters—safety, documentation, and accuracy. The goal is to restore performance while minimizing risk and avoiding unnecessary disassembly.
Maintenance and Prevention for Longevity and Efficiency
Preventive care is cheaper than reactive fixes. Regularly replace or clean air filters every 1–3 months, depending on usage and environmental factors. Schedule an annual professional inspection to evaluate refrigerant charge, electrical connections, and coil cleanliness. Keep outdoor units free of debris, ensure adequate clearance around the condenser, and inspect the condensate drain to prevent overflow. Use a smart thermostat or timer to optimize operation, which can extend the system’s lifespan and improve energy efficiency. In the long run, consistent maintenance reduces the likelihood of sudden breakdowns and keeps your Daikin mini split running at peak efficiency.
Authority Sources and Further Reading
- Environmental Protection Agency (EPA): Refrigerant handling and safety guidelines relevant to HVAC systems. https://www.epa.gov/saferchoice
- Energy Star: HVAC maintenance and energy efficiency recommendations. https://www.energystar.gov
- Occupational Safety and Health Administration (OSHA): Electrical safety basics when servicing appliances. https://www.osha.gov
Quick Troubleshooting Checklist
- Verify the unit is powered and circuit breakers are not tripped.
- Check and clean air filters; clear obstructions from vents.
- Inspect outdoor unit for debris, leaves, or snow; ensure adequate airflow.
- Note any error codes on the display and record conditions.
- If issues persist or refrigerant problems are suspected, contact a licensed technician.
Tools & Materials
- Digital multimeter(To test wiring, contact closures, and voltage at the control board or main terminals)
- Screwdrivers (Phillips & flat-head)(Assorted sizes for panel and access screws; insulated handles preferred)
- Nut drivers set(For securing service panels and disconnects)
- Voltage tester(Verify power is truly off before touching wiring)
- Safety goggles(Eye protection during all inspection steps)
- Work gloves (ANSI-rated)(Electrical safety and handling equipment; keep hands protected)
- Leak detection spray(Identify refrigerant leaks around connections (do not refrigerant-charge))
- Refrigerant leak sealant & pump-down equipment(Advanced DIY advised only with licensing; optional for temporary testing)
- Digital camera or smartphone(Document wiring layouts and positions before disassembly)
- Owner’s service manual or model documentation(Refer to wiring diagrams and fault code sheets)
Steps
Estimated time: Estimated total time: 60-90 minutes
- 1
Power down and verify safety
Switch off the main breaker feeding both the outdoor condenser and indoor air handler. Use a voltage tester to confirm no voltage at accessible points before touching any wires. This prevents shock and accidental compressor start-up during inspection.
Tip: Label circuits and use lockout–tagout if available to prevent re-energizing the system. - 2
Inspect for obvious signs of trouble
Visually inspect filters, vents, insulation, and coils for dirt, damage, or ice buildup. A dirty filter or blocked airflow is a common cause of performance drop and can be corrected without disassembling the unit.
Tip: Replace dirty filters immediately and clean any visible debris from vents. - 3
Record error codes and conditions
Note any fault codes from the remote or unit display and record ambient conditions (temperature, humidity). This documentation helps pinpoint the fault and provides a reference for future maintenance checks.
Tip: Photograph the display and note the exact code string for later reference. - 4
Test electrical connections and supply
With power off, inspect control wiring for signs of wear, looseness, or corrosion. Use a multimeter to verify continuity and correct voltage at the control board and disconnects.
Tip: Handle wires gently; avoid bending terminals and never probe live contacts. - 5
Check refrigerant-related indicators
Look for oil residue at connections, hissing sounds, or frost on the evaporator coil. Do not attempt to recharge refrigerant; refrigerant handling requires licensed service.
Tip: If you suspect a leak, stop work and call a pro rather than attempting a DIY recharge. - 6
Inspect and reseat components
Gently reseat connectors, tighten screws within torque specifications, and ensure fans rotate freely without obstruction. Clean any condensate line and ensure proper drainage slope.
Tip: Keep a clean workspace and organize screws to avoid reassembly errors. - 7
Run a test cycle and observe
Power the system and run a 15–20 minute test cycle. Monitor airflow, noise levels, coil temperature, and any error codes. Document the results and determine if a professional upgrade or replacement is needed.
Tip: If issues persist after the test, schedule a professional diagnostic visit.
FAQ
Can I repair refrigerant leaks myself on a Daikin mini split?
No. Refrigerant handling and charging require licensed HVAC technicians and proper recovery equipment. DIY attempts can be hazardous and illegal in many areas.
Refrigerant leaks require a licensed technician—don’t attempt a DIY recharge.
What are the most common symptoms that indicate a repair is needed?
Low cooling/heating performance, ice on the evaporator coil, unusual noises, error codes on the control display, and water leaks near units are typical signs that a Daikin mini split repair may be necessary.
Look for poor performance, ice on coils, or error codes as red flags.
Do I need professional tools or equipment to perform repairs?
Basic tools and a homeowner’s toolkit plus a digital multimeter will cover many diagnostics. Refrigerant handling, pressure testing, or compressor work should be done by a licensed pro.
Basic tools help with diagnostics, but refrigerant work should be left to pros.
Is regular DIY maintenance enough to prevent failures?
Routine maintenance—clean filters, clear condensate drains, and seasonal checks—significantly reduces failures. Schedule an annual professional inspection for deeper checks.
Regular maintenance helps prevent many issues, but professional tune-ups are still important.
What should I do if the outdoor unit is blocked or iced?
Clear debris around the outdoor unit, ensure adequate clearance for airflow, and defrost if you see ice. If ice recurs or airflow remains poor, contact a technician.
Clear around the outdoor unit and defrost if iced; persistent issues require a pro.
How can I prevent future leaks or electrical faults?
Keep filters clean, inspect wiring for wear, and perform annual professional checks. A simple maintenance routine reduces the likelihood of leaks and electrical faults.
Regular cleaning and annual checks go a long way in preventing issues.
Watch Video
Key Takeaways
- Power down safely before inspection
- Document symptoms and codes for accurate diagnosis
- Avoid refrigerant work unless licensed
- Regular maintenance prevents most Daikin mini split failures
- Use the provided service manual and professional help when needed