Carrier AC Repair: Step-by-Step Troubleshooting Guide for Homeowners
Master safe, step-by-step Carrier AC repair techniques, diagnose common faults, and maintain efficiency. A practical guide for homeowners deciding when to DIY or call a pro.

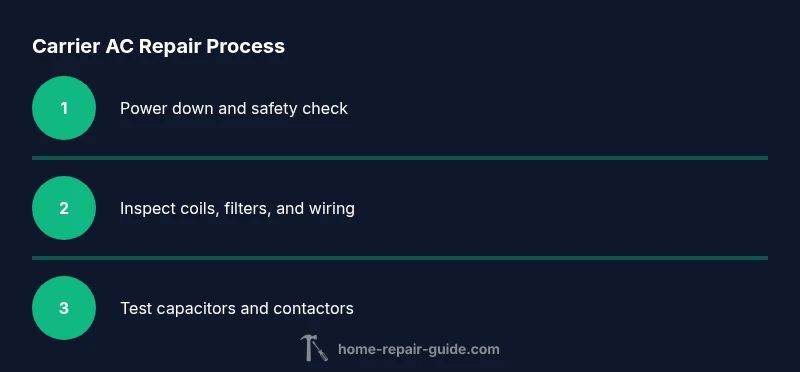
This guide helps you diagnose and address common Carrier AC issues through a clear, six-step process. It covers safety checks, basic electrical tests, and components most often at fault, such as capacitors and contactors. You'll learn when a DIY fix is appropriate and when to call a licensed technician to protect your home and equipment.
What Carrier AC Repair Involves
Carrier air conditioning systems are designed for reliability, but they depend on several components working in harmony. When a cooling cycle stumbles, the issue could lie with electrical controls, a failing capacitor, a dirty condenser coil, restricted airflow, or refrigerant-related problems. This block explains the typical fault domains in Carrier systems and frames the approach you should take. It also notes that routine maintenance—filters, coil cleaning, and yearly inspections—helps prevent many common failures. According to Home Repair Guide, a disciplined maintenance routine reduces the likelihood of sudden breakdowns and keeps efficiency high. By understanding the fault domains, you can triage issues quickly and decide whether DIY steps are appropriate or if a licensed technician is needed. This section sets expectations for what you can safely attempt and when professional service is the better option.
A Carrier system relies on clear electrical signals, clean air pathways, and sealed refrigerant circuits. When any one of these areas deteriorates, you’ll notice symptoms such as insufficient cooling, warm air, short cycling, or unusual noises. The Home Repair Guide team emphasizes safety first: never work on live electrical components, disconnect power before handling wires, and wear eye protection and gloves during maintenance tasks. The goal of repair planning is to restore proper airflow, ensure proper thermostat behavior, and verify that the outdoor condenser is free of debris so it can reject heat efficiently.
Safety Considerations and When to Call a Pro
Safety is the top priority when working on any HVAC system. Carrier units involve high voltage portions, refrigerant circuits, and moving parts that can cause injury if mishandled. Always start by turning off the power at both the indoor air handler and outdoor condenser, and verify that no voltage is present with a non-contact tester. If you encounter a trace of refrigerant odor, oily residue around connections, or you suspect a refrigerant leak, stop work and contact a licensed technician. Do not attempt to recover or recharge refrigerant yourself. For simple maintenance tasks like filter replacement or coil cleaning, ensure you have the right protective gear and follow manufacturer guidelines. If your system is under warranty or you have a complex issue (no cooling, intermittent operation, frequent tripping of breakers), the Home Repair Guide team recommends consulting a pro to avoid voiding warranties or causing further damage.
This block highlights the decision points for DIY vs professional service, with practical heuristics for homeowners. For routine tasks that don’t require refrigerant handling, a careful, supervised DIY approach can add value and extend life, provided you stay within your comfort and safety limits. Always weigh the potential cost of DIY vs professional repair, including the risk of incorrect fixes and the cost of accidental damage to electrical components. Remember: safety, warranty terms, and potential environmental impact of improper refrigerant handling should guide your decision.
Common Faults in Carrier AC Systems
Carrier systems share several recurring issues that can disrupt cooling. The most common faults include a failing run capacitor, a sticking or burnt contactor, dirty or blocked condenser coils, a dirty or clogged air filter, and thermostat or wiring problems. A capacitor failure may cause the outdoor unit to hum or not start; a damaged contactor can produce a buzzing sound or visible pitting on the contacts. Dirty coils reduce heat rejection, causing reduced cooling efficiency and higher energy use. Clogged air filters constrain airflow, leading to frost buildup on the evaporator coil. Thermostat miscalibration or loose wiring can prevent proper temperature control. Less common but serious concerns include refrigerant leaks and compressor failures. The Home Repair Guide analysis shows that regular maintenance correctly addresses most of these issues and helps identify problems before they escalate. If you detect a refrigerant leak, oil residue on connections, or frost on the evaporator coil, consult a licensed professional for leak repair and refrigerant handling.
This section helps you recognize typical fault signatures and sets expectations for when a simple DIY fix is possible and when a pro is required to avoid further damage.
Diagnostic Approach: Where to Start
A systematic diagnostic approach saves time and reduces misdiagnosis. Start with safety and basic checks: ensure power is off, verify thermostat settings, and inspect for obvious blockages or debris. Next, test electrical components such as capacitors and contactors using a multimeter or capacitor tester—look for values within manufacturer tolerance and replace if out of spec. Inspect the air filter and ducts for obstruction to ensure proper airflow. Visually inspect refrigerant lines for oil traces that indicate leaks, and listen for unusual compressor noises. Record observations and, if needed, perform non-invasive tests (e.g., airflow measurement) to narrow down the culprit. This approach minimizes risk and helps you communicate precise symptoms to a technician if professional service is needed. The aim is to restore consistent airflow, correct thermostat operation, and efficient heat exchange in both outdoor and indoor units.
When testing, keep a detailed log of measurements and any parts replaced. This documentation will be valuable for future maintenance and for technicians who may work on the system later. If you feel uncertain at any point, stop and seek professional guidance.
Maintenance to Prevent Future Failures
Prevention is more cost-effective than repeated repairs. Establish a routine that includes changing or cleaning filters every 1–3 months, depending on usage and indoor air quality. Schedule seasonal inspections to check refrigerant levels, electrical connections, thermostat calibration, and coil cleanliness. Clean outdoor coils yearly to maximize heat rejection, and trim nearby vegetation to ensure unobstructed airflow. Verify duct integrity and seal leaks with appropriate weather-stripping and duct tape if needed. Keep an eye on unusual noises, vibrations, or performance changes—these often signal developing issues before a full breakdown. The Home Repair Guide team emphasizes documenting maintenance activities and creating a simple maintenance calendar so you don’t overlook essential tasks. By staying proactive, you’ll extend the life of your Carrier system and maintain peak efficiency.
Tools & Materials
- Non-contact voltage tester(Essential for confirming power is off before touching wires)
- Multimeter with capacitance setting(Used to test voltage, resistance, and capacitor values)
- Screwdriver set (Phillips and flathead)(For panel access and component inspection)
- Nut driver set(Helpful for outdoor condenser components)
- Capacitor tester or LCR meter(Optional but recommended to verify capacitor health)
- Replacement run capacitor (same microfarad rating)(Only if you’ve confirmed capacitor failure)
- Insulated gloves and eye protection(Personal safety gear)
- Soft brush or coil cleaning brush(For gentle condenser/evaporator coil cleaning)
- Air filter (MERV-rated if possible)(Replace to restore airflow and efficiency)
- Duct tape/weather stripping(Seal minor duct leaks during maintenance)
Steps
Estimated time: 60-90 minutes
- 1
Power down and verify safety
Switch off the disconnect at the outdoor unit and the main breaker for the indoor unit. Use a non-contact tester to confirm no voltage is present before touching wires. This reduces the risk of electric shock during inspection.
Tip: Always assume a live circuit until you’ve tested it with a tester. - 2
Inspect outdoor condenser and indoor air handler
Look for debris, ice buildup, and unusual noises. Clean a dirty condenser coil with a soft brush and remove obstructions from around the outdoor unit so it can reject heat effectively. Ensure the fan spins freely when powered
Tip: Do not spray water directly into electrical components; use a brush and water with care. - 3
Check thermostat and control wiring
Verify the thermostat is set to cool and that wires are securely connected to the correct terminals. Confirm that the indoor control board and outdoor relay have intact wiring and no signs of scorching. A miswired thermostat can mimic many other problems.
Tip: Take a photo of the wiring before disconnecting any terminals to ensure accurate reconnection. - 4
Test capacitor and contactor
Using a multimeter or dedicated capacitor tester, check the capacitance against the manufacturer spec. Inspect the outdoor contactor for pitting or burnt contacts and replace if necessary. A weak capacitor or a stuck contactor is a common cause of failure to start.
Tip: Never discharge a charged capacitor with bare hands; use a resistor or proper discharger. - 5
Inspect refrigerant lines and leaks
Look for oily residues at connections and on the compressor, which can indicate a refrigerant leak. Do not attempt to repair or recharge refrigerant yourself; refrigerant handling requires licensed technicians and proper recovery equipment.
Tip: If you suspect a leak, document observations and contact a pro promptly. - 6
Replace/clean air filter and check ductwork
Remove and replace dirty air filters; clean accessible ducts if visible. Ensure there are no obvious holes in the ductwork and that sealant or tape is intact at joints. Proper filtration improves system efficiency and reduces coil frost risk.
Tip: A clean filter is the most cost-effective maintenance item; replace regularly. - 7
Test run and observe performance
Restore power and run a cooling cycle. Observe airflow, temperature drop, and unit cycling. Listen for unusual noises and watch for freezing or icing on the evaporator coil. If performance is inconsistent, stop and reassess or call a pro.
Tip: Keep notes on cycle times, temperatures, and any anomalies to aid diagnosis.
FAQ
Is it safe to attempt Carrier AC repair myself?
DIY repair can be safe for basic tasks, but avoid refrigerant handling and high-voltage work unless you’re trained. Follow manufacturer guidance and turn off power during any inspection. If you’re unsure, consult a professional.
Yes for simple checks, but avoid refrigerant work and high-voltage tasks unless you’re trained.
What are the first signs my Carrier AC needs service?
Weak cooling, unusual noises, warm air, ice on coils, or excessive energy use are early indicators. If these occur, perform basic checks like filter replacement and thermostat settings before calling a pro.
Weak cooling or odd noises are common signs you should check the basics and consider professional help.
How much does Carrier AC repair typically cost?
Costs vary by problem and region. Expect differences between DIY parts and professional labor. Get a written estimate after a technician assesses the system.
Costs vary; get a detailed estimate after an on-site assessment.
Can I fix a refrigerant leak on my own?
Refrigerant leaks require licensed technicians and proper recovery equipment. Attempting to seal or recharge refrigerant without credentials is dangerous and illegal in many areas.
No, refrigerant leaks must be handled by licensed pros.
How often should I maintain my Carrier AC?
Inspect and replace filters monthly or quarterly, depending on usage. Schedule a professional annual check for refrigerant levels, coils, and electrical connections.
Check filters regularly and book an annual professional inspection.
When should I replace rather than repair Carrier AC?
If repairs exceed a significant portion of the system’s replacement value or the unit is over 10-15 years old, replacement can be more cost-effective and improve efficiency.
If repairs keep piling up or the unit is old, consider replacement.
Watch Video
Key Takeaways
- Start with safety and a clear diagnostic plan.
- Common faults are capacitor, contactor, coils, and filters.
- DIY fixes are suitable for non-refrigerant tasks; refrigerant work requires a pro.
- Regular maintenance prevents most Carrier AC breakdowns.