Air Handler Repair: A Comprehensive Step-by-Step Guide
Learn how to diagnose, safely repair, and maintain your air handler to improve airflow and efficiency. This Home Repair Guide tutorial covers safety, essential tools, and common fixes for air handler repair tasks in 2026.

You will learn how to safely diagnose and perform common air handler repair tasks, from powering down the unit to testing the capacitor, blower, and refrigerant-related components, and reinstalling a clean filter. This guide covers essential tools, safety steps, and when to call a pro. Expect a practical, kitchen-table friendly process you can follow today.
What is an air handler and typical repair needs
An air handler is the indoor component of your home's heating and cooling system, responsible for circulating conditioned air through the ductwork. When it runs into trouble, airflow can drop, temperatures swing, or the unit may make unusual noises. According to Home Repair Guide, understanding the layout of the air handler helps you diagnose potential failures quickly. Common repair needs include dirty filters, clogged coils, a worn blower belt (if you have belt-driven units), loose electrical connections, or a faulty capacitor. Addressing these issues early can prevent minor faults from becoming costly repairs. When planning an air handler repair, start by identifying which subsystem is affected: airflow, cooling, or heating. A clean, well-maintained air handler operates more efficiently and lasts longer, reducing energy usage and uneven climate control in a living space. As you work, label components and document changes to support future maintenance, especially if you rent out the property.
Common signs your air handler needs attention
Air handler repair is often prompted by observable symptoms. Look for reduced airflow, uneven room temperatures, or drafts; rattling, buzzing, or grinding noises; moisture or ice buildup on coils; a sudden spike in energy bills; or frequent cycling on and off. A dirty filter or restricted ductwork can cause all of these symptoms by stressing the blower motor and reducing efficiency. If odors are present, inspect for mold or damp conditions around the blower housing and condensate pan. Addressing signs early can prevent more expensive fixes and keep the system running at peak efficiency. Remember, persistent issues may indicate deeper problems in the blower, motor, capacitor, or control wiring.
Safety first: powering down and protecting yourself
Before any inspection or repair, shut off power to the air handler and verify no voltage is present. Locate the service disconnect or the circuit breaker feeding the unit, and use a multimeter to double-check that the terminals are inactive. Wear safety goggles, gloves, and closed-toe shoes; keep hair and loose clothing away from moving parts. If your unit is in an attic or crawl space, ensure stable footing and proper lighting. Never work with refrigerant-related components or high-voltage parts without proper training, and always follow local electrical codes. In all cases, disconnecting power reduces shock risk and is a fundamental step in air handler repair.
Diagnosing common problems impacting air handler repair
Start with the simplest causes and progress to the more complex. A clogged air filter restricts airflow and strains the blower; replace it and observe improvements. Check coils for frost or dirt buildup and clean or service as appropriate. Inspect the blower belt for wear or looseness if you have a belt-driven model, and replace it if stretched or cracked. Test the blower motor and capacitor with a multimeter to confirm they’re within tolerance. Examine electrical connections for looseness, corrosion, or scorch marks, reseating or replacing components as needed. Finally, verify thermostat wiring is secure and communication with the control board is intact. Systematic testing helps isolate the fault and reduces unnecessary part replacements.
Preventive maintenance to extend life
Establish a regular maintenance routine to minimize air handler repair needs. Schedule filter changes every 1–3 months depending on usage and filter type. Clean the blower housing and coils at least twice a year, and inspect ductwork for leaks or obstructions. Keep the condensate pan clear and ensure the drain line is free of blockages to prevent water damage and mold growth. A well-maintained air handler repair plan not only improves comfort but also extends the life of the overall HVAC system. Document maintenance tasks and outcomes to create a reference for future work, and consider scheduling professional inspections annually.
Tools, parts, and safety gear overview
Having the right tools on hand makes air handler repair more predictable and safer. Stock a multimeter, a screwdriver set (Phillips and flat-head), nut drivers, pliers, a flashlight, and a vacuum or coil cleaning brush. Replaceable filters, a coil cleaner, and optional belt kits (if you have a belt-driven system) simplify common tasks. Personal protective equipment such as safety goggles and gloves reduces risk during inspections and minor disassembly. Keep extra line sets and electrical tape for temporary fixes, and tote everything in a labeled bin for quick access during future air handler repairs. This preparation helps you tackle DIY tasks more confidently and safely.
Authority sources and further reading
For foundational guidance on safe HVAC practice and building science behind air handlers, consult respected sources such as federal and academic organizations. These references provide general principles and safety guidelines you can apply to air handler repair tasks:
- U.S. Department of Energy. HVAC System Basics and Efficiency Tips: energy.gov
- U.S. Environmental Protection Agency. Indoor Air Quality and Filtration: epa.gov/iaq
- Occupational Safety and Health Administration. Electrical Safety in Maintenance Work: osha.gov
These sources offer additional context on energy efficiency, indoor air quality, and safety practices that complement hands-on repair work by homeowners and rental property managers.
Tools & Materials
- Multimeter(Verify voltage, resistance, and capacitors.)
- Screwdriver set (Phillips and flat-head)(For panel access and component connections.)
- Nut driver set(For fasteners around ductwork or blower housing.)
- Pliers (needle-nose)(Grip small connectors and wires.)
- Replacement air filters(Check size on label; replace if dirty.)
- Coil cleaner/brush(Use if coils are visibly dirty; avoid refrigerant contact.)
- Safety goggles and work gloves(Protect eyes and hands during disassembly.)
- Vacuum or soft brush(Clean dust from blower housing and coils.)
- Electrical tape and wire nuts(Secure loose wiring during reassembly.)
Steps
Estimated time: 30-60 minutes
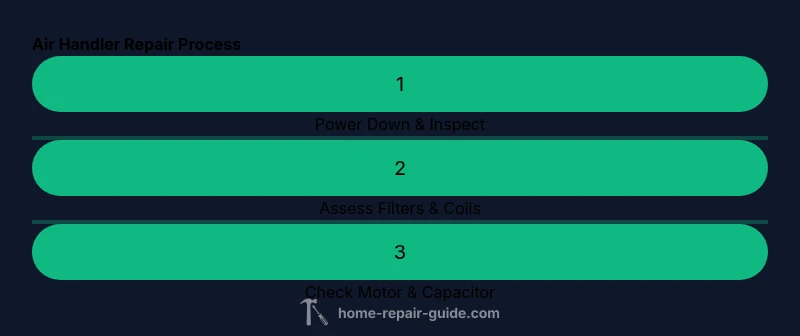
- 1
Power down and locate the air handler
Turn off the circuit feeding the air handler at the main panel and the device’s disconnect. Use a multimeter to confirm there is no voltage present at the panel or terminals. This is the foundation of a safe air handler repair.
Tip: Always double-check power at both the breaker and unit to avoid shock. - 2
Inspect and replace the air filter
Open the access panel and remove the existing filter. If dirty or blocked, replace with a filter of the correct size and type. A clean filter improves airflow and reduces stress on the blower.
Tip: Take a quick photo of how the filter sits before removal to ensure proper orientation when installing the new one. - 3
Check the blower belt and motor (if belt-driven)
Inspect the blower belt for cracks, wear, or looseness. Replace if necessary and ensure proper tension according to your model’s spec. For direct-drive units, listen for bearing noise or rough operation.
Tip: Use the belt chart from the manufacturer to select the right replacement size. - 4
Test electrical components
With power off, inspect the blower motor connections and test the capacitor with a multimeter to verify capacitance within tolerance. Check the control board and thermostat wiring for loose terminals or corrosion.
Tip: Discharge capacitors carefully before handling and replace if out of spec. - 5
Clean and reseat connections
Wipe dust from the blower housing, coil surfaces, and electrical terminals. Reseat all wire connections securely and reassemble the access panel. Ensure there are no loose screws or missing fasteners.
Tip: Label wires before disconnecting to simplify reassembly. - 6
Test system operation and safety checks
Restore power and run a full system cycle to verify airflow, temperature consistency, and that there are no unusual noises or leaks. Check condensate drainage and listen for any abnormal sounds during operation.
Tip: Document results and watch for any recurring issues over the next few days.
FAQ
Can I repair an air handler myself?
Simple tasks like filter changes and cleaning can be DIY, but electrical work or refrigerant handling should be done by a professional.
You can handle basics, but avoid electrical or refrigerant work unless you’re trained.
What safety gear do I need?
Wear safety goggles and gloves, and ensure the area is well lit and dry. Turn off power before touching electrical components.
Goggles, gloves, and power off are essential.
How often should I service an air handler?
Check filters monthly and service coils and electrical connections semi-annually or as recommended by the manufacturer.
Check filters monthly; service coils and connections twice a year.
What if the air handler makes noises?
Rattling or grinding can indicate loose parts or worn bearings. Stop and inspect; call a pro if unsure.
Unusual noises usually mean something is loose or worn; stop and inspect.
Can I replace an air handler capacitor myself?
Capacitor work is risky and requires discharge and testing. If unsure, hire a pro.
Capacitors can be dangerous; don’t try unless you’re trained.
Are there energy efficiency benefits to repairing an air handler?
Yes. A properly repaired air handler improves airflow, reduces cycling, and lowers energy use.
Fixing issues helps the system run more efficiently.
Watch Video
Key Takeaways
- Power down before touching air handler components.
- Replace dirty filters to restore airflow and efficiency.
- Test electrical components with a meter to confirm operation.
- Document fixes for future DIY maintenance.
- Know your limits and call a licensed HVAC tech when needed.