Repair Car Engine: A Practical Step-by-Step Guide
A practical, classroom-friendly guide to diagnosing and repairing common car engine problems, with safety tips, essential tools, a step-by-step workflow, and budgeting advice for durable, affordable fixes.

By following this guide, you will understand how to diagnose and perform safe, basic repairs on a car engine, focusing on common faults and practical steps you can take with basic tools. It covers safety, diagnosis, essential parts, and when to seek professional help. This plan emphasizes conservative, buildable fixes rather than full engine overhauls.
Understanding why a car engine needs repair
Repair car engine issues often emerge from a combination of wear, poor maintenance, and environmental stress. When components like spark plugs, timing belts, gaskets, or fuel injectors fail, a car can exhibit misfires, rough idling, rough acceleration, overheating, or reduced fuel efficiency. This section explains how engines convert fuel into motion and why seemingly small faults can cascade into bigger problems if ignored. You will learn to recognize early warning signs and to differentiate between fixes you can perform safely in a home garage and problems that require specialized equipment or a professional technician. The emphasis here is on practical, scalable steps that avoid costly mistakes while protecting your engine’s longevity. Remember, regular maintenance is a key part of preventing major failures down the line and helps you assess when a repair is truly necessary.
Safety first: precautions before you begin
Safety is non-negotiable when working on a car engine. Start by parking on a flat surface, turning off the engine, and removing the keys. Allow the engine to cool before touching hot components, and wear protective gear like safety glasses and gloves. Keep a fire extinguisher nearby and ensure you have adequate lighting. Work in a well-ventilated area to avoid fumes, and never work under a raised vehicle without solid jack stands and wheel chocks. Label hoses and electrical connectors before disconnecting anything, and store fasteners in labeled containers. If you’re ever unsure about a procedure, pause and consult a repair guide or seek professional assistance.
Diagnostic mindset: how to approach engine problems
A systematic diagnostic approach saves time and reduces the risk of causing additional damage. Start with the symptoms: when does the issue occur (cold start, idle, under load), what sounds accompany the problem, and are there warning lights. Use an OBD-II scanner to pull fault codes and research their definitions. Perform basic checks: inspect ignition components, test spark at the spark plugs, verify fuel delivery, and assess compression if needed. Document each observation, as this helps you distinguish between root causes and secondary symptoms. The goal is to form a concise hypothesis before purchasing parts or proceeding with disassembly.
Common repair scenarios you’ll encounter
Engine repair ranges from routine maintenance to component replacement. Common scenarios include replacing worn spark plugs and ignition coils, addressing oil or coolant leaks, replacing a timing belt/chain if applicable, and fixing gasket failures. Fuel delivery issues may involve cleaning or replacing fuel injectors or the fuel filter. In many cases, simple fixes like cleaning throttle bodies or correcting dirty air filters yield immediate improvements. More involved repairs, such as timing adjustments or gasket replacements, require careful planning, the right torque specs, and sometimes specialized tools. Always verify that your chosen fix aligns with the symptoms you observed.
Tools and workspace setup
A clean, organized workspace reduces mistakes and speeds up repairs. Set up a sturdy workbench, use tray organizers for fasteners, and keep a parts tray within arm’s reach. Establish a routine: disconnect the battery before working near electrical systems, work with the engine cool, and keep solvents away from heat sources. A well-lit area with good ventilation helps, as does a shop mat to reduce fatigue. Label wires and hoses, maintain a parts inventory, and use a notebook or app to track which components were removed, replaced, or inspected. This preparation reduces surprises and helps with future maintenance.
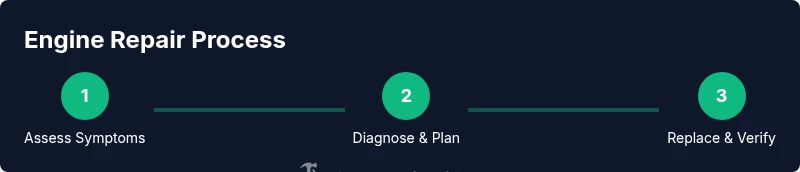
Step-by-step overview you can trust
The following section provides a practical, high-level road map of the repair journey. It is designed to complement the detailed, step-by-step instructions and helps you stay oriented as you progress through evaluation, disassembly if needed, part replacement, reassembly, and testing. Always cross-reference with your vehicle’s service manual for torque specs, sequence, and safety cautions. With careful planning and methodical execution, you can safely complete many common repairs without professional intervention, while leaving room to escalate to a technician if complications arise.
Performing a spark plug replacement
Spark plug replacement is one of the most common and straightforward engine maintenance tasks. Begin by locating the spark plugs and detaching the ignition coils or wires one at a time to avoid cross-connecting hoses. Clean the area around each plug, remove the old plug using the correct socket, and check the gap on the new plug. Install the new plugs with the correct torque setting, reconnect the coils or wires, and tidy the surrounding area to prevent debris ingress. This task can restore power and efficiency and often resolves misfire symptoms when plugs are worn or fouled.
Addressing coolant and oil leaks
Leaks are a frequent source of engine problems and early-warning signs for more serious failures. Start by locating the source: look for wet spots, dried residue, and temperature changes on the gauge. Replace gaskets or seals that show signs of wear, such as the valve cover gasket, oil pan seal, or radiator hoses. After replacement, clean the area, refill fluids to the correct levels, and monitor for further leaks. Correctly addressing leaks not only prevents potential engine damage but also improves cooling efficiency and overall reliability.
Verifying repairs with tests and observations
Verification is the final, crucial phase of any engine repair. Start the engine and monitor for abnormal noises, smoke, or unusual smells. Use a scan tool to confirm codes are cleared and that live data (RPM, fuel trims, misfire counters) is within expected ranges. Check for leaks once the engine has reached operating temperature and ran through a few cycles. Take the vehicle on a short test drive to observe idle behavior, acceleration, and braking stability. If any issue persists, revisit the diagnostic process and consider re-evaluating parts that were replaced.
Maintenance habits to prevent future failures
Proactive maintenance is your best defense against major engine problems. Adhere to a regular schedule for oil changes, filter replacements, and coolant maintenance. Use quality parts and fluids matching the manufacturer’s specifications. Keep an eye on warning lights and temperature gauges, and address small issues promptly to avoid cascading failures. A clean air intake, properly functioning sensors, and a balanced fuel system all contribute to longer engine life and better performance.
When to seek professional help
Some engine problems require specialized equipment, torque procedures, or precise timing procedures that are beyond typical DIY capabilities. If you encounter low compression readings, persistent coolant in the oil, signs of timing chain damage, or critical engine noises during operation, stop and seek professional help. An ASE-certified technician can perform advanced diagnostics, teardown, and reassembly with proper safety protocols. Remember that attempting advanced repairs without experience can lead to safety hazards and costly mistakes.
Budgeting and cost considerations for engine repair
Engine repair costs can vary widely depending on the scope of work, parts quality, and vehicle make. Plan for parts, fluids, and potential shop time if you decide to seek professional help. Rather than rushing into an overhaul, prioritize fixes that address the immediate symptoms and protect engine integrity. Keep maintenance records to support future diagnoses and potential warranty considerations. A conservative budgeting approach helps you evaluate the trade-offs between DIY fixes and professional services.
Tools & Materials
- Socket set (metric and SAE)(Includes 8mm–19mm sockets; both deep and shallow)
- Torque wrench(Essential for fastener torque accuracy)
- Ratchet, extensions, and hex keys(Helps reach recessed bolts)
- Combination wrenches(For tight spaces where a socket won’t fit)
- Screwdrivers (Phillips and flat-head)(Various sizes for hoses, clamps, and covers)
- Needle-nose pliers and locking pliers(Grip components and remove small clips)
- Multimeter or OBD-II scanner(Test electrical sensors and pull fault codes)
- Gasket scraper and solvent(Clean surfaces before resealing)
- Shop rags and brake cleaner(Keep the workspace clean and free of debris)
- Funnel and coolant(Refill with the correct coolant type)
- Engine oil and oil filter(Use manufacturer-recommended grade)
- Safety gear (gloves, safety glasses)(Protect hands and eyes from chemicals)
- Jack stands and wheel chocks(Stabilize the vehicle when lifting)
Steps
Estimated time: 4-6 hours
- 1
Prepare the workspace
Clear the area, gather tools, and set up a clean surface with ample lighting. Verify you have all replacement parts and fluids before you begin to prevent mid-task interruptions. This preparation reduces the risk of misplacing components.
Tip: Label all fasteners and place them in a labeled tray to avoid misassembly. - 2
Disconnect the battery and relieve fuel pressure
For safety, disconnect the negative battery cable. If you’ll be working near the fuel system, relieve pressure according to your vehicle’s manual to prevent fuel spray. This reduces the risk of sparks and accidental fires during disassembly.
Tip: Use a torque wrench to re-connect the battery terminals to avoid under-tightening. - 3
Diagnose symptoms with basic tests
Review the symptom history, pull fault codes with an OBD-II scanner, and perform initial checks on ignition, fuel, and cooling systems. Document observations to guide your repair path and avoid chasing non-root causes.
Tip: Cross-check multiple symptoms before replacing parts to prevent unnecessary costs. - 4
Inspect ignition components
Inspect spark plugs, wires, and coils for wear or fouling. Replace worn plugs and faulty coils; clean or reseat connections. Ensuring a strong ignition is essential for reliable starting and smooth running.
Tip: Use the correct plug type and torque setting to prevent fouling or thread damage. - 5
Inspect fuel delivery components
Check the fuel filter, lines, and injectors for clogs or leaks. Clean or replace components as necessary. A clean fuel system improves combustion efficiency and eliminates rough idle issues.
Tip: After service, prime the fuel system if your vehicle requires it to avoid vapor lock. - 6
Check compression and timing
If you suspect a mechanical issue, perform a compression test and verify timing belt/chain alignment. Use the manufacturer’s specification as the reference. Improper timing can cause severe engine damage.
Tip: If timing marks don’t align after belt/chain service, re-check tension and seating direction. - 7
Replace worn parts
Install new spark plugs, seals, or gaskets as identified. Ensure all fasteners are torqued to spec and that mating surfaces are clean before resealing. Take your time to avoid leaks.
Tip: Use anti-seize compound on bolts if recommended by the manual to ease future removal. - 8
Refill fluids and perform a test run
Refill with the correct grade of oil and coolant. Start the engine and run through a warm-up cycle, checking for leaks and listening for abnormal noises. Verify that all dashboards indicators behave normally during the test drive.
Tip: Monitor exhaust color and smell during first miles; unusual signs may indicate remaining issues.
FAQ
What are common signs that indicate an engine needs repair?
Common indicators include misfires, rough idle, power loss, overheating, or warning lights. Start with a systematic diagnostic approach to identify the root cause.
If you notice misfires or overheating, diagnose step by step to find the root cause.
Is it safe for a beginner to attempt engine repairs?
Beginners can perform simple maintenance tasks with proper guidance, but avoid high-risk procedures such as timing belt work or compression testing without experience or supervision.
Some tasks are beginner-friendly, but avoid high-risk repairs unless you’re trained.
Can I fix an engine myself without risk?
DIY work lowers cost but carries risk of injury and mechanical damage if misapplied. Follow manuals, use correct parts, and stop if unsure.
DIY fixes help save money, but only if you’re careful and know your limits.
How long does a typical engine repair take?
Time varies by problem complexity. Simple fixes may take a few hours; major overhauls can require a full day or more with parts ordering.
Most common repairs fit within a few hours to a day, depending on parts.
Should I use aftermarket parts or OEM for repairs?
OEM parts exactly match the original specifications, while high-quality aftermarket parts can be cost-effective. Verify part compatibility with your vehicle.
OEM plans match the original design; aftermarket parts can be cheaper but verify compatibility.
What are typical costs for engine repair?
Costs vary with the scope, parts, and labor. For budget planning, estimate parts and fluids first, then consider labor if you’ll use a shop.
Costs differ widely; plan for parts and fluids first and decide if you’ll hire a pro.
Watch Video
Key Takeaways
- Identify root cause before part replacement
- Follow torque specs for all fasteners
- Test after each repair step
- Prioritize safety and clean workspace
- Know when to escalate to a professional