Diesel Engine Repair: A Homeowners Step-by-Step Guide
A practical, safe guide to repairing a diesel engine at home. Learn diagnostics, essential tools, common fixes, and when to call a professional for reliable, durable results.

Goal: safely diagnose and perform basic maintenance to repair engine diesel issues at home. This guide walks you through identifying symptoms, gathering tools, and following a structured step-by-step process. You’ll learn when to stop and seek professional help to avoid costly damage. Expect practical, non-technical explanations, safety reminders, and a clear boundary: if the problem involves high-pressure systems, hot surfaces, or homemade fuel mixing, pause and call a pro.
Why diesel engines require careful maintenance
Diesel engines operate differently from gasoline engines, with higher compression ratios and ignition managed by compression rather than spark. This makes reliable fuel delivery, cooling, and lubrication even more critical. The phrase repair engine diesel often conjures fear, but with a solid plan, routine maintenance and careful diagnoses prevent most failures. According to Home Repair Guide, regular inspection and timely service significantly reduce the risk of costly breakdowns. The Home Repair Guide team found that homeowners who schedule routine checks—oil, filters, belts, and cooling system—enjoy longer engine life and fewer on-road emergencies. In practice, you’ll focus on cleanliness, secure mounting, and consistent monitoring of key indicators such as oil pressure and exhaust smoke. By understanding the fundamentals, you’ll be better prepared to recognize symptoms early and decide whether a DIY fix is feasible or a professional is required. This section lays the groundwork for safe, effective diesel engine care.
Key concepts: diesel engine fundamentals
Diesel engines rely on compression ignition rather than spark, so the air-fuel mix must be carefully controlled. Fuel injection timing, injector condition, and air intake cleanliness all determine combustion quality. A clean fuel system reduces cold-start struggles and exhaust smoke. You’ll hear terms like ECU, glow plugs, turbocharger, and particulates; these are either sensors, actuators, or subsystems that influence performance. For DIY repairs, focus on non-destructive checks first: inspect visible hoses for cracks, listen for unusual knocks, and verify oil and coolant levels. Always consult the service manual for torque specs and replacement intervals. Understanding how these parts interact helps you diagnose root causes rather than applying a guess-at-random fix. Remember: when a diesel engine is not behaving as expected, symptom-based troubleshooting should guide your next steps rather than random part swaps. This approach saves time and reduces the risk of introducing new problems.
Safety first: PPE and risk assessment
Diesel work carries risks, including burns from hot components, exposure to fuel and fumes, and high-pressure fuel lines. Before you touch anything, wear PPE: sturdy gloves, eye protection, and a flame-resistant apron if needed. Ensure the area is well-ventilated and free of ignition sources. Secure the vehicle or engine with chocks and supports, and disconnect electrical power where appropriate. When dealing with filters, pumps, or fuel lines, depressurize systems according to the manual. Never work alone on a diesel engine repair; have a partner to assist in an emergency. Keep a fire extinguisher rated for fuel fires within reach and have a spill kit handy. By prioritizing safety, you reduce the chance of injury and make troubleshooting more reliable. If you encounter high-pressure leaks, stop immediately and seek professional help.
Tools and materials you will need
Having the right tools prevents unnecessary improvisation and reduces the risk of damage. Essential items include a basic socket set with metric sizes, screwdrivers, torque wrench, fuel line clamps, a compression tester, a fuel pressure gauge, and a digital multimeter. You’ll also need clean rags, a suitable container for drained fluids, protective eyewear, and gloves. Optional items that improve efficiency include a boroscope for internal inspection, a fluid catch basin with sealable lid, and a quality flashlight with adjustable beam. Label everything as you disassemble to simplify reassembly. If you’re working on a vehicle, verify the correct service manual for model-specific procedures. Remember to follow manufacturer torque specs and use OEM or equivalent parts to ensure reliability. This section helps you prepare for the hands-on work ahead.
Common symptoms and quick diagnostics
The diesel engine may show symptoms like rough idle, misfiring, excessive white or black smoke, hesitation under load, or sudden loss of power. Start with a basic diagnostic: check for trouble codes with an OBD scanner if available, inspect indicator lights, and verify oil pressure. Look for signs of fuel contamination, clogged air filters, or timing issues. In many cases, poor performance is tied to simple maintenance tasks such as replacing filters or hoses. Always work with cold or safely cooled components and avoid forcing connections that could damage seals. Document observations with photos and notes to track patterns. The Home Repair Guide analysis shows that systematic observation improves diagnostic accuracy and reduces wasted effort. By correlating symptoms with service intervals, you can prioritize fixes that yield reliable results and minimize downtime.
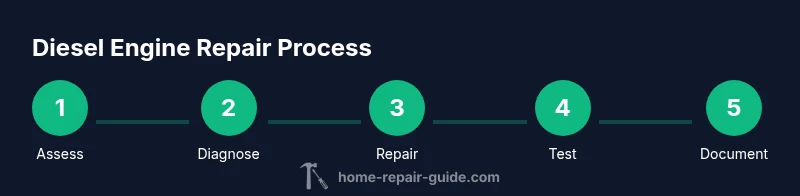
Step-by-step diagnostic workflow
Below is a practical, safety-conscious workflow you can follow to diagnose engine diesel issues methodically. Use it as a scaffold for your hands-on work, not a rushed, one-size-fits-all procedure. Each step is designed to be performed in a controlled, safe environment. Begin with a non-destructive assessment and escalate only as needed. If at any point you feel uncertain, stop and consult a professional rather than forcing a repair.
Basic repairs you can perform at home
With the right approach, several non-urgent repairs are within a capable DIYer’s remit. Start with non-invasive tasks such as refreshing fuel and air filters, tightening loose connections, cleaning sensor housings, and resealing minor leaks around hoses. Avoid disassembly of high-pressure fuel lines or major fuel system components unless you have model-specific guidance and the proper torque specs. When replacing parts, choose OEM or equivalent components and verify the fit before reassembly. After any repair, re-check for leaks and verify proper fluid levels. This section emphasizes practical, low-risk tasks that improve reliability while keeping safety front and center, aligning with the Home Repair Guide’s practical ethos.
When to stop and call a pro
Some diesel engine failures involve high-stakes systems such as fuel injection pumps, rail systems, or turbocharged subsystems. If you notice persistent loss of power under load, fuel leaks, strong fuel odors, severe smoke, or unexpected temperature rises, pause and seek professional aid. Diesel engines are sensitive to timing and fuel quality; incorrect adjustments can cause costly damage. When in doubt, postpone advanced disassembly and contact an ASE-certified technician or the dealership service department. The goal is durable, safe fixes rather than quick-but-risky shortcuts.
Maintenance plan to prevent future failures
Prevention is more affordable than repair, especially for diesel engines. Implement a maintenance cycle that includes regular oil and filter changes, fuel system cleaning, air filter replacement, coolant checks, belt tension checks, and electrical system inspections. Establish service intervals based on manufacturer recommendations and operating conditions (urban driving vs. heavy duty). Track parameters such as oil pressure, coolant temperature, and exhaust characteristics to spot trends early. Proper maintenance reduces wear, keeps components within spec, and extends engine life. The Home Repair Guide analysis, 2026, reinforces that a well-planned maintenance routine pays dividends in reliability and value over time. Consider recording each service in a log for quick reference during future repairs.
Authority sources
- Authority sources provide external reference points for diesel engine care and safety. For detailed guidelines on diesel fuel systems, consult EPA and OSHA resources, and engineering-focused research from reputable institutions. These sources help you cross-check recommended practices and stay aligned with industry standards. Always compare your findings with model-specific service manuals and official safety guidelines.
Authority sources (continued)
- https://www.epa.gov/
- https://www.osha.gov/
- https://www.nrel.gov/
- For model-specific procedures, consult your vehicle’s service manual and OEM documentation.
Tools & Materials
- Socket set (metric sizes)(Include 6mm-24mm sockets for common diesel components)
- Torque wrench(Capable of 5-80 Nm range; check actual spec in manual)
- Fuel line clamps(Flat and worm-gear clamps; have spare sizes)
- Compression tester(Use compatible adapter for your engine family)
- Fuel pressure gauge(Digital preferred; ensure gauge ranges match system)
- Digital multimeter(For electrical checks and sensor tests)
- Oils, lubricants, and filters(Use OEM or equivalent; compatible with diesel specs)
- Drain pan and clean rags(Keep area tidy to spot leaks quickly)
- Safety gear (gloves, eye protection)(Fortified PPE; nitrile gloves, safety glasses)
- Bleed and fill tools for fuel system(Specialty tools may be optional depending on model)
- Boroscope (optional)(Internal inspection for hard-to-reach areas)
Steps
Estimated time: 3-6 hours
- 1
Inspect the engine area and safety setup
Open the hood and visually inspect for leaks, cracked hoses, and obvious loose connections. Check that the engine is cool, the area is ventilated, and that you have adequate lighting. Secure the vehicle or engine with chocks and supports if needed. Confirm safety gear is in place before touching any components.
Tip: Take a photo of the original arrangement before disassembly to aid reassembly. - 2
Check oil level and quality
With the engine off, pull the dipstick and wipe clean. Reinsert fully, then pull again to read the level. Note color and smell of the oil; milky or burnt smells indicate issues. If oil is low, top up with the correct grade and check for leaks.
Tip: If the oil looks contaminated, perform a full oil change following the manual. - 3
Perform a compression test
Connect the compression tester to a spark plug or compression port per the manual. Crank the engine several revolutions and record the reading. Compare results to the manufacturer’s spec for your model. Look for uneven cylinders which signal gasket or ring issues.
Tip: Warm up the engine slightly to get stable readings, but avoid hot surfaces during testing. - 4
Inspect and test the fuel system
Check fuel lines for cracks, tighten fittings, and inspect the fuel filter. If you can access the fuel rail, test fuel pressure with a gauge. Look for air leaks, which are common culprits in hard starts or misfires. Replace any compromised lines or seals.
Tip: Bleed the fuel system if air is suspected, following the model’s bleed procedure. - 5
Check glow plugs and electricals
Inspect glow plugs for resistance or debounce problems. Test related wiring, fuses, and relays, looking for corrosion or loose connectors. Replace faulty glow plugs only with the correct part type for your engine.
Tip: Disconnect the battery before electrical work to avoid shorts. - 6
Replace filters if needed
Replace air and fuel filters if they appear dirty or clogged. Ensure proper seating and seal integrity during installation. Start with the simplest filter first to gauge impact on performance.
Tip: Always dispose of used filters per local regulations. - 7
Tighten, reseal, and reassemble
Re-check tightened connections and worn seals, including intake and fuel lines. Reassemble components in reverse order of disassembly, ensuring all fasteners reach specified torque. Clean any spilled fluids immediately.
Tip: Verify torque specs against the service manual to avoid over-tightening. - 8
Conduct a controlled test run
Start the engine carefully and observe for leaks, abnormal noises, or smoke. Check oil pressure and coolant temperatures. If the engine runs roughly, recheck the related subsystems before attempting further repairs.
Tip: Run the engine at idle first, then gradually apply load to test performance. - 9
Document results and plan follow-up
Record all observations, parts replaced, and test results. Schedule a follow-up check after a short interval to confirm stability. Keep a maintenance log for future reference.
Tip: A well-kept log helps you predict and prevent future failures.
FAQ
Can I repair a diesel engine myself, or should I always hire a professional?
Many routine checks and non-invasive maintenance tasks can be performed safely by a careful DIYer. However, diesel engines involve high pressures and complex fuel systems; if you encounter high-pressure fuel lines, timing concerns, or unfamiliar symptoms, it's best to consult a professional.
Many maintenance tasks can be done safely at home, but for high-pressure fuel systems or timing issues, contact a professional.
What are the most common diesel engine issues for homeowners?
Common issues include fuel system leaks, clogged filters, glow plug failures, and wear in timing components. Regular maintenance reduces risk, and symptoms like rough idling or smoke point to areas to inspect first.
Common issues include fuel leaks, clogged filters, and worn glow plugs. Regular maintenance helps prevent these problems.
What safety precautions should I take before starting repairs?
Work in a well-ventilated area, wear PPE, secure the engine, and disconnect power as needed. Avoid working with hot components and high-pressure lines without proper training.
Ensure good ventilation, wear PPE, and disconnect power; avoid high-pressure fuel work unless trained.
Do I need special tools for home diesel engine repair?
Most basic maintenance tasks require standard automotive tools plus a compression tester and a fuel pressure gauge. Model-specific tasks may need specialty adapters—check your manual.
A standard toolset plus a couple of diagnostic gauges usually suffices for many tasks.
How long does a typical diesel engine repair take for a DIYer?
Time varies with the issue and access to components. A simple filter replacement can take under an hour, while diagnosing and addressing fuel system problems may take several hours or more.
It varies, from under an hour for simple filters to several hours for complex diagnostics.
What maintenance schedule helps prevent failures?
Follow the manufacturer’s service intervals for oil changes, filter replacements, and cooling system checks. Log each service and monitor key indicators like oil pressure and temperatures.
Follow the factory service intervals and keep a maintenance log.
Watch Video
Key Takeaways
- Identify symptoms before taking action
- Use model-specific manuals for torque and specs
- Safety gear and ventilation are non-negotiable
- Address simple maintenance tasks first
- Know when to pause and call a pro