Repair Diesel: Essential Home DIY Guide for Reliability
Learn practical, safe diesel repair techniques with step-by-step guidance from Home Repair Guide. This article covers common problems, essential tools, safety practices, and maintenance tips to keep diesel-powered equipment reliable.

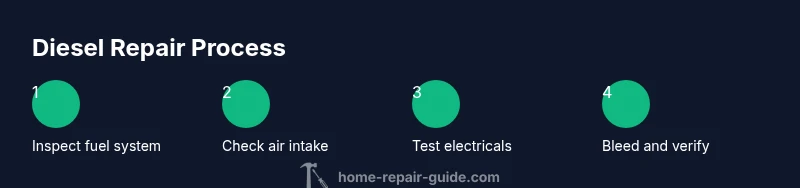
Goal: Diagnose and perform safe, durable diesel repairs at home with basic equipment. You’ll learn how to prepare for maintenance, identify common symptoms, inspect the fuel, air, and electrical systems, and complete fixes or escalate to a professional when needed. This guide explains tools, safety, and stepwise actions to keep diesel-powered equipment reliable.
Understanding Diesel Systems: What Can Go Wrong
Diesel engines are built for high torque, efficiency, and longevity, but they still depend on clean fuel, proper air flow, and reliable electronics to run smoothly. Common failure modes include degraded fuel quality, clogged filters, air intake restrictions, glow plug or controller faults, and issues in high-pressure fuel systems. Over time, vibration, heat, and poor maintenance can accelerate wear on injectors, seals, and hoses. The Home Repair Guide team emphasizes that many visible symptoms—hard starting, rough idle, smoking, or loss of power—often point to problems in one of these core subsystems. By understanding how these subsystems interact, you can prioritize checks in a safe, systematic way. According to Home Repair Guide, the most durable fixes come from a blend of preventative maintenance and careful diagnosis rather than guesswork. Start with the simplest potential cause and avoid replacing parts without evidence. A well-maintained diesel setup also benefits from regular oil changes, coolant checks, and fuel system cleaning with manufacturer-approved products. A solid diagnostic approach reduces risk, saves time, and minimizes unnecessary repairs.
Key concern areas include fuel quality and contamination, air intake cleanliness, fuel delivery pressures, electrical grounding, and glow plug operation. Each subsystem feeds information to the engine control module (ECM) or mechanical control, guiding timing and fuel delivery. If you suspect a fuel-air mismatch or electrical fault, document symptoms clearly, note environmental conditions, and test one variable at a time to prevent compounding issues. This methodical approach is especially important when you’re working with high-pressure fuel lines or hot components. Remember to work in a ventilated space and keep a fire extinguisher nearby in case of fuel exposure or solvent use. The guidance provided here aims to help homeowners and DIY enthusiasts build confidence while preserving safety and engine integrity.
From a practical standpoint, begin with the simplest checks: verify fuel level, inspect visible hoses for cracks or leaks, and ensure the air filter is clean. If symptoms persist after these basic steps, move to more targeted checks (glow plugs, sensors, or fuel delivery components) with appropriate tools and references. The Home Repair Guide approach blends everyday tools with engine-specific knowledge, offering a realistic path to durable repairs rather than one-off quick fixes.
Diagnosing Common Diesel Problems
Diesel engines exhibit a range of predictable behaviors when components fail or wear. A systematic approach begins with symptom mapping: is the engine hard to start, does it misfire under load, or does it emit unusual smoke or odors? Start by checking the simplest sources: fuel quality (water or particulates in fuel), clogged filters, air intake obstructions, and obvious leaks. If you notice hard starting on cold days, test glow plugs or the engine coolant temperature sensor, since cold-start efficiency depends on both. If there’s rough running or loss of power, inspect air filters, turbochargers (if equipped), and intake hoses for cracks or blockages. Persistent misfires or poor fueling can indicate injector issues, high-pressure fuel pump faults, or ECM sensor problems. For smoky exhaust, diagnose the type of smoke: black often signals excess fuel or poor combustion; blue can indicate oil burning; white may point to coolant leaks or fuel vaporization inefficiencies. Each diagnosis path should be documented with symptoms, measurements, and test results. Using a diagnostic scan tool compatible with your diesel model can reveal fault codes that guide your next steps. Dhis method reduces unnecessary part replacements and helps you tune the repair to the core problem. Home Repair Guide analysis shows that reliable DIY diesel repair hinges on accurate symptom interpretation, conservative testing, and careful part verification before replacement.
Safety First: Handling Diesel Repairs
Diesel repair work involves fuels, solvents, high-pressure lines, and hot engine surfaces. Prioritize safety at every stage. Before touching anything, disconnect the battery to prevent accidental starts, and depressurize fuel lines only after following the manufacturer’s procedure. Wear proper PPE: safety goggles, chemical-resistant gloves, and, if dealing with airborne fumes, a suitable respirator or mask. Work in a well-ventilated area with a fire extinguisher rated for chemical/Electrical fires within reach. Keep spill containment supplies on hand, and place absorbent pads under work areas to limit fuel exposure. When handling cleaners or solvents, follow the product’s safety data sheet (SDS) and avoid mixing chemicals. If you’re working near wiring, avoid contact with hot surfaces and fuel lines; if you notice damaged insulation or exposed wiring, halt work and seek professional assistance. If you’re unsure about high-pressure fuel system work, pause and consult a manual or a professional. The practical takeaway: safety isn’t optional in diesel repair; it’s foundational to a successful fix and to preventing injuries.
Tools and Materials You'll Need for Diesel Repair
A well-equipped DIYer can tackle many diesel maintenance tasks with a focused set of tools and consumables. Start with a durable hand tool set, including wrenches, sockets, pliers, and screwdrivers in metric sizes. A torque wrench is essential for fastener torque specs to avoid overtightening or under-tightening. Include a clean rags kit, catch pans, and approved fuel-safe containers for draining fluids. For more advanced checks, have a diesel-specific diagnostic scan tool or code reader compatible with your engine, and a fuel pressure gauge if your model supports fuel system pressure testing. Replace consumables with the correct parts per your engine’s manual: air filters, fuel filters, oil filters, and seals. Keep a bottle of diesel-compatible cleaner, appropriate degreasers, and corrosion inhibitors on hand. Finally, label hoses and connectors before disconnecting them to speed reassembly. While not all tools are required for every task, a well-planned toolkit reduces downtime and enhances safety.
Maintenance Best Practices to Extend Diesel Engine Life
Preventive maintenance is your best defense against unexpected diesel failures. Establish a schedule that aligns with your owner's manual, climate, and usage patterns. Regularly check and replace oil and oil filters on a recommended interval, monitor coolant levels, and verify the condition of belts and hoses. Use clean, high-quality diesel fuel and keep an eye on water separators and fuel filters for signs of water contamination. Keep air filters clean and replace them as needed to maintain proper air intake and combustion efficiency. If you notice excessive exhaust smoke, unusual noises, or a drop in performance, address the issue promptly rather than delaying repairs. A small, scheduled maintenance routine—drains, checks, and part replacements—can significantly extend engine life and save on more substantial repairs later.
Common DIY Diesel Repair Scenarios and When to Call a Pro
Some diesel issues are suitable for DIY resolution, such as replacing a clogged air filter, draining fluids, or replacing a worn fuel filter when you can access the filter housing. Others require specialized tools and expertise, notably high-pressure fuel system work, injector servicing, or timing adjustments. If you encounter codes that you cannot resolve with basic diagnostics, or if the engine fails to start after systematic checks, seek professional service. For stubborn diagnostic codes, have the vehicle or equipment’s service manual handy and consider a professional inspection to avoid misinterpretation of fault codes. In all cases, document symptoms, steps taken, and parts used to guide future repairs or warranty claims.
Tools & Materials
- Safety gear(Goggles, gloves, and a respirator when handling fuel and solvents)
- Wrenches and socket set(Metric sizes to fit engine bolts)
- Flat blade and Phillips screwdrivers(For clamps, hoses, and covers)
- Diesel fuel filter and replacement parts(Have correct part numbers for your model)
- Diesel fuel pressure gauge(Optional for fuel-system pressure checks)
- Diagnostic scan tool(Diesel-specific codes and live data)
- Cleaning solvents and rags(For fittings, hoses, and spills)
Steps
Estimated time: Total: 60-120 minutes
- 1
Power down and secure engine
Shut off the engine and disconnect the battery to prevent accidental starts. Allow any hot components to cool before handling; use PPE and clear the workspace of flammable materials. Why: prevents burns, electrical shocks, and inadvertent engine starts during diagnostics.
Tip: Wait a few minutes after battery disconnection to ensure capacitors discharge before touching electrical components. - 2
Identify symptom and isolate system
Record the exact symptom (start, idle, power loss, smoke) and isolate the likely subsystem (fuel, air, or electrical). Begin with low-risk checks (fuel level, visible leaks, air filter condition) before moving to deeper tests. Why: narrows down causes without exposing you to high-pressure systems.
Tip: Label hoses and connectors before disconnecting to simplify reassembly. - 3
Inspect glow plugs and electricals
For cold-start issues, test glow plugs and related wiring. Check ignition circuits and ECM sensors if accessible. Why: faulty glow plugs or weak connections can make starting difficult and affect combustion.
Tip: Use the manufacturer’s service manual for test procedures and resistance specs. - 4
Test fuel system components
Inspect fuel lines for cracks, leaks, and signs of contamination. Replace the fuel filter if dirty and bleed air from the system according to the manual. Why: air or contaminants in the fuel path cause misfires and low power.
Tip: Always replace filters with the engine off and conform with the correct orientation and seals. - 5
Perform a controlled test run
Reconnect the battery, start the engine, and run under light load to observe performance. Look for abnormal noises or smoke, and monitor gauges or live data if using a scanner. Why: confirms whether the repair addressed the symptom without introducing new issues.
Tip: Keep a fire extinguisher within reach during the test run. - 6
Document results and plan next steps
Record what was done, parts replaced, measurements taken, and the engine’s behavior after the test. If the problem persists, consider escalating to a professional or scheduling a follow-up diagnostic. Why: creates a recovery plan and protects against repeating the same failed approach.
Tip: Take clear photos of any disconnected parts to aid future maintenance.
FAQ
Is diesel repair safe for DIY beginners?
DIY can be safe for basic tasks if you follow safety protocols and working manuals. Start with non-pressurized tasks and seek professional help for high-risk components like high-pressure fuel systems.
DIY diesel repair can be safe for beginners with proper safety steps, starting small and avoiding high-risk fuel-system work.
What tools do I need to start diesel repair?
A basic hand tool set, PPE, a torque wrench, a clean workspace, and a diesel-compatible diagnostic tool or code reader are a solid start. More specialized checks may require additional equipment.
Start with a basic toolkit, PPE, torque wrench, and a diesel diagnostic tool if you have access to one.
How much does it cost to repair a diesel engine at home?
Costs vary widely based on parts and fluids. Plan for a range from modest to substantial and prioritize essential components first. Keep receipts and compare OEM versus aftermarket parts carefully.
Costs vary a lot; plan for parts and fluids and compare options before buying.
When should I hire a professional?
If you lack proper tools, understand high-pressure fuel systems, or the engine won’t start after basic diagnostics, it’s wise to seek professional service to avoid safety risks and costly errors.
If you’re unsure about high-pressure systems or the engine won’t start after checks, call a professional.
Are glow plugs worth replacing?
Glow plugs are worth testing if cold starts are sluggish. Replace with OEM parts if tests show poor resistance or failure, as they can significantly improve cold starting.
If cold starts are weak, test and replace glow plugs as needed.
How should I dispose of diesel waste safely?
Store diesel waste in approved containers and follow local regulations. Take waste to a certified collection facility or recycling center to prevent environmental harm.
Store waste properly and take it to a certified disposal site.
Watch Video
Key Takeaways
- Prioritize safety and PPE before any work.
- Diagnose using symptom mapping across fuel, air, and electrical systems.
- Use manufacturer guidance for parts and torque specs.
- Know when DIY ends and professional service begins.